Viewing entries in
C#

C# Discord Bot: Command Handling

C# Discord Bot: Command Handling

This post will go over command handling with Discord.Net. Whether you are following along from the Raspberry Pi series, or are just curious about how to do command handling with Discord.Net, welcome!

I am currently in the process of updating this guide to use the new /Slash Command implementation, as you will need a new intent to use the old way (having the bot parse messages)

Prerequisites

  • .NET 6.x

  • …and we will be building upon the framework laid out here:

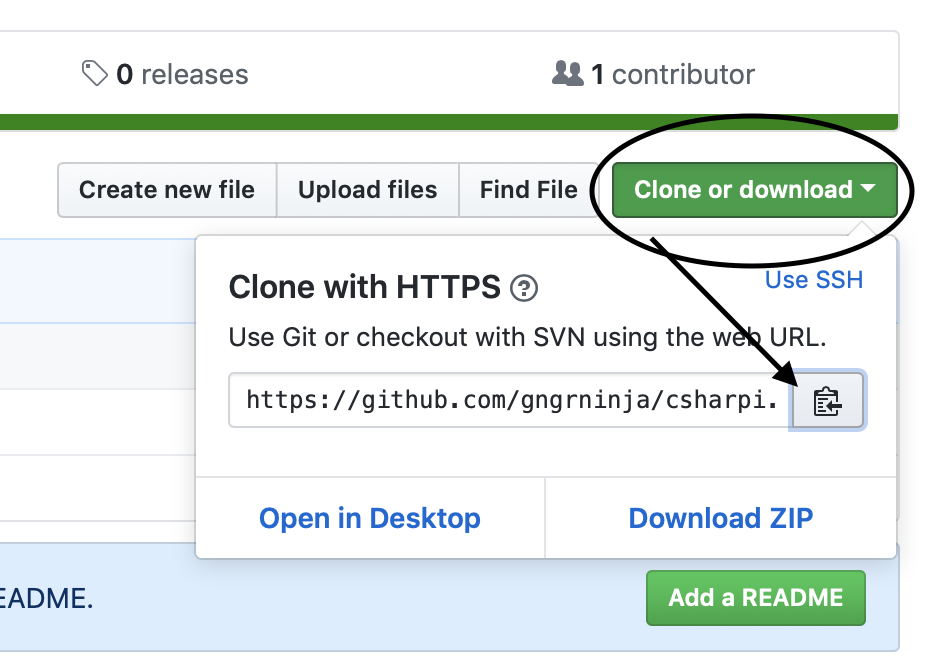
If you want to follow along with the finished code, go here: https://github.com/gngrninja/csharpi/tree/02-command-basics.

If you would like the starter code, and want to try building off of it yourself, go here: https://github.com/gngrninja/csharpi/tree/intro.

To keep up with Discord.Net examples and specifics, their repo has code samples: Discord.Net/samples at dev · discord-net/Discord.Net (github.com)

Adding the Command Handler

The first thing we’ll want to do is add the command handling service.

This service will be responsible for:

  • Hooking into the SlashCommandExecuted, ContextCommandExecuted, and ComponentCommandExecuted events to process commands as they come in (to see if they are a valid command), and handle command execution (success/failure/not found actions)

  • Utilizing Dependency Injection in .NET to setup and pass through services/configurations

  • Loading all the command modules that inherit from InteractionModuleBase

Command Handler Service Creation

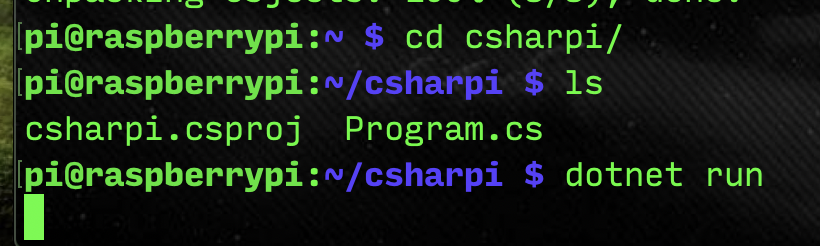
The first thing we want to do here is create the command handling service.

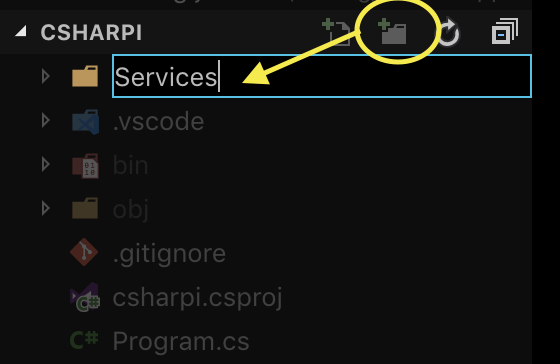
  1. Create a folder named Services, and under that folder a file named CommandHandler.cs.

services_folder.png
CommandHandler.png

2. Here is the code for the command handling service, with comments to help understand what is happening (don’t worry too much about not understanding what is happening, yet!):

You can always view the most updated code, here: https://github.com/gngrninja/csharpi/blob/02-command-basics/Services/CommandHandler.cs.

  1
  2
  3
  4
  5
  6
  7
  8
  9
 10
 11
 12
 13
 14
 15
 16
 17
 18
 19
 20
 21
 22
 23
 24
 25
 26
 27
 28
 29
 30
 31
 32
 33
 34
 35
 36
 37
 38
 39
 40
 41
 42
 43
 44
 45
 46
 47
 48
 49
 50
 51
 52
 53
 54
 55
 56
 57
 58
 59
 60
 61
 62
 63
 64
 65
 66
 67
 68
 69
 70
 71
 72
 73
 74
 75
 76
 77
 78
 79
 80
 81
 82
 83
 84
 85
 86
 87
 88
 89
 90
 91
 92
 93
 94
 95
 96
 97
 98
 99
100
101
102
103
104
105
106
107
108
109
110
111
112
113
114
115
116
117
118
119
120
121
122
123
124
125
126
127
128
129
130
131
132
133
134
135
136
137
138
139
140
141
142
143
144
145
146
147
using Discord;
using Discord.Interactions;
using Discord.WebSocket;
using System;
using System.Collections.Generic;
using System.Linq;
using System.Reflection;
using System.Text;
using System.Threading.Tasks;

namespace csharpi.Services
{
    public class CommandHandler
    {
        private readonly DiscordSocketClient _client;
        private readonly InteractionService _commands;
        private readonly IServiceProvider _services;

        public CommandHandler(DiscordSocketClient client, InteractionService commands, IServiceProvider services)
        {
            _client = client;
            _commands = commands;
            _services = services;
        }

        public async Task InitializeAsync()
        {
            // add the public modules that inherit InteractionModuleBase<T> to the InteractionService
            await _commands.AddModulesAsync(Assembly.GetEntryAssembly(), _services);

            // process the InteractionCreated payloads to execute Interactions commands
            _client.InteractionCreated += HandleInteraction;

            // process the command execution results 
            _commands.SlashCommandExecuted += SlashCommandExecuted;
            _commands.ContextCommandExecuted += ContextCommandExecuted;
            _commands.ComponentCommandExecuted += ComponentCommandExecuted;
        }

        private Task ComponentCommandExecuted(ComponentCommandInfo arg1, Discord.IInteractionContext arg2, IResult arg3)
        {
            if (!arg3.IsSuccess)
            {
                switch (arg3.Error)
                {
                    case InteractionCommandError.UnmetPrecondition:
                        // implement
                        break;
                    case InteractionCommandError.UnknownCommand:
                        // implement
                        break;
                    case InteractionCommandError.BadArgs:
                        // implement
                        break;
                    case InteractionCommandError.Exception:
                        // implement
                        break;
                    case InteractionCommandError.Unsuccessful:
                        // implement
                        break;
                    default:
                        break;
                }
            }    

            return Task.CompletedTask;
        }

        private Task ContextCommandExecuted(ContextCommandInfo arg1, Discord.IInteractionContext arg2, IResult arg3)
        {
            if (!arg3.IsSuccess)
            {
                switch (arg3.Error)
                {
                    case InteractionCommandError.UnmetPrecondition:
                        // implement
                        break;
                    case InteractionCommandError.UnknownCommand:
                        // implement
                        break;
                    case InteractionCommandError.BadArgs:
                        // implement
                        break;
                    case InteractionCommandError.Exception:
                        // implement
                        break;
                    case InteractionCommandError.Unsuccessful:
                        // implement
                        break;
                    default:
                        break;
                }
            }

            return Task.CompletedTask;
        }

        private Task SlashCommandExecuted(SlashCommandInfo arg1, Discord.IInteractionContext arg2, IResult arg3)
        {
            if (!arg3.IsSuccess)
            {
                switch (arg3.Error)
                {
                    case InteractionCommandError.UnmetPrecondition:
                        // implement
                        break;
                    case InteractionCommandError.UnknownCommand:
                        // implement
                        break;
                    case InteractionCommandError.BadArgs:
                        // implement
                        break;
                    case InteractionCommandError.Exception:
                        // implement
                        break;
                    case InteractionCommandError.Unsuccessful:
                        // implement
                        break;
                    default:
                        break;
                }
            }

            return Task.CompletedTask;
        }

        private async Task HandleInteraction (SocketInteraction arg)
        {
            try
            {
                // create an execution context that matches the generic type parameter of your InteractionModuleBase<T> modules
                var ctx = new SocketInteractionContext(_client, arg);
                await _commands.ExecuteCommandAsync(ctx, _services);
            }
            catch (Exception ex)
            {
                Console.WriteLine(ex);
                // if a Slash Command execution fails it is most likely that the original interaction acknowledgement will persist. It is a good idea to delete the original
                // response, or at least let the user know that something went wrong during the command execution.
                if(arg.Type == InteractionType.ApplicationCommand)
                {
                    await arg.GetOriginalResponseAsync().ContinueWith(async (msg) => await msg.Result.DeleteAsync());
                }
            }
        }
    }
}

[top]

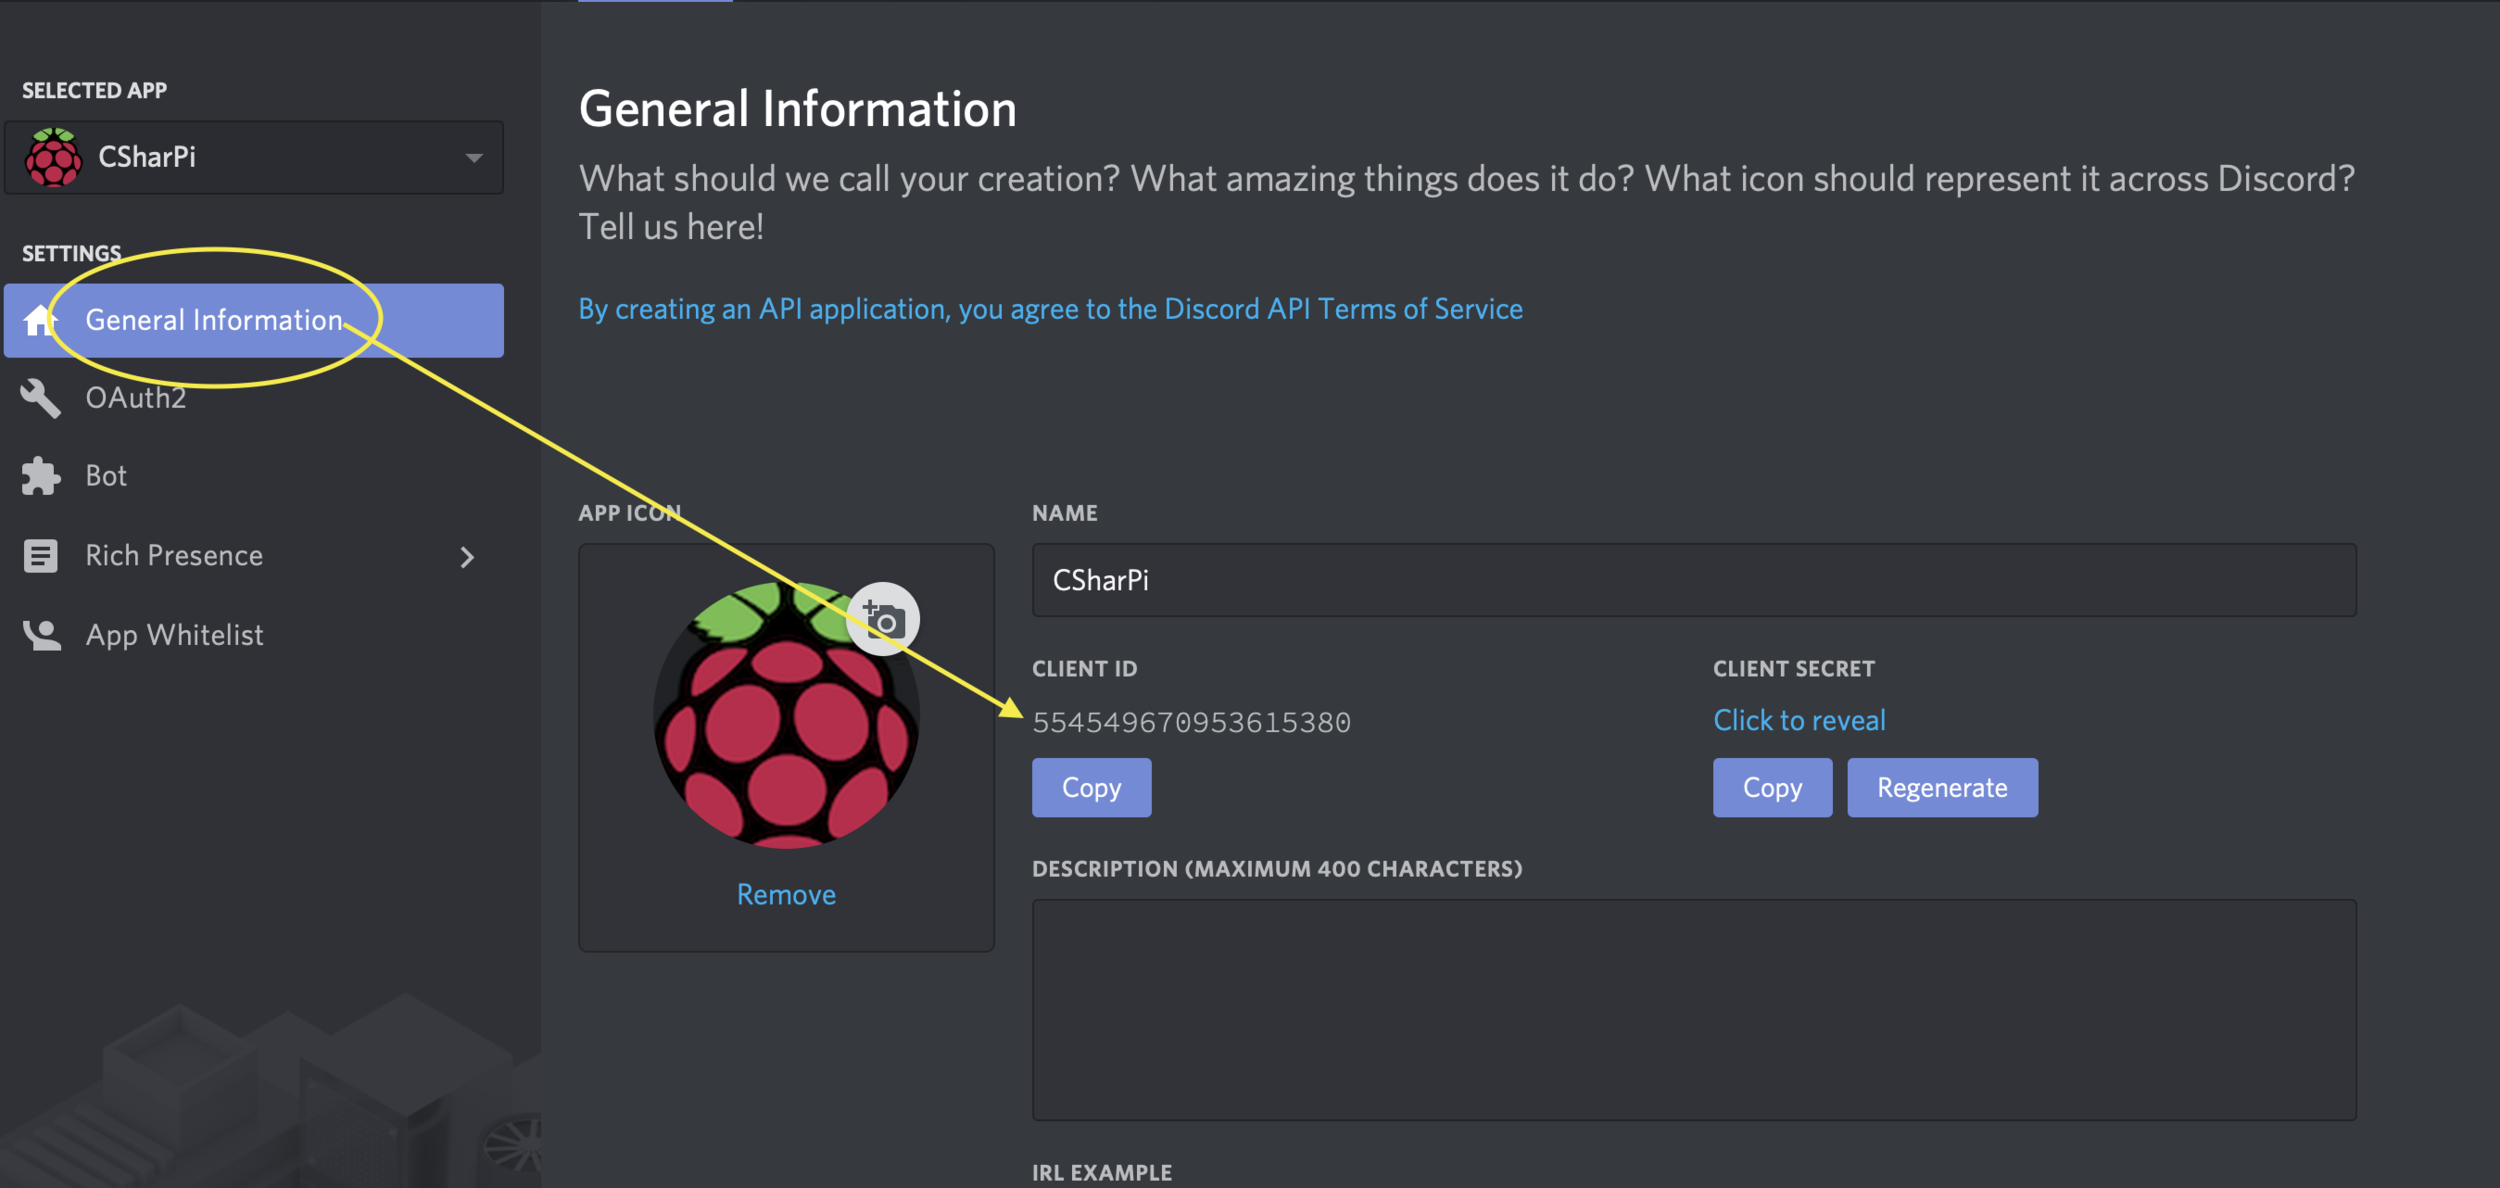
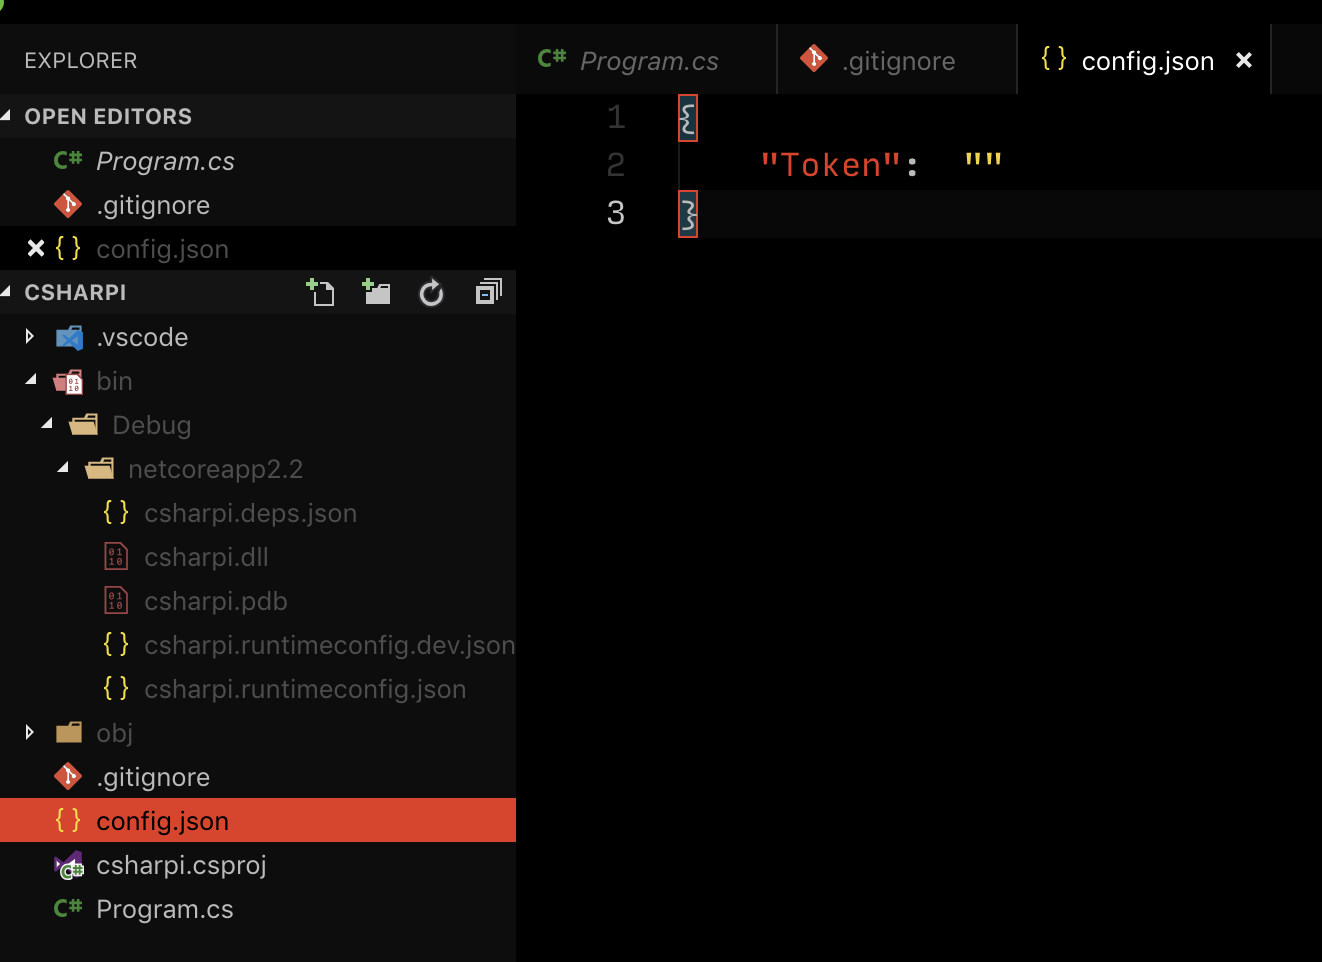
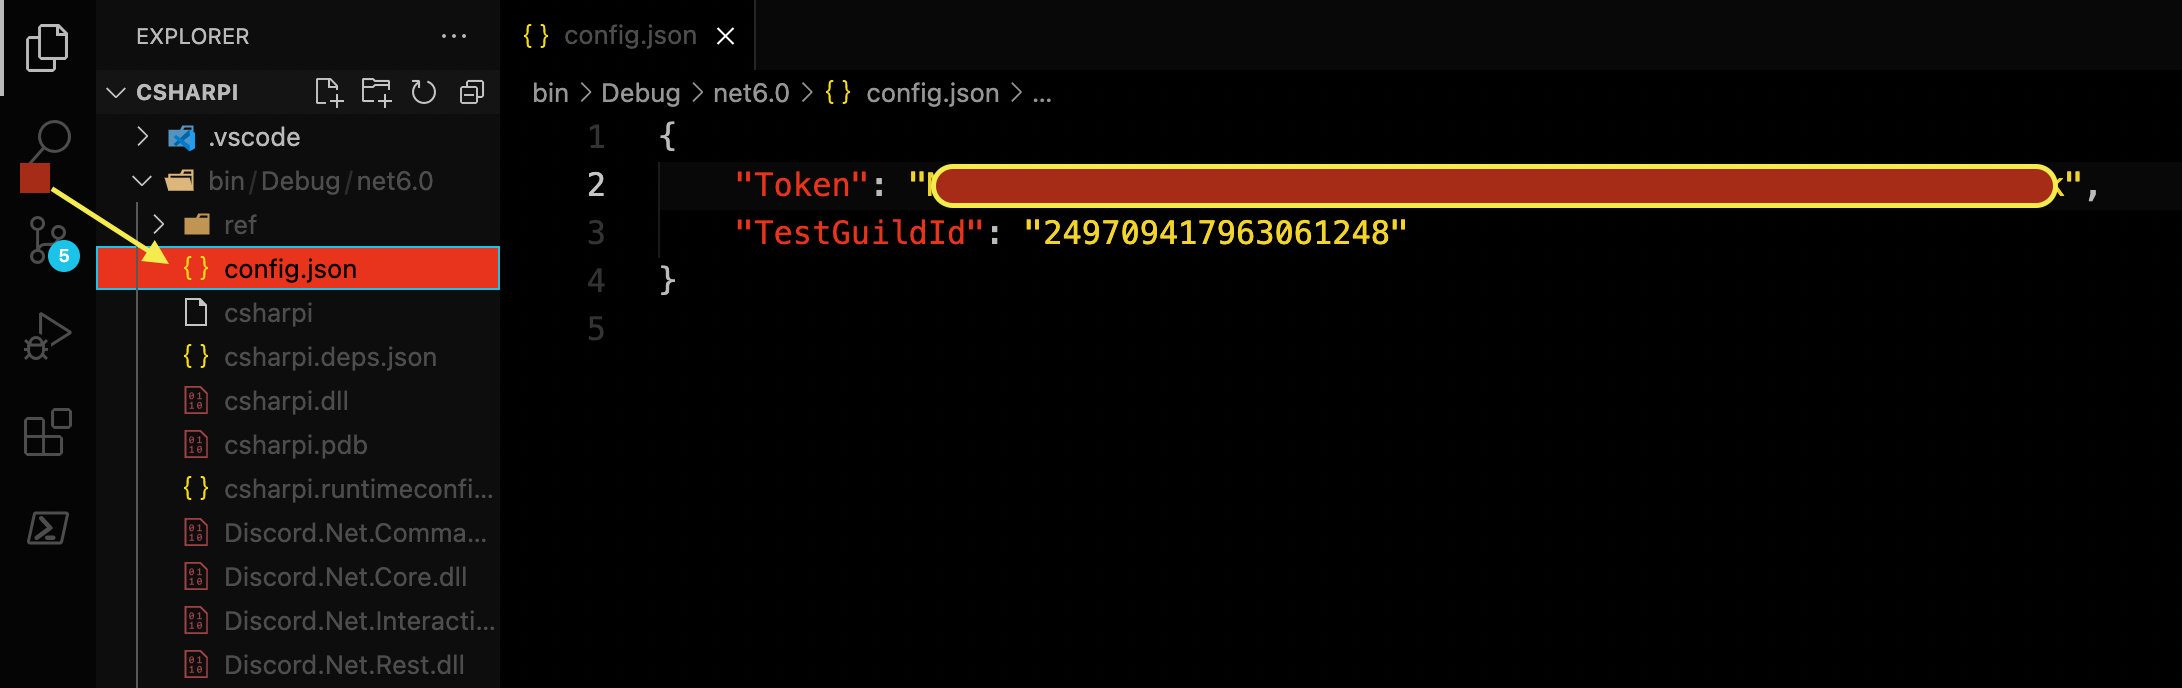
Adding your test Discord guild id to config.json

Remember :

  • When debugging you want the config.json file in /bin/Debug/net6.0/

  • When running the bot normally via dotnet projectname.dll, you want the config.json file in the root folder (same folder as the .dll/executable)

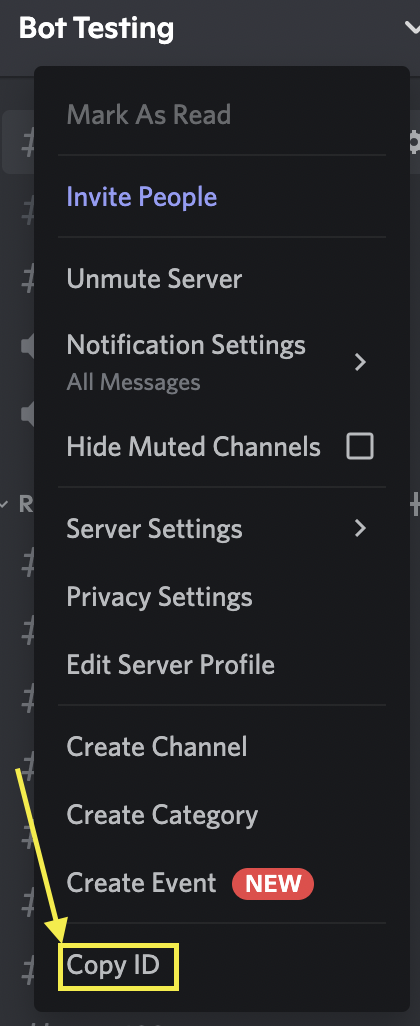
You can find your Discord guild(server) id by right clicking on your server name, and going to Copy ID

To add the Guild id, your config.json should look like this:

{
    "Token":  "ThIsIsNtMyToKeN",
    "TestGuildId": "123456789101112131415"
}

Now what we have created our CommandHandler service, let’s wire up Program.cs to enable dependency injection and use it.

[top]

Adding Dependency Injection

Add NuGet Package for Dependency Injection

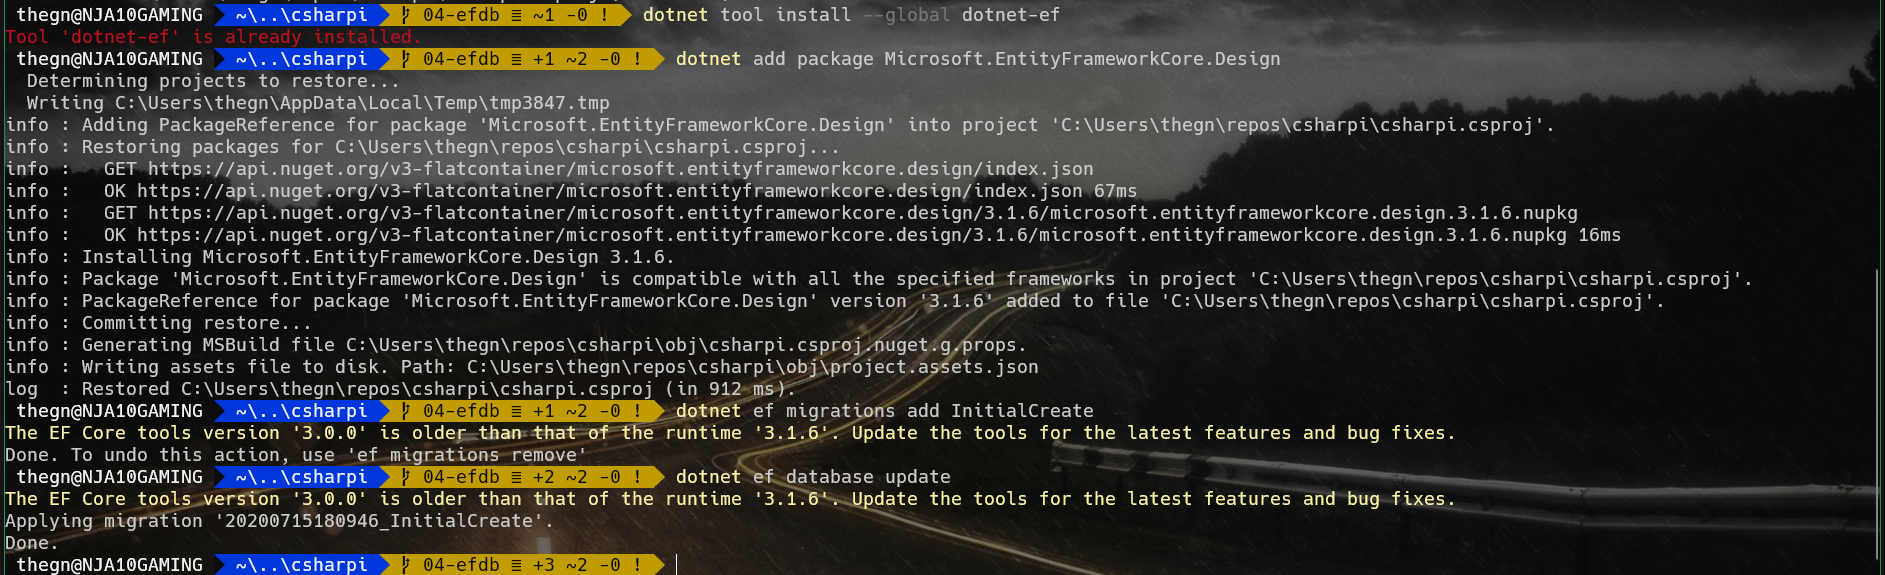
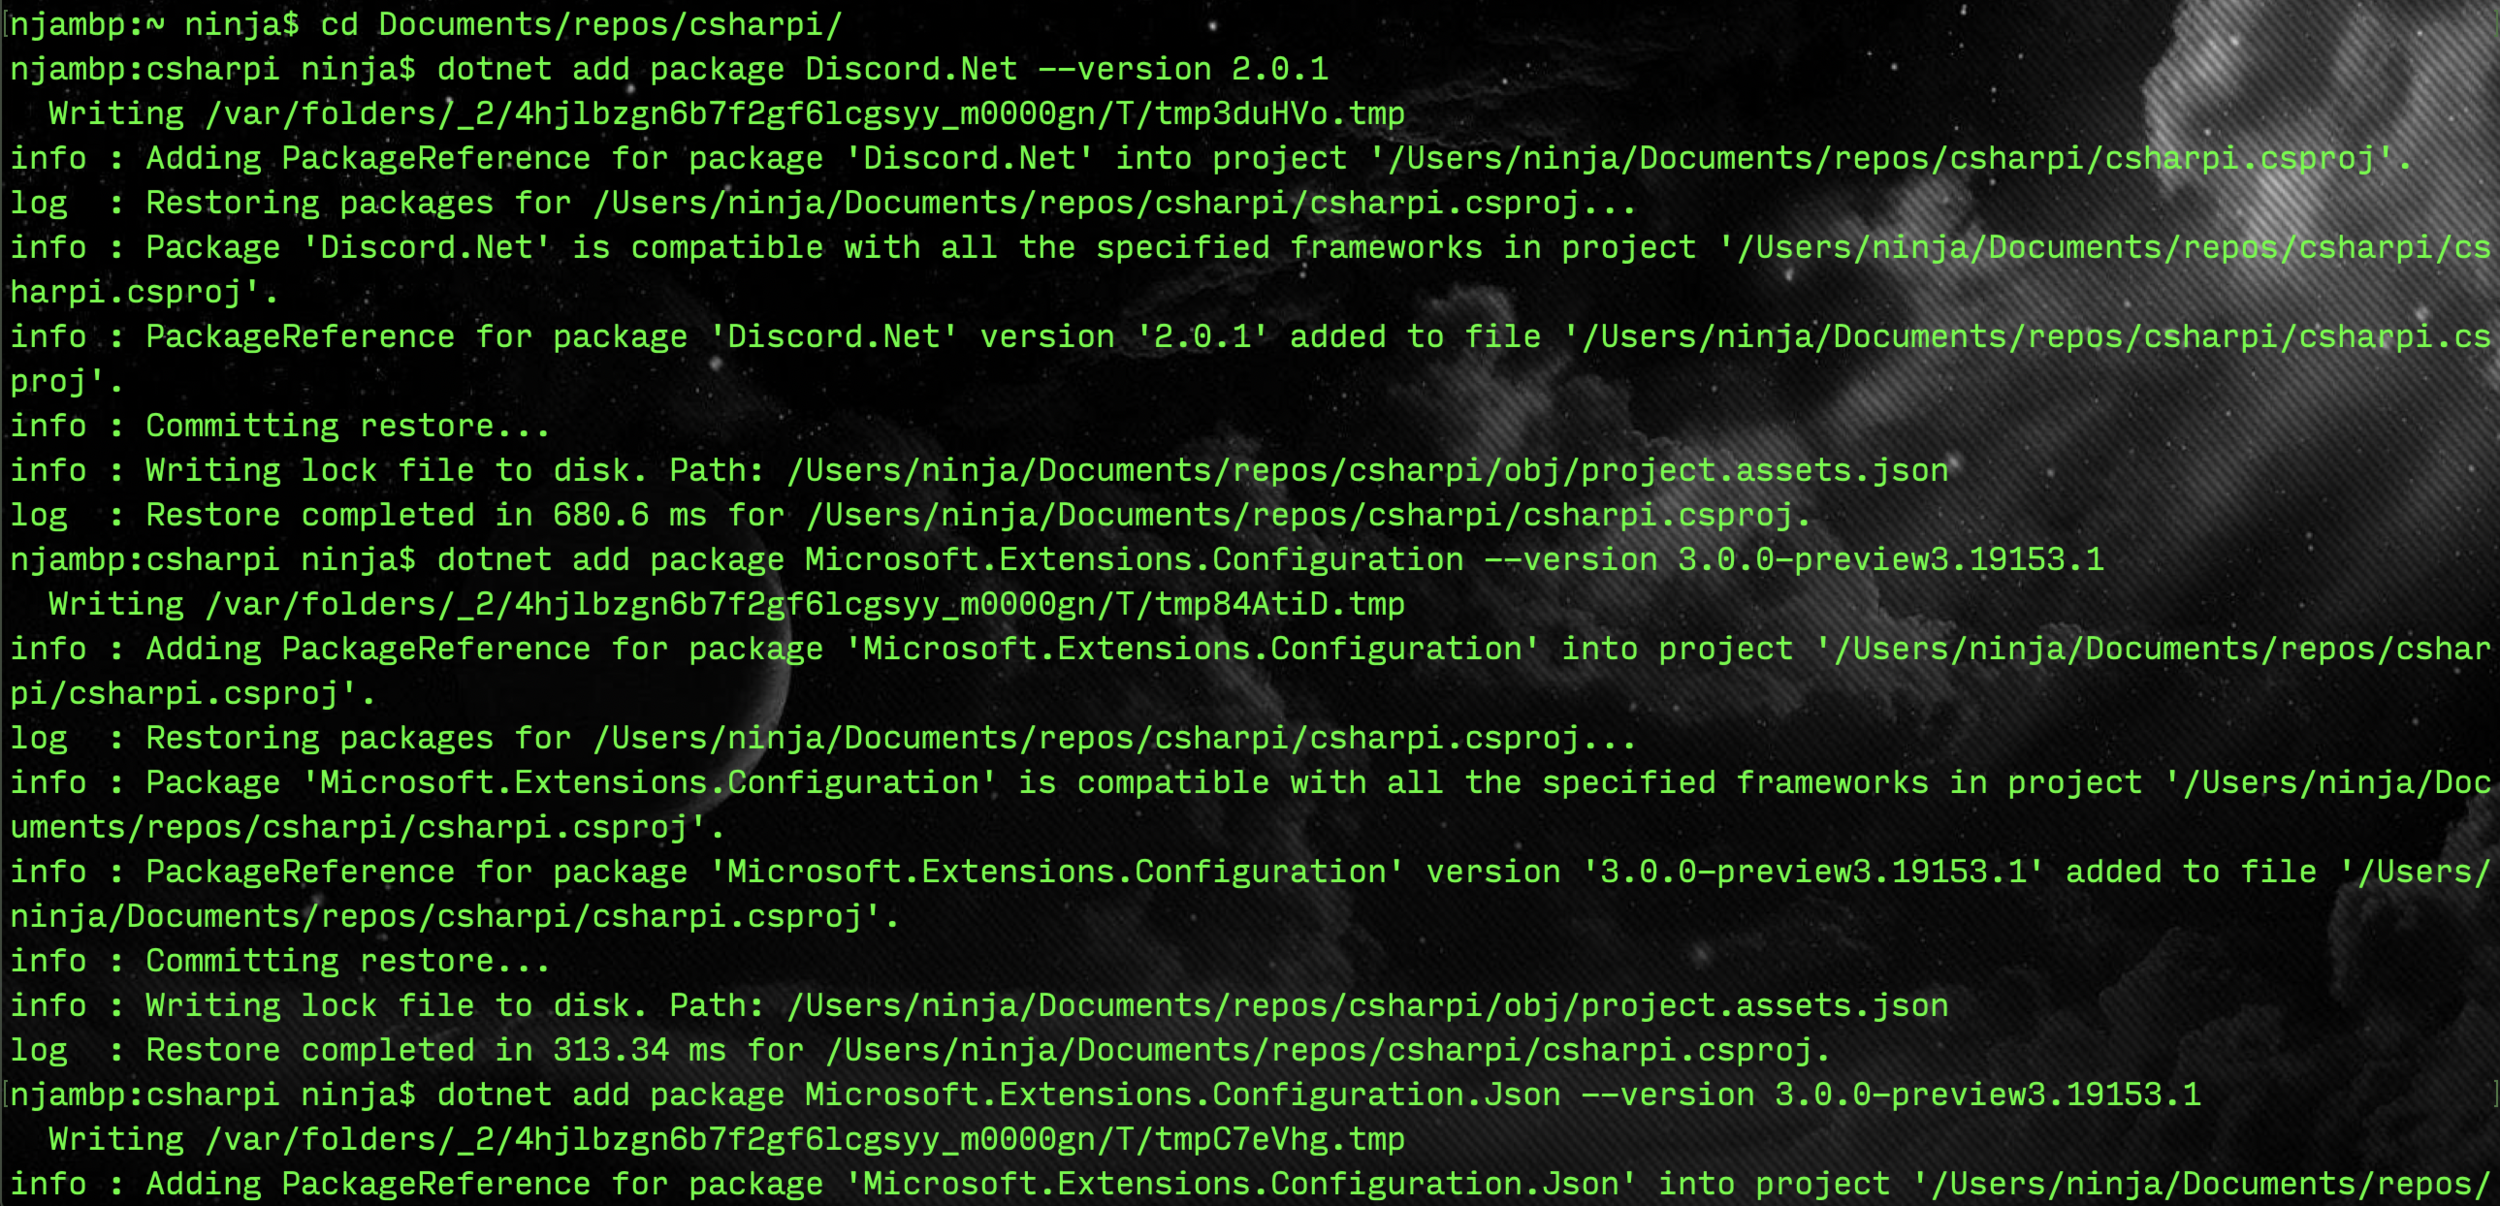
When using the Discord.Net v3.2.0 library, I noticed that I had to manually add the Dependency Injection package. To do this, drop down to your command line, navigate to the project folder, and run:

dotnet add package Microsoft.Extensions.DependencyInjection --version 6.0.0
dotnet restore

Next we’ll want to modify Program.cs to add dependency injection.

What we need to do in Program.cs:

  • Add a using statement to gain access to the service we created
    - For this example that’s using chsarpi.Services;

  • Create a method that will construct the dependency injection model / ServicesProvider for the model we can consume later (ConfigureServices)

  • Call upon and use the ConfigureServices method, and work with the bot code via dependency injection

Below is the sample code to achieve what I’ve gone over above:

You can always view the most updated code, here: https://github.com/gngrninja/csharpi/blob/02-command-basics/Program.cs

  1
  2
  3
  4
  5
  6
  7
  8
  9
 10
 11
 12
 13
 14
 15
 16
 17
 18
 19
 20
 21
 22
 23
 24
 25
 26
 27
 28
 29
 30
 31
 32
 33
 34
 35
 36
 37
 38
 39
 40
 41
 42
 43
 44
 45
 46
 47
 48
 49
 50
 51
 52
 53
 54
 55
 56
 57
 58
 59
 60
 61
 62
 63
 64
 65
 66
 67
 68
 69
 70
 71
 72
 73
 74
 75
 76
 77
 78
 79
 80
 81
 82
 83
 84
 85
 86
 87
 88
 89
 90
 91
 92
 93
 94
 95
 96
 97
 98
 99
100
101
102
103
104
105
106
107
108
109
110
111
112
113
114
115
116
using System;
using Discord;
using Discord.Net;
using Discord.Commands;
using Discord.Interactions;
using Discord.WebSocket;
using System.Threading.Tasks;
using Microsoft.Extensions.Configuration;
using Microsoft.Extensions.Configuration.Json;
using Microsoft.Extensions.DependencyInjection;
using csharpi.Services;
using System.Threading;

namespace csharpi
{
    class Program
    {
        // setup our fields we assign later
        private readonly IConfiguration _config;
        private DiscordSocketClient _client;
        private InteractionService _commands;
        private ulong _testGuildId;

        public static Task Main(string[] args) => new Program().MainAsync();

        public async Task MainAsync(string[] args)
        {
            
        }

        public Program()
        {
            // create the configuration
            var _builder = new ConfigurationBuilder()
                .SetBasePath(AppContext.BaseDirectory)
                .AddJsonFile(path: "config.json");  

            // build the configuration and assign to _config          
            _config = _builder.Build();
            _testGuildId = ulong.Parse(_config["TestGuildId"]);
        }

        public async Task MainAsync()
        {
            // call ConfigureServices to create the ServiceCollection/Provider for passing around the services
            using (var services = ConfigureServices())
            {
                // get the client and assign to client 
                // you get the services via GetRequiredService<T>
                var client = services.GetRequiredService<DiscordSocketClient>();
                var commands = services.GetRequiredService<InteractionService>();
                _client = client;
                _commands = commands;

                // setup logging and the ready event
                client.Log += LogAsync;
                commands.Log += LogAsync;
                client.Ready += ReadyAsync;

                // this is where we get the Token value from the configuration file, and start the bot
                await client.LoginAsync(TokenType.Bot, _config["Token"]);
                await client.StartAsync();

                // we get the CommandHandler class here and call the InitializeAsync method to start things up for the CommandHandler service
                await services.GetRequiredService<CommandHandler>().InitializeAsync();

                await Task.Delay(Timeout.Infinite);
            }
        }

        private Task LogAsync(LogMessage log)
        {
            Console.WriteLine(log.ToString());
            return Task.CompletedTask;
        }

        private async Task ReadyAsync()
        {
            if (IsDebug())
            {
                // this is where you put the id of the test discord guild
                System.Console.WriteLine($"In debug mode, adding commands to {_testGuildId}...");
                await _commands.RegisterCommandsToGuildAsync(_testGuildId);
            }
            else
            {
                // this method will add commands globally, but can take around an hour
                await _commands.RegisterCommandsGloballyAsync(true);
            }
            Console.WriteLine($"Connected as -> [{_client.CurrentUser}] :)");
        }

        // this method handles the ServiceCollection creation/configuration, and builds out the service provider we can call on later
        private ServiceProvider ConfigureServices()
        {
            // this returns a ServiceProvider that is used later to call for those services
            // we can add types we have access to here, hence adding the new using statement:
            // using csharpi.Services;
            return new ServiceCollection()
                .AddSingleton(_config)
                .AddSingleton<DiscordSocketClient>()
                .AddSingleton(x => new InteractionService(x.GetRequiredService<DiscordSocketClient>()))
                .AddSingleton<CommandHandler>()
                .BuildServiceProvider();
        }

        static bool IsDebug ( )
        {
            #if DEBUG
                return true;
            #else
                return false;
            #endif
        }
    }
}

Now that we’re wired up to use dependency injection, and have our service created to handle commands, let’s create our first set of commands (the right way!).

[top]

Writing Robust Commands

In this section we will be writing our first real, robust command. Writing commands this way gives us access to Discord.Net’s command writing goodness.

1. Create a folder named Modules, and under that folder a file named ExampleCommands.cs.

module_folder.png
example_commands_file.png

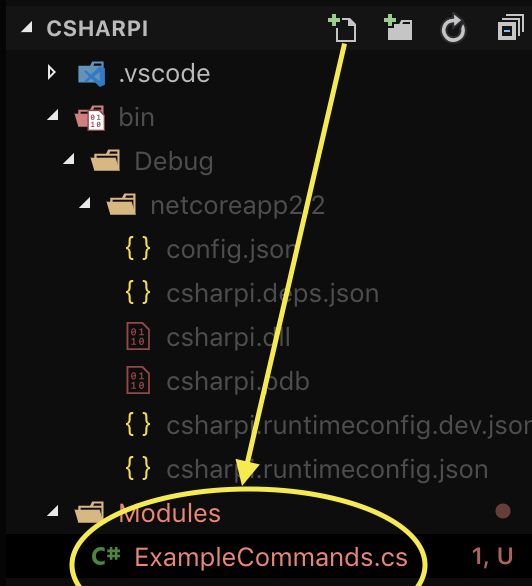
ExampleCommands will contain our first command using this framework!

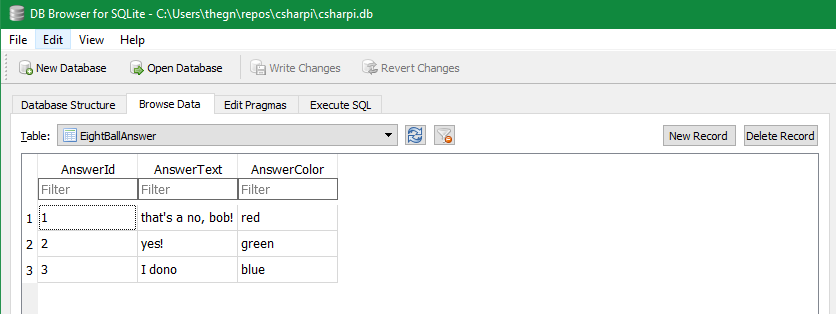
Below I have some code that will get us started with an 8-ball command:

You can always find the most up to date code, here: https://github.com/gngrninja/csharpi/blob/02-command-basics/Modules/ExampleCommands.cs

 1
 2
 3
 4
 5
 6
 7
 8
 9
10
11
12
13
14
15
16
17
18
19
20
21
22
23
24
25
26
27
28
29
30
31
32
33
34
35
36
37
38
39
40
41
42
43
44
45
using Discord;
using Discord.Interactions;
using Discord.WebSocket;
using System;
using System.Collections.Generic;
using System.Linq;
using System.Text;
using System.Threading.Tasks;

namespace csharpi.Services
{
    // interation modules must be public and inherit from an IInterationModuleBase
    public class ExampleCommands : InteractionModuleBase<SocketInteractionContext>
    {
        // dependencies can be accessed through Property injection, public properties with public setters will be set by the service provider
        public InteractionService Commands { get; set; }
        private CommandHandler _handler;

        // constructor injection is also a valid way to access the dependecies
        public ExampleCommands (CommandHandler handler)
        {
            _handler = handler;
        }

        // our first /command!
        [SlashCommand("8ball", "find your answer!")]
        public async Task EightBall(string question)
        {
            // create a list of possible replies
            var replies = new List<string>();

            // add our possible replies
            replies.Add("yes");
            replies.Add("no");
            replies.Add("maybe");
            replies.Add("hazzzzy....");

            // get the answer
            var answer = replies[new Random().Next(replies.Count - 1)];

            // reply with the answer
            await RespondAsync($"You asked: [**{question}**], and your answer is: [**{answer}**]");
        }
    }
}

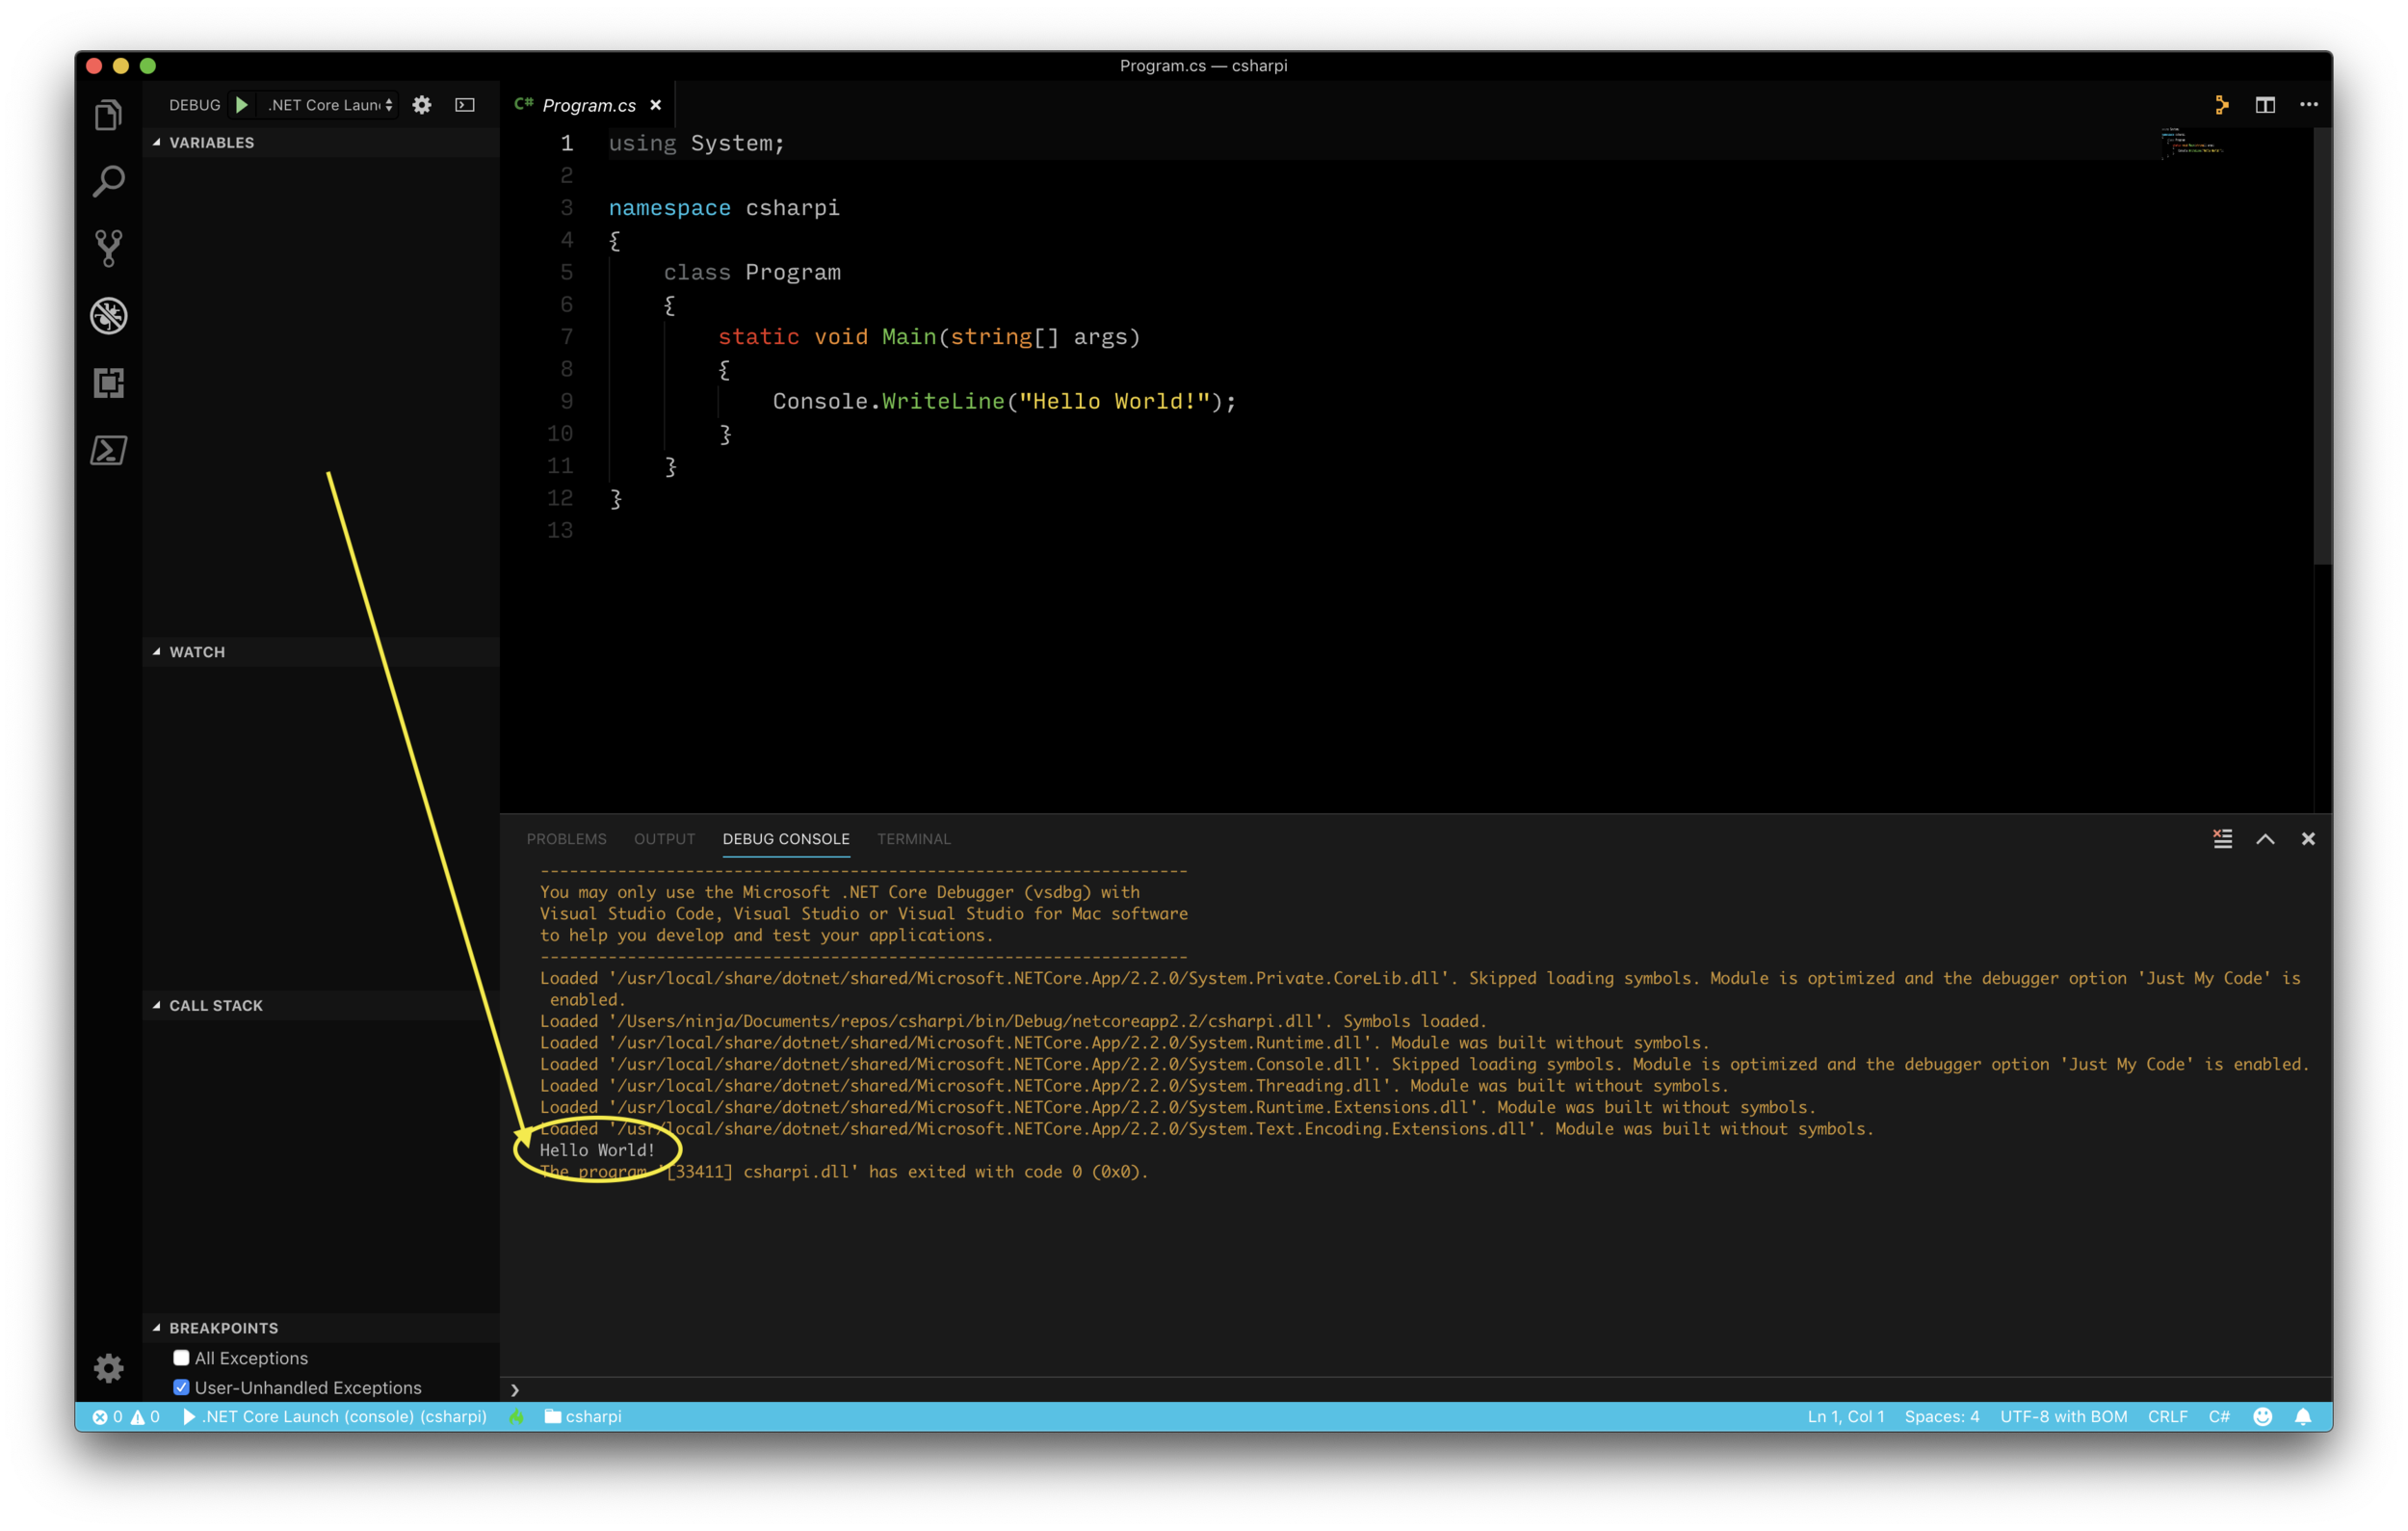
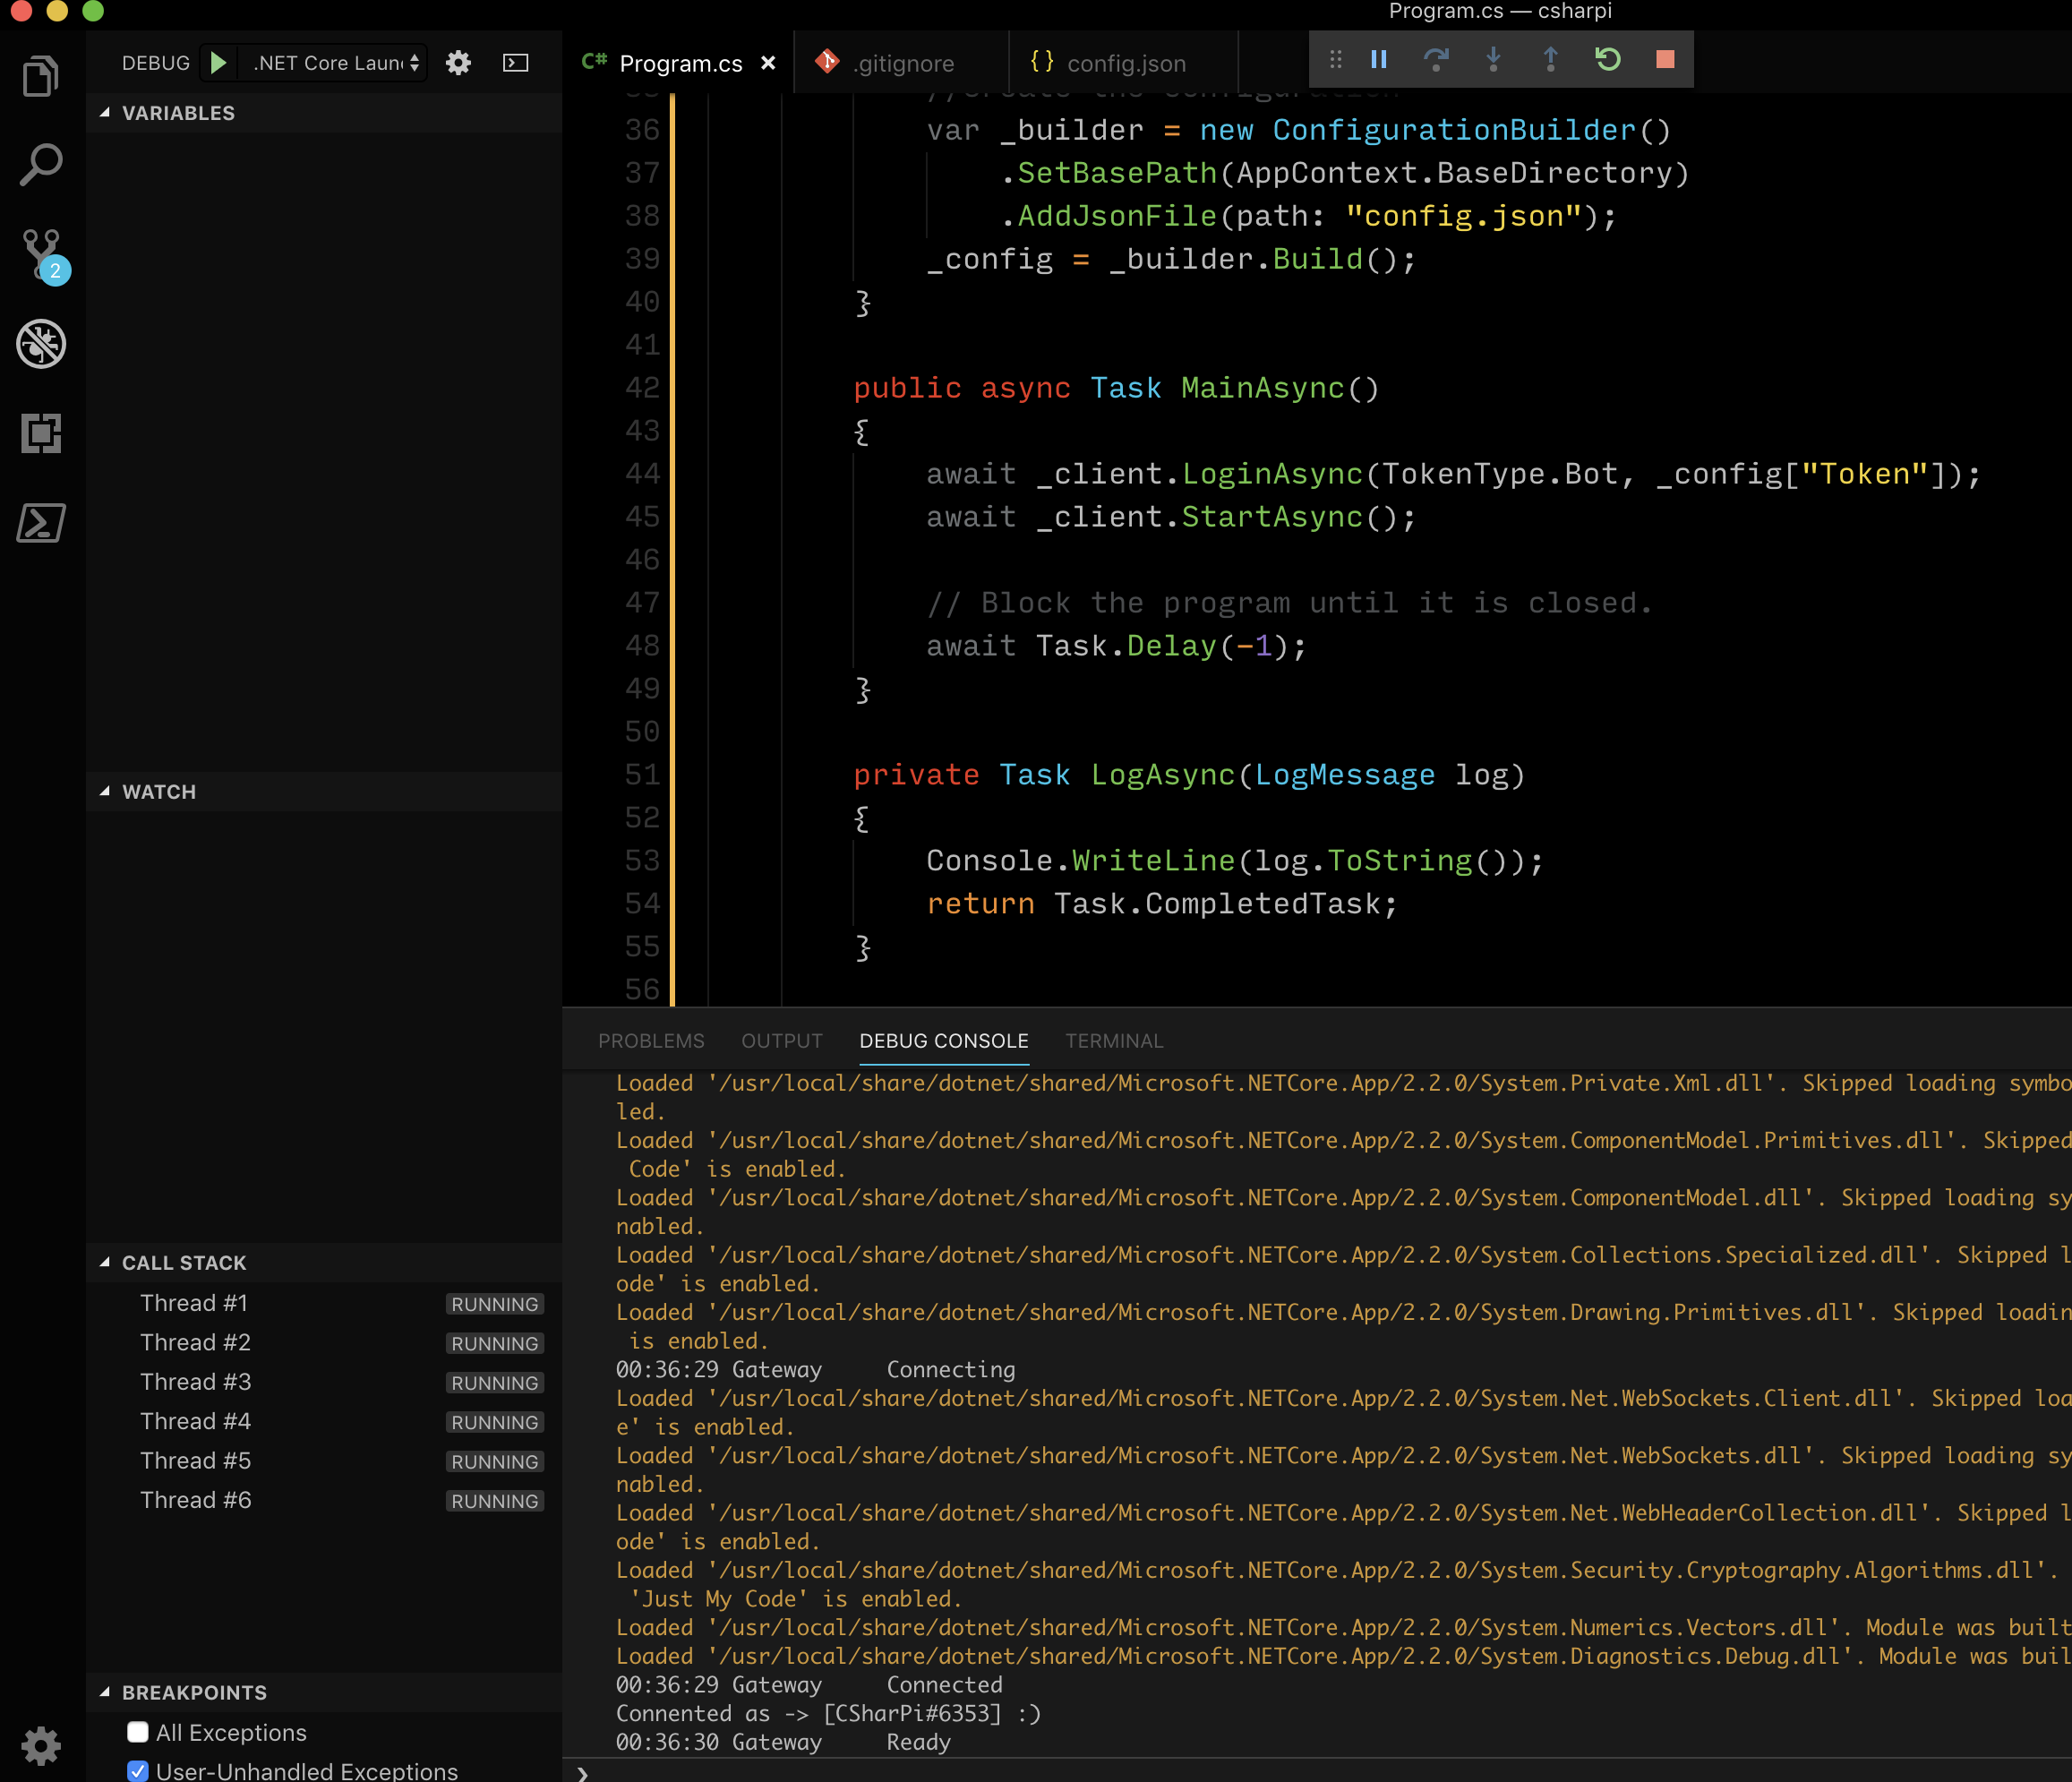
That’s it! Now we’re ready to debug/test to see if it is all working!

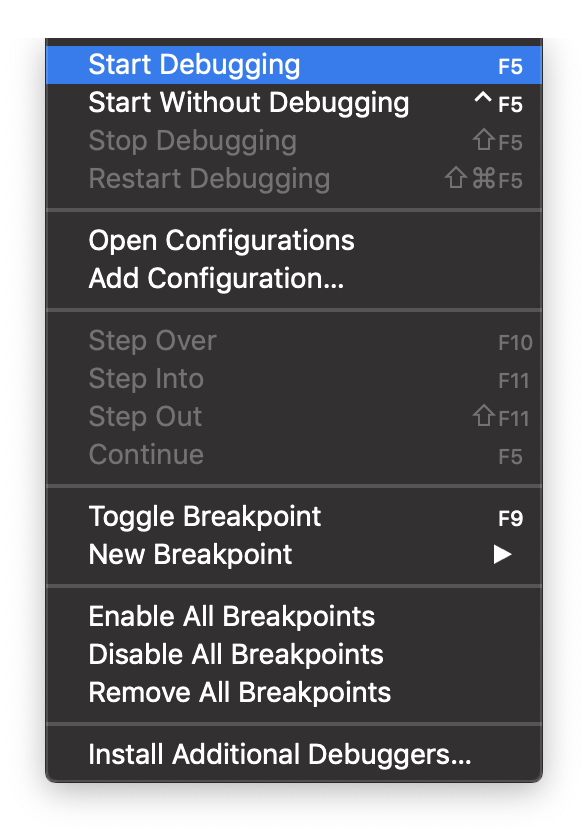
Remember it is F5 in VS Code, or you can use [Debug] -> [Start Debugging] from the menu bar.

8-Ball Command

Now that the bot is running, we can test our 8-ball command.

Go into the server your bot is in, and type the following:

/8
The command should show up as an autocomplete, and if you hit enter it will ask for the question:

Type out your question, and hit enter!

[top]

Getting it Working on the Pi

To get this working on our Raspberry Pi we will simply need to push the updated code to the Github repo, and pull it down to the Pi. We will need to update our config.json on the Pi, and copy it to the debug folder, as well as the bot folder (after we’ve added the Prefix line). If you’d like more information on getting the initial setup done with the Raspberry Pi, visit the below post and check out it’s prerequisites as well!

The below steps all assume we are sshed into our Pi.

ssh_in_pi.png

Switching Branches on Git

If you are following along, and want to use my Github repo as reference, you must ensure you’re working with the proper branch for this post.

First you’ll want to get into the directory:

cd csharpi

Then, you want to run:

git checkout 02-command-basics
git pull
You can see here we are in the intro branch, and we need to switch it up!

You can see here we are in the intro branch, and we need to switch it up!

checkpull.png

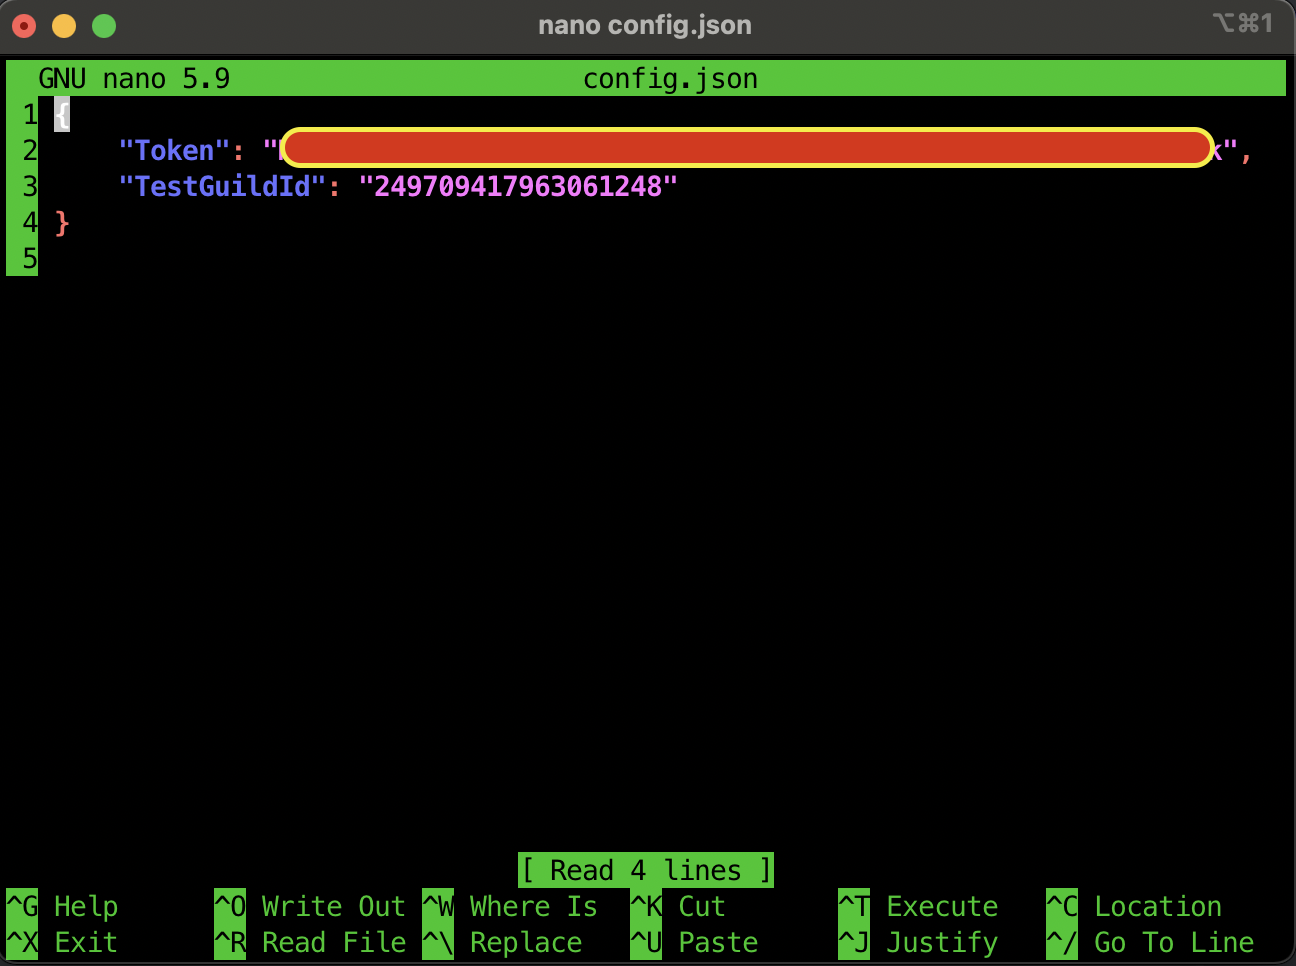
Pi config.json Editing

Now that we have the latest code on the Pi (refresher here if you’re using your own repo), let’s edit the config.json file to add the command prefix we want to use.

You’ll want to be in the cloned git repo’s directory, and assuming you have the base config created there from the linked post above, run (if you don’t, create it by using touch config.json):

nano config.json
nanotoeditconfig.png

In this file we want to ensure the Token and TestGuildId are there as such:

{
    "Token":  "ThIsIsNtMyToKeN",
    "TestGuildId": ";"
}

Use the following sequence to save the contents:

CTRL+O
[Enter]
CTRL+X

Now let’s copy that to the debug folder so we can test/debug the code, and to the bot’s published location:

cp config.json bin/Debug/net6.0/
cp config.json ~/bot
copyconfig.png

Let’s test the code from the Git repo…

Test Code From Repo

Now that we copied the new config.json file over to the Debug folder, we can test things out. Ensure you’re in the repo’s folder and run (remember, this method of running the bot takes a while to start):
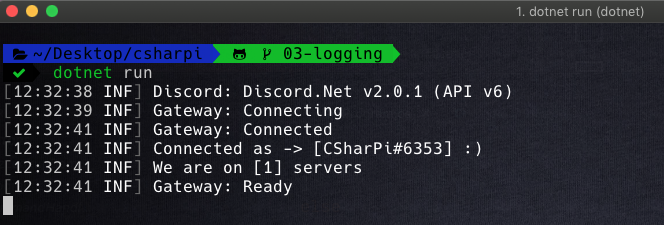
dotnet run
piruns.png

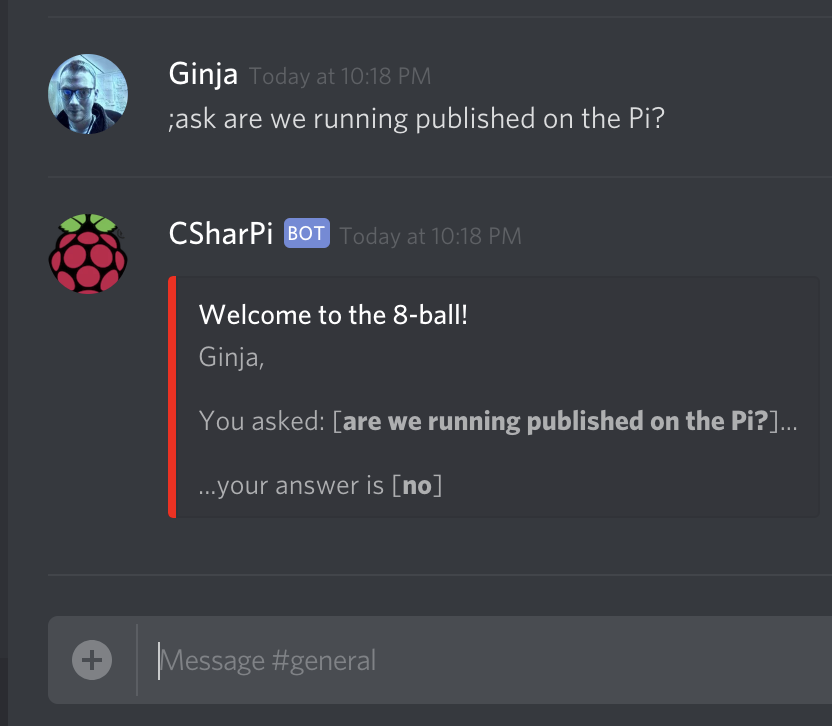
Now to run a command in Discord just to be sure…

worksonpi.png
piexecuted.png

Success! Now to get it published and run it properly.

Running Published Code on Pi

Let’s get things published and running smoothly! To start out, ensure you are in the git repo’s folder and run:
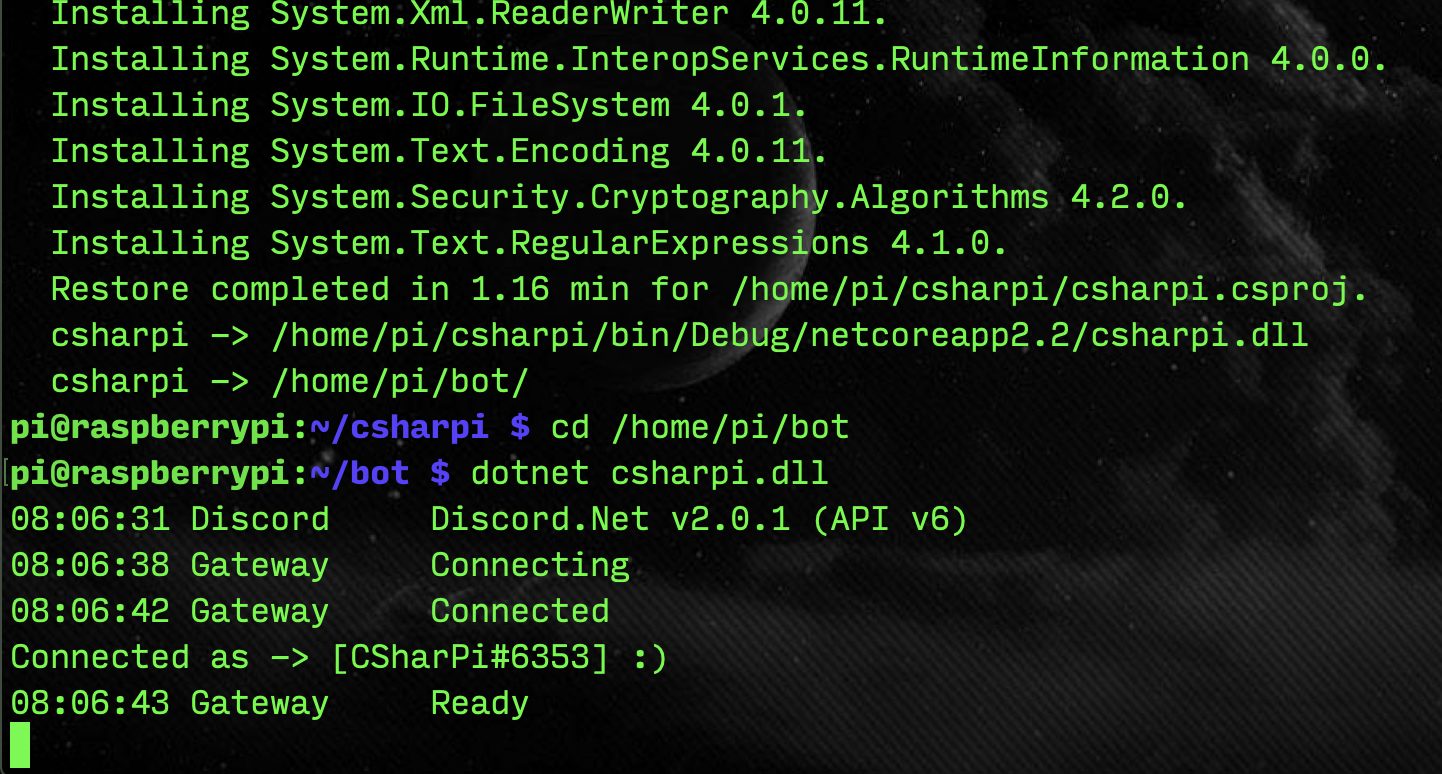
dotnet publish -o ~/bot

Then you’ll want to get into the bot’s folder:

cd ~/bot
publishcd.png

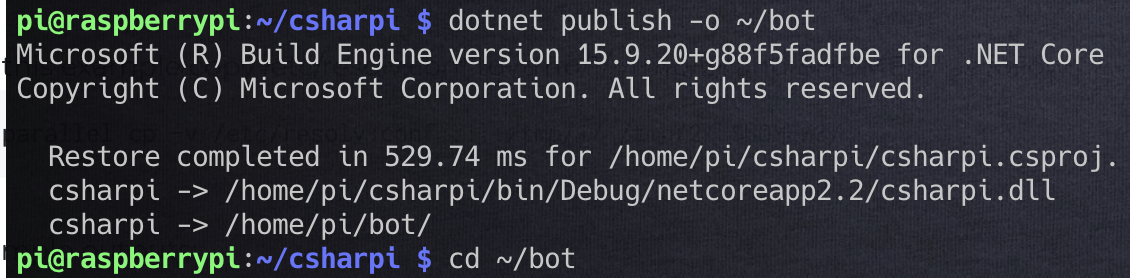
And finally, you can run:

dotnet csharpi.dll
dotnet csharpi.png

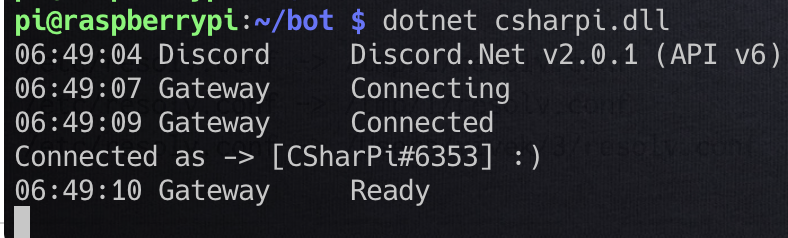
Looks good, but one more test with Discord to really be sure!

8ballpub.png
pubrunning.png

Looks like we’re all set.

accuracy of 8-ball is not guaranteed

[top]

Conclusion

In this post we added some proper command handling to our Discord bot.
Feel free to change things around and see what you can make happen (or break and fix… break + fix = learn, right?).

In the next part of this series, we will add proper logging to the bot.
If you have any questions or comments, leave them below!

C# Discord Bot: Adding a Database

C# Discord Bot: Adding a Database

Welcome

A database can be used to store and retrieve data that can make your bot even more robust. In this post, I will be going over how to create a database, and use it to expand our 8Ball command.

Prerequisites

  • .NET Core 3.x

  • A fundamental understanding of the Discord.Net library, or following along step-by-step with (if you’re working on a local bot, just omit the Raspberry Pi steps!):

Setting things up

This post will be building off of the code found in the logging post, found here: https://github.com/gngrninja/csharpi/tree/04-efdb

If you‘d like to go through the logging post first, check that out as well, here:

Let’s add the package we’ll need to get started using EF Core w/sqlite.

Drop down to a console, navigate to your project folder, and run:

dotnet add package Microsoft.EntityFrameworkCore.Sqlite
dotnet restore
add_package.PNG

Creating our database model

Now we’ll want to create a model for Entity Framework Core to use when generating the database. The model will be converted into a table.

To do this, we’ll:

  • Create a folder in our project root named Database

  • In the Database folder, create two files:

    • CsharpiContext.cs

    • EightBallAnswer.cs

db_folder.PNG

Let’s start defining our EightBallAnswer, by adding the following to the EightBallAnswer.cs file:

https://github.com/gngrninja/csharpi/blob/04-efdb/Database/EightBallAnswer.cs

 1
 2
 3
 4
 5
 6
 7
 8
 9
10
11
12
13
using System;
using System.ComponentModel.DataAnnotations;

namespace csharpi.Database
{
    public partial class EightBallAnswer
    {
        [Key]
        public long AnswerId { get; set; }
        public string AnswerText { get; set; }
        public string AnswerColor { get; set; }
    }
}

Now we can create our DbSet in CsharpEntities.cs, which will tell EF Core what we want our database to look like:

https://github.com/gngrninja/csharpi/blob/04-efdb/Database/CsharpiEntities.cs

 1
 2
 3
 4
 5
 6
 7
 8
 9
10
11
12
13
14
15
16
17
18
using Microsoft.Data.Sqlite;
using Microsoft.EntityFrameworkCore;

namespace csharpi.Database
{
    public partial class CsharpiEntities : DbContext
    {
        public virtual DbSet<EightBallAnswer> EightBallAnswer { get; set; }
        
        protected override void OnConfiguring(DbContextOptionsBuilder optionsBuilder)
        {
            var connectionStringBuilder = new SqliteConnectionStringBuilder { DataSource = "csharpi.db" };
            var connectionString = connectionStringBuilder.ToString();
            var connection = new SqliteConnection(connectionString);
            optionsBuilder.UseSqlite(connection);
        }        
    }
}

Now let’s add some pieces to our Program.cs file:

At the top:

using csharpi.Database;

And to inject the DB Context via Dependency Injection:

.AddDbContext<CsharpiEntities>() 

That will make Program.cs look like this:

https://github.com/gngrninja/csharpi/blob/intro/Program.cs

  1
  2
  3
  4
  5
  6
  7
  8
  9
 10
 11
 12
 13
 14
 15
 16
 17
 18
 19
 20
 21
 22
 23
 24
 25
 26
 27
 28
 29
 30
 31
 32
 33
 34
 35
 36
 37
 38
 39
 40
 41
 42
 43
 44
 45
 46
 47
 48
 49
 50
 51
 52
 53
 54
 55
 56
 57
 58
 59
 60
 61
 62
 63
 64
 65
 66
 67
 68
 69
 70
 71
 72
 73
 74
 75
 76
 77
 78
 79
 80
 81
 82
 83
 84
 85
 86
 87
 88
 89
 90
 91
 92
 93
 94
 95
 96
 97
 98
 99
100
101
102
103
104
105
106
107
108
109
110
111
112
113
114
115
116
117
118
119
120
121
122
123
124
125
126
127
128
129
130
131
132
133
134
135
136
137
using System;
using Discord;
using Discord.Net;
using Discord.Commands;
using Discord.WebSocket;
using System.Threading.Tasks;
using Microsoft.Extensions.Configuration;
using Microsoft.Extensions.Logging;
using Microsoft.Extensions.DependencyInjection;
using csharpi.Services;
using System.Linq;
using Serilog;
using csharpi.Database;

namespace csharpi
{
    class Program
    {
        // setup our fields we assign later
        private readonly IConfiguration _config;
        private DiscordSocketClient _client;
        private static string _logLevel;

        static void Main(string[] args = null)
        {
            if (args.Count() != 0)
            {
                _logLevel = args[0];
            } 
            Log.Logger = new LoggerConfiguration()
                .WriteTo.File("logs/csharpi.log", rollingInterval: RollingInterval.Day)
                .WriteTo.Console()
                .CreateLogger();

            new Program().MainAsync().GetAwaiter().GetResult();
        }

        public Program()
        {
            // create the configuration
            var _builder = new ConfigurationBuilder()
                .SetBasePath(AppContext.BaseDirectory)
                .AddJsonFile(path: "config.json");  

            // build the configuration and assign to _config          
            _config = _builder.Build();
        }

        public async Task MainAsync()
        {
            // call ConfigureServices to create the ServiceCollection/Provider for passing around the services
            using (var services = ConfigureServices())
            {
                // get the client and assign to client 
                // you get the services via GetRequiredService<T>
                var client = services.GetRequiredService<DiscordSocketClient>();
                _client = client;

                // setup logging and the ready event
                services.GetRequiredService<LoggingService>();

                // this is where we get the Token value from the configuration file, and start the bot
                await client.LoginAsync(TokenType.Bot, _config["Token"]);
                await client.StartAsync();

                // we get the CommandHandler class here and call the InitializeAsync method to start things up for the CommandHandler service
                await services.GetRequiredService<CommandHandler>().InitializeAsync();

                await Task.Delay(-1);
            }
        }

        private Task LogAsync(LogMessage log)
        {
            Console.WriteLine(log.ToString());
            return Task.CompletedTask;
        }

        private Task ReadyAsync()
        {
            Console.WriteLine($"Connected as -> [{_client.CurrentUser}] :)");
            return Task.CompletedTask;
        }

        // this method handles the ServiceCollection creation/configuration, and builds out the service provider we can call on later
        private ServiceProvider ConfigureServices()
        {
            // this returns a ServiceProvider that is used later to call for those services
            // we can add types we have access to here, hence adding the new using statement:
            // using csharpi.Services;
            // the config we build is also added, which comes in handy for setting the command prefix!
            var services = new ServiceCollection()
                .AddSingleton(_config)
                .AddSingleton<DiscordSocketClient>()
                .AddSingleton<CommandService>()
                .AddSingleton<CommandHandler>()
                .AddSingleton<LoggingService>()
                .AddDbContext<CsharpiEntities>() 
                .AddLogging(configure => configure.AddSerilog());

            if (!string.IsNullOrEmpty(_logLevel)) 
            {
                switch (_logLevel.ToLower())
                {
                    case "info":
                    {
                        services.Configure<LoggerFilterOptions>(options => options.MinLevel = LogLevel.Information);
                        break;
                    }
                    case "error":
                    {
                        services.Configure<LoggerFilterOptions>(options => options.MinLevel = LogLevel.Error);
                        break;
                    } 
                    case "debug":
                    {
                        services.Configure<LoggerFilterOptions>(options => options.MinLevel = LogLevel.Debug);
                        break;
                    } 
                    default: 
                    {
                        services.Configure<LoggerFilterOptions>(options => options.MinLevel = LogLevel.Error);
                        break;
                    }
                }
            }
            else
            {
                services.Configure<LoggerFilterOptions>(options => options.MinLevel = LogLevel.Information);
            }

            var serviceProvider = services.BuildServiceProvider();
            return serviceProvider;
        }
        
    }
}

Create the Database File

Now that we’ve defined what we want our database to look like, we can run some commands to get it created. Run these commands while in the root of your project folder:

  1. Install tooling for EF in .NET Core

    dotnet tool install --global dotnet-ef
    dotnet add package Microsoft.EntityFrameworkCore.Design
  2. Create the database using our model

    dotnet ef migrations add InitialCreate
    dotnet ef database update

If all went well, you should see a new file named csharpi.db:

new_file.PNG

Taking a peek at the DB

To take a look and verify the database was created as per our defined model, you can use this tool: https://sqlitebrowser.org/

Here is what the file I created looks like:

Add Eight Ball Commands

Now we will want to add some commands to the bot that will allow us to:

  • Add an answer w/associated color to the database

  • List out answers currently in the database

  • Remove an answer from the database

  • Ask the 8Ball a question

The first thing we will want to do is remove the 8Ball command from the Modules/ExampleCommands.cs file. After removing it, ExampleCommands.cs should look like this:

https://github.com/gngrninja/csharpi/blob/04-efdb/Modules/ExampleCommands.cs

 1
 2
 3
 4
 5
 6
 7
 8
 9
10
11
12
13
14
15
16
17
18
19
20
21
22
23
24
25
26
27
28
29
30
31
32
33
34
using Discord;
using Discord.Net;
using Discord.WebSocket;
using Discord.Commands;
using System;
using System.Linq;
using System.Text;
using System.Threading.Tasks;
using System.Collections.Generic;
using Microsoft.Extensions.Configuration;

namespace csharpi.Modules
{
    // for commands to be available, and have the Context passed to them, we must inherit ModuleBase
    public class ExampleCommands : ModuleBase
    {
        [Command("hello")]
        public async Task HelloCommand()
        {
            // initialize empty string builder for reply
            var sb = new StringBuilder();

            // get user info from the Context
            var user = Context.User;
            
            // build out the reply
            sb.AppendLine($"You are -> [{user.Username}]");
            sb.AppendLine("I must now say, World!");

            // send simple string reply
            await ReplyAsync(sb.ToString());
        }        
    }
}

The next thing we will do is add all of our eight ball handling commands to a new file in the Modules folder named EightBallCommands.cs

commands_file.PNG

The contents for EightBallCommands.cs should be as follows:

  1
  2
  3
  4
  5
  6
  7
  8
  9
 10
 11
 12
 13
 14
 15
 16
 17
 18
 19
 20
 21
 22
 23
 24
 25
 26
 27
 28
 29
 30
 31
 32
 33
 34
 35
 36
 37
 38
 39
 40
 41
 42
 43
 44
 45
 46
 47
 48
 49
 50
 51
 52
 53
 54
 55
 56
 57
 58
 59
 60
 61
 62
 63
 64
 65
 66
 67
 68
 69
 70
 71
 72
 73
 74
 75
 76
 77
 78
 79
 80
 81
 82
 83
 84
 85
 86
 87
 88
 89
 90
 91
 92
 93
 94
 95
 96
 97
 98
 99
100
101
102
103
104
105
106
107
108
109
110
111
112
113
114
115
116
117
118
119
120
121
122
123
124
125
126
127
128
129
130
131
132
133
134
135
136
137
138
139
140
141
142
143
144
145
146
147
148
149
150
151
152
153
154
155
156
157
158
159
160
161
162
163
164
165
166
167
168
169
170
171
172
173
174
175
176
177
178
179
180
181
182
183
184
185
186
187
188
189
190
191
192
193
194
195
196
197
198
199
200
201
202
203
204
205
206
207
208
209
210
using Discord;
using Discord.Net;
using Discord.WebSocket;
using Discord.Commands;
using System;
using System.Linq;
using System.Text;
using System.Threading.Tasks;
using System.Collections.Generic;
using Microsoft.Extensions.Configuration;
using csharpi.Database;
using Microsoft.Extensions.DependencyInjection;

namespace csharpi.Modules
{
    // for commands to be available, and have the Context passed to them, we must inherit ModuleBase
    public class EightBallCommands : ModuleBase
    {
        private readonly CsharpiEntities _db;
        private List<String> _validColors = new List<String>();
        private readonly IConfiguration _config;

        public EightBallCommands(IServiceProvider services)
        {
            // we can pass in the db context via depedency injection
            _db = services.GetRequiredService<CsharpiEntities>();
            _config = services.GetRequiredService<IConfiguration>();

            _validColors.Add("green");
            _validColors.Add("red");
            _validColors.Add("blue");
        }

        [Command("add")]
        public async Task AddResponse(string answer, string color)
        {            
            var sb = new StringBuilder();
            var embed = new EmbedBuilder();

            // get user info from the Context
            var user = Context.User;
            
            // check to see if the color is valid
            if (!_validColors.Contains(color.ToLower()))
            {
                sb.AppendLine($"**Sorry, [{user.Username}], you must specify a valid color.**");
                sb.AppendLine("Valid colors are:");
                sb.AppendLine();
                foreach (var validColor in _validColors)
                {
                    sb.AppendLine($"{validColor}");
                }       
                embed.Color = new Color(255, 0, 0);         
            }
            else 
            {
                // add answer/color to table
                await _db.AddAsync(new EightBallAnswer
                    {
                        AnswerText  = answer,
                        AnswerColor = color.ToLower()                     
                    }
                );
                // save changes to database
                await _db.SaveChangesAsync();                
                sb.AppendLine();
                sb.AppendLine("**Added answer:**");
                sb.AppendLine(answer);
                sb.AppendLine();
                sb.AppendLine("**With color:**");
                sb.AppendLine(color);
                embed.Color = new Color(0, 255, 0);  
            }

            // set embed
            embed.Title = "Eight Ball Answer Addition";
            embed.Description = sb.ToString();
            
            // send embed reply
            await ReplyAsync(null, false, embed.Build());
        }

        [Command("list")]
        public async Task ListAnswers()
        {            
            var sb = new StringBuilder();
            var embed = new EmbedBuilder();

            // get user info from the Context
            var user = Context.User;
            
            var answers = await _db.EightBallAnswer.ToListAsync();
            if (answers.Count > 0)
            {
                foreach (var answer in answers)
                {
                    sb.AppendLine($":small_blue_diamond: [{answer.AnswerId}] **{answer.AnswerText}**");
                }
            }
            else
            {
                sb.AppendLine("No answers found!");
            }

            // set embed
            embed.Title = "Eight Ball Answer List";
            embed.Description = sb.ToString();
            
            // send embed reply
            await ReplyAsync(null, false, embed.Build());
        }   

        [Command("remove")]
        public async Task RemoveAnswer(int id)
        {            
            var sb = new StringBuilder();
            var embed = new EmbedBuilder();

            // get user info from the Context
            var user = Context.User;
            
            var answers = await _db.EightBallAnswer.ToListAsync();
            var answerToRemove = answers.Where(a => a.AnswerId == id).FirstOrDefault();

            if (answerToRemove != null)
            {
                _db.Remove(answerToRemove);
                await _db.SaveChangesAsync();
                sb.AppendLine($"Removed answer -> [{answerToRemove.AnswerText}]");
            }
            else
            {
                sb.AppendLine($"Did not find answer with id [**{id}**] in the database");
                sb.AppendLine($"Perhaps use the {_config["prefix"]}list command to list out answers");
            }
            
            // set embed
            embed.Title = "Eight Ball Answer List";
            embed.Description = sb.ToString();
            
            // send embed reply
            await ReplyAsync(null, false, embed.Build());
        } 

        [Command("8ball")]
        [Alias("ask")]
        public async Task AskEightBall([Remainder]string args = null)
        {
            // I like using StringBuilder to build out the reply
            var sb = new StringBuilder();

            // let's use an embed for this one!
            var embed = new EmbedBuilder();
            
            // add our possible replies from the database
            var replies = await _db.EightBallAnswer.ToListAsync();

            // add a title                        
            embed.Title = "Welcome to the 8-ball!";
            
            // we can get lots of information from the Context that is passed into the commands
            // here I'm setting up the preface with the user's name and a comma
            sb.AppendLine($"{Context.User.Username},");
            sb.AppendLine();

            // let's make sure the supplied question isn't null 
            if (args == null)
            {
                // if no question is asked (args are null), reply with the below text
                sb.AppendLine("Sorry, can't answer a question you didn't ask!");
            }
            else 
            {
                // if we have a question, let's give an answer!
                // get a random number to index our list with 
                var answer = replies[new Random().Next(replies.Count)];
                
                // build out our reply with the handy StringBuilder
                sb.AppendLine($"You asked: [**{args}**]...");
                sb.AppendLine();
                sb.AppendLine($"...your answer is [**{answer.AnswerText}**]");

                switch (answer.AnswerColor)
                {
                    case "red":
                    {
                        embed.WithColor(255, 0, 0);
                        break;
                    }
                    case "blue":
                    {
                        embed.WithColor(0, 0, 255);
                        break;
                    }
                    case "green":
                    {
                        embed.WithColor(0, 255, 0);
                        break;
                    }                                        
                }                               
            }

            // now we can assign the description of the embed to the contents of the StringBuilder we created
            embed.Description = sb.ToString();

            // this will reply with the embed
            await ReplyAsync(null, false, embed.Build());
        }
    }
}

Testing it out

Let’s test it out!

Adding answers

+add "yes!" "green"
+add "that's a no, bob!" "red"
+add "I dono" "blue"
add_response.PNG
db_answers.PNG

Listing answers

+list
list_answers.PNG

Removing answers

+remove 3
remove_response.PNG
db_removed.PNG

Asking a question

+8ball is the sky blue?
asked.PNG

I asked it a couple times so I could see the different responses and color changes.

Conclusion

This is a very basic example of what you can do with a simple database, created via code, for your Discord Bot to use. If you have any questions or feedback, please leave a comment below!

C# Discord Bot: Logging All The Things

C# Discord Bot: Logging All The Things

Welcome

No matter what you're using your bot for, more likely than not you'll want to know what the heck is happening at some point. Luckily, we can add a logging service to get this done.

In this post I will be going over how to use Serilog, along with Microsoft’s logging framework/interface to wrap it up for dependency injection. The logging done will be to the console, as well as to a file.

The starting point I will be using is from the prerequisites portion, if you want to follow along and build it out as you go.

Prerequisites

  • .NET Core 3.x

  • A fundamental understanding of the Discord.Net library, or following along step-by-step with (if you’re working on a local bot, just omit the Raspberry Pi steps!):

Adding Required Packages

The first thing we will want to do is add the packages we need to take care of logging.

Here is the list of packages we will need:

Microsoft.Extensions.Logging.Debug Microsoft.Extensions.Logging.Console Microsoft.Extensions.Logging Serilog.Sinks.File Serilog.Sinks.Console Serilog.AspNetCore 

We can use the dotnet add package command to get them added.

dotnet add package Microsoft.Extensions.Logging.Debug dotnet add package Microsoft.Extensions.Logging.Console dotnet add package Microsoft.Extensions.Logging dotnet add package Serilog.Sinks.File dotnet add package Serilog.Sinks.Console dotnet add package Serilog.AspNetCore 

**Note**
Make sure you are in the csharpi project’s or your own project’s root folder when doing this (the one with the .csproj file in it).

add packages.png

Now that we have the required packages added, we can move on to modifying Program.cs to add some logging goodness!

Modifying Program.cs

The next step will be to modify Program.cs to setup and use logging.
We will be:

  • Adding using statements to bring in the namespaces we need

  • Setting up the Serilog logger with a few options

  • Adding logging to the services provided by dependency injection

  • Invoke the logger

Using Statements

We will need to add the following using statements to Program.cs:

1
2
using Serilog;
using Microsoft.Extensions.Logging;

Modifying the main method to add logging options

Now we will want to add some code to the main method to configure the logger.

  • We will null out the args parameter so we can better take input

  • An if statement will be added to see if an argument was passed to set the logging level

  • The Serilog logger will be created with the options we specify

 1
 2
 3
 4
 5
 6
 7
 8
 9
10
11
12
13
static void Main(string[] args = null)
{
    if (args.Count() != 0)
    {
        _logLevel = args[0];
    } 
    Log.Logger = new LoggerConfiguration()
         .WriteTo.File("logs/csharpi.log", rollingInterval: RollingInterval.Day)
         .WriteTo.Console()
         .CreateLogger();

    new Program().MainAsync().GetAwaiter().GetResult();
}

A note on Log.logger

The Log.Logger portion of the code is what sets up the logging configuration.
In the above example the following options are configured:

  • Write out to the console and to a file

  • The file will be stored in the logs directory (from the project root), and will create a new file named csharpi.log (feel free to change the directory/file name to suite your needs)

  • The files will roll every day, and have each day’s date as a timestamp (Serilog takes care of this magic)

Adding the logger to our service provider / dependency injection

Now we’ll want to change our ConfigureServices method to add logging.

 1
 2
 3
 4
 5
 6
 7
 8
 9
10
11
12
13
14
15
16
17
18
19
20
21
22
23
24
25
26
27
28
29
30
31
32
33
34
35
36
37
38
39
40
41
42
43
44
45
46
47
48
private ServiceProvider ConfigureServices()
{
    // this returns a ServiceProvider that is used later to call for those services
    // we can add types we have access to here, hence adding the new using statement:
    // using csharpi.Services;
    // the config we build is also added, which comes in handy for setting the command prefix!
    var services = new ServiceCollection()
        .AddSingleton(_config)
        .AddSingleton<DiscordSocketClient>()
        .AddSingleton<CommandService>()
        .AddSingleton<CommandHandler>()
        .AddSingleton<LoggingService>()
        .AddLogging(configure => configure.AddSerilog());

    if (!string.IsNullOrEmpty(_logLevel)) 
    {
        switch (_logLevel.ToLower())
        {
            case "info":
            {
                services.Configure<LoggerFilterOptions>(options => options.MinLevel = LogLevel.Information);
                break;
            }
            case "error":
            {
                services.Configure<LoggerFilterOptions>(options => options.MinLevel = LogLevel.Error);
                break;
            } 
            case "debug":
            {
                services.Configure<LoggerFilterOptions>(options => options.MinLevel = LogLevel.Debug);
                break;
            } 
            default: 
            {
                services.Configure<LoggerFilterOptions>(options => options.MinLevel = LogLevel.Error);
                break;
            }
        }
    }
    else
    {
        services.Configure<LoggerFilterOptions>(options => options.MinLevel = LogLevel.Information);
    }

    var serviceProvider = services.BuildServiceProvider();
    return serviceProvider;
}

The above method will build out the service provider, and handle some logic in regards to the logging level.

MainAsync method modification

We can now clean up the MainAsync method a bit, here are the new contents (note that the logging hooks are removed, and a simple service retrieval takes its place):

 1
 2
 3
 4
 5
 6
 7
 8
 9
10
11
12
13
14
15
16
17
18
19
20
21
22
23
public async Task MainAsync()
{
    // call ConfigureServices to create the ServiceCollection/Provider for passing around the services
    using (var services = ConfigureServices())
    {
        // get the client and assign to client 
        // you get the services via GetRequiredService<T>
        var client = services.GetRequiredService<DiscordSocketClient>();
        _client = client;

        // setup logging and the ready event
        services.GetRequiredService<LoggingService>();

        // this is where we get the Token value from the configuration file, and start the bot
        await client.LoginAsync(TokenType.Bot, _config["Token"]);
        await client.StartAsync();

        // we get the CommandHandler class here and call the InitializeAsync method to start things up for the CommandHandler service
        await services.GetRequiredService<CommandHandler>().InitializeAsync();

        await Task.Delay(-1);
    }
}

You can always see the most updated version of this example’s Program.cs file, here: https://github.com/gngrninja/csharpi/blob/03-logging/Program.cs.

**Note**
There is a little chicken and egg here, where we are adding the LoggingService. We will be building that out next!

Adding the LoggingService

The logging service is where we will move the old logging hooks and methods to. This will allow us to remove the following from Program.cs, if it is there:

 1
 2
 3
 4
 5
 6
 7
 8
 9
10
11
12
13
14
client.Log += LogAsync;
client.Ready += ReadyAsync;
services.GetRequiredService<CommandService>().Log += LogAsync;
private Task LogAsync(LogMessage log)
{
    Console.WriteLine(log.ToString());
    return Task.CompletedTask;
}

private Task ReadyAsync()
{
    Console.WriteLine($"Connected as -> [] :)");
    return Task.CompletedTask;
}

To create the logging service, perform the following steps:

1. Create LoggingService.cs in the Services/ folder

2. Place the following content in the file (to see the most updated code, go here: https://github.com/gngrninja/csharpi/blob/03-logging/Services/LoggingService.cs). Be sure to change the namespace to yourprojectname.Services, if needed

 1
 2
 3
 4
 5
 6
 7
 8
 9
10
11
12
13
14
15
16
17
18
19
20
21
22
23
24
25
26
27
28
29
30
31
32
33
34
35
36
37
38
39
40
41
42
43
44
45
46
47
48
49
50
51
52
53
54
55
56
57
58
59
60
61
62
63
64
65
66
67
68
69
70
71
72
73
74
75
76
77
78
79
80
81
82
using Discord;
using Discord.Commands;
using Discord.WebSocket;
using System.Threading.Tasks;
using Microsoft.Extensions.Logging;
using Microsoft.Extensions.DependencyInjection;
using System;

namespace csharpi.Services
{
    public class LoggingService
    {

        // declare the fields used later in this class
        private readonly ILogger _logger;
        private readonly DiscordSocketClient _discord;
        private readonly CommandService _commands;

        public LoggingService(IServiceProvider services)
        { 
            // get the services we need via DI, and assign the fields declared above to them
            _discord = services.GetRequiredService<DiscordSocketClient>(); 
            _commands = services.GetRequiredService<CommandService>();
            _logger = services.GetRequiredService<ILogger<LoggingService>>();

            // hook into these events with the methods provided below
            _discord.Ready += OnReadyAsync;
            _discord.Log += OnLogAsync;
            _commands.Log += OnLogAsync;
        }

        // this method executes on the bot being connected/ready
        public Task OnReadyAsync()
        {
            _logger.LogInformation($"Connected as -> [] :)");
            _logger.LogInformation($"We are on [] servers");
            return Task.CompletedTask;
        }

        // this method switches out the severity level from Discord.Net's API, and logs appropriately
        public Task OnLogAsync(LogMessage msg)
        { 
            string logText = $": {msg.Exception?.ToString() ?? msg.Message}";
            switch (msg.Severity.ToString())
            {
                case "Critical":
                {
                    _logger.LogCritical(logText);
                    break;
                }
                case "Warning":
                {
                    _logger.LogWarning(logText);
                    break;
                }
                case "Info":
                {
                    _logger.LogInformation(logText);
                    break;
                }
                case "Verbose":
                {
                    _logger.LogInformation(logText);
                    break;
                } 
                case "Debug":
                {
                    _logger.LogDebug(logText);
                    break;
                } 
                case "Error":
                {
                    _logger.LogError(logText);
                    break;
                } 
            }

            return Task.CompletedTask; 

        }
    }
}

What LoggingService does

  • The fields in this class are _logger, _discord, and _commands

  • The constructor is what handles the assignment of those fields, and when using Microsoft’s logging interface, we want to assign the _logger field as as ILogger<TypeName>, so in this case ILogger<LoggingService>.

    • This is a nice way to do it, because it abstracts the logging away from implemented framework, which in this case is Serilog. You could change that to a different framework, and this code would stay the same

    • After assigning the fields we hook into the OnReadyAsync and OnLogAsync events, and assign them to the appropriate methods

Now let’s move on the adding logging to an existing service, CommandHandler!

Adding Logging to CommandHandler

This next part here will demonstrate how to add logging to an existing class via dependency injection.

To add logging to the CommandHandler service, we will need to add the following using statement:

using Microsoft.Extensions.Logging;

We’ll then want to create the following field:

private readonly Microsoft.Extensions.Logging.ILogger _logger;

In the constructor, we can assign the logger as we did in the LoggingService, using the type name of this class:

_logger = services.GetRequiredService<ILogger<CommandHandler>>();

Now we can start using _logger, as such:

_logger.LogError($"Command failed to execute for [] <-> []!");

Much better than strictly using System.Console.WriteLine!

Here is the full code for the updated CommandHandler.cs file (to see the most updated code, go here https://github.com/gngrninja/csharpi/blob/03-logging/Services/CommandHandler.cs):

 1
 2
 3
 4
 5
 6
 7
 8
 9
10
11
12
13
14
15
16
17
18
19
20
21
22
23
24
25
26
27
28
29
30
31
32
33
34
35
36
37
38
39
40
41
42
43
44
45
46
47
48
49
50
51
52
53
54
55
56
57
58
59
60
61
62
63
64
65
66
67
68
69
70
71
72
73
74
75
76
77
78
79
80
81
82
83
84
85
86
87
88
89
90
91
92
93
94
95
96
97
98
using System;
using System.Reflection;
using System.Threading.Tasks;
using Microsoft.Extensions.DependencyInjection;
using Discord;
using Discord.Commands;
using Discord.WebSocket;
using Microsoft.Extensions.Configuration;
using Microsoft.Extensions.Logging;

namespace csharpi.Services
{
    public class CommandHandler
    {
        // setup fields to be set later in the constructor
        private readonly IConfiguration _config;
        private readonly CommandService _commands;
        private readonly DiscordSocketClient _client;
        private readonly IServiceProvider _services;
        private readonly Microsoft.Extensions.Logging.ILogger _logger;

        public CommandHandler(IServiceProvider services)
        {
            // juice up the fields with these services
            // since we passed the services in, we can use GetRequiredService to pass them into the fields set earlier
            _config = services.GetRequiredService<IConfiguration>();
            _commands = services.GetRequiredService<CommandService>();
            _client = services.GetRequiredService<DiscordSocketClient>();
            _logger = services.GetRequiredService<ILogger<CommandHandler>>();
            _services = services;
            
            // take action when we execute a command
            _commands.CommandExecuted += CommandExecutedAsync;

            // take action when we receive a message (so we can process it, and see if it is a valid command)
            _client.MessageReceived += MessageReceivedAsync;
        }

        public async Task InitializeAsync()
        {
            // register modules that are public and inherit ModuleBase<T>.
            await _commands.AddModulesAsync(Assembly.GetEntryAssembly(), _services);
        }

        // this class is where the magic starts, and takes actions upon receiving messages
        public async Task MessageReceivedAsync(SocketMessage rawMessage)
        {
            // ensures we don't process system/other bot messages
            if (!(rawMessage is SocketUserMessage message)) 
            {
                return;
            }
            
            if (message.Source != MessageSource.User) 
            {
                return;
            }

            // sets the argument position away from the prefix we set
            var argPos = 0;

            // get prefix from the configuration file
            char prefix = Char.Parse(_config["Prefix"]);

            // determine if the message has a valid prefix, and adjust argPos based on prefix
            if (!(message.HasMentionPrefix(_client.CurrentUser, ref argPos) || message.HasCharPrefix(prefix, ref argPos))) 
            {
                return;
            }
           
            var context = new SocketCommandContext(_client, message);

            // execute command if one is found that matches
            await _commands.ExecuteAsync(context, argPos, _services); 
        }

        public async Task CommandExecutedAsync(Optional<CommandInfo> command, ICommandContext context, IResult result)
        {
            // if a command isn't found, log that info to console and exit this method
            if (!command.IsSpecified)
            {
                _logger.LogError($"Command failed to execute for [{context.User.Username}] <-> [{result.ErrorReason}]!");
                return;
            }
                

            // log success to the console and exit this method
            if (result.IsSuccess)
            {
                _logger.LogInformation($"Command [{command.Value.Name}] executed for [{context.User.Username}] on [{context.Guild.Name}]");
                return;
            }
            
            // failure scenario, let's let the user know
            await context.Channel.SendMessageAsync($"Sorry, {context.User.Username}... something went wrong -> [{result}]!");
        }        
    }
}

Testing it all out

Now its time for the fun part, seeing if it all works!

You can either debug it in VS Code (F5), or from a terminal (ensure you are in the project’s folder) and use:

dotnet run
Screen Shot 2019-07-21 at 12.32.51 PM.png

The logging to the console looks good! On the left it shows the log level next to the timestamp, in this case INF means info. Now let’s look in the logs folder for a log file and see its contents.

Screen Shot 2019-07-21 at 12.36.49 PM.png

Awesome! Since we hooked into the CommandHandler, and use the logger now, let’s test a command and see what happens.

hello.png
hello_logged.png

Looks good, logged as expected. Now let’s check something that would log as an error (in this case an unknown command):

not_cmd_error.png
cmd_error.png

Changing the log level

The log level can be changed by running the bot with an argument (that is the log level). To change the log level to error (thus not logging anything under the error level such as INF/Info, use:

dotnet run error

error.png

Notice we don’t have the information messages anymore. However, if we used an unknown command, it should show an error:

not_cmd_error.png
just_error.png

Conclusion

And that’s that. Now we have some logging in place for use with our Discord Bot!

Be sure to add the /logs folder to your .gitignore file, as you likely don’t want those uploaded to GitHub.

Feel free to change things around and see what you can make happen (or break and fix… break + fix = learn, right?).

In the next part of this series, we will add a database to our project!


If you have any questions or comments, leave them below!

[top]


C# Discord Bot on Raspberry Pi: Simple Bot With Config File

C# Discord Bot on Raspberry Pi: Simple Bot With Config File

CSharPi: Simple Bot With Config File

RPi-Logo-Reg-SCREEN.png

Now let’s get a Discord bot working on our Pi!

Creating the Discord App

We will need a bot token to authenticate the bot and get things going.

1. Login to the developer portal for Discord, here: https://discordapp.com/developers/applications/.

2. Once logged in, click “New Application”, and give it a name.

newapp.png

3. Now click “Bot” on the menu to the left.

Click bot.png

4. Click “Add Bot”, and confirm.

Add Bot.png
botconfirm.png

5. Now you should see an option to reveal the bot’s token. We will need to get this information shortly.

token.png

6. Let’s invite the bot to a Discord server. You will need to be an administrator on the server you want to invite the bot to. To do this, go to the “General Information” option on the menu to the left, and copy the Client ID.

clientid.png

My bot’s client ID is 554549670953615380.

7. Go to https://discordapi.com/permissions.html#3198016, and input your client ID towards the bottom. I’ve added the basic permissions that will be good for this example bot. Feel free to add more if you’d like.

invitepage.png

8. The invite URL is the one you see towards the bottom. Go to that link in your browser. For my bot, it is: https://discordapp.com/oauth2/authorize?client_id=554549670953615380&scope=bot&permissions=3198016.

9. Confirm the server you are adding the bot to, and click “Authorize”.

confirmauth.png

10. You should now see an (offline) bot join your server.

joined.png

Token in Configuration File

Local Machine

From here on out we will be relying upon the groundwork we laid in this post:

If you haven’t done the setup in that post, but are an advanced user familiar with C# / .NET, carry on. Otherwise, I strongly recommend going through it.

1. Open the csharpi folder in Visual Studio Code on your local machine.

2. Create a new file in the root named config.json

createfile.png

3. Give it the following content:

    {
        "Token":  ""
    }

4. Move the file to the /bin/Debug/netcoreapp3.1 folder (if you are using a different version, it will show up as a different number, such as 2.2 as seen in the screenshot. That is ok, just move the file there instead).
(note) the only reason we are creating this copy is for testing, and when we debug the app it uses this folder as its root folder. We will be creating a separate config.json on the Pi in a moment.

movefile.png
movedfiled.png

5. Navigate back to https://discordapp.com/developers/applications/, and click the application we made earlier.

6. Click “Bot from the menu on the left, and then click “Reveal Token

bottokencopy.png

7. Copy the token and drop it inbetween the quotes in the config.json file.

droptokeninconffil.png

(note) it is very important you keep your token a secret, and regenerate it if you think anyone else knows it.

Raspberry Pi

1. SSH into your Raspberry Pi

2. Navigate to the published folder we created in part one:

        cd /home/pi/bot

3. Create the configuration file here:

        touch config.json

4. Copy the contents of the file from the one created on your local machine.

copycontents.png

5. Open the config.json file in /home/pi/bot on the Pi in nano:

        nano config.json
cdtouchnano.png

6. Once the editor is opened, paste in the contents.

pastenano.png

7. Use the following sequence to write the contents and exit the editor:

        CTRL+O
        [Enter]
        CTRL+X

8. Verify the file contents via the more command:

        more config.json
Screen Shot 2019-03-11 at 12.18.17 AM.png

Add Required Packages

Now it is time to add required packages to our project. We will need to add the Discord.Net package, and a couple Microsoft configuration packages to help us read and store the configuration file.

1. Open your favorite console / terminal, and navigate to the csharpi project folder on your local machine.

2. Run the following commands:

dotnet add package Discord.Net --version 3.1.0
dotnet add package Microsoft.Extensions.Configuration --version 6.0.0  
dotnet add package Microsoft.Extensions.Configuration.Json --version 6.0.0

Add Simple Bot Code

Now we’re going to replace the contents of Program.cs with the simple bot code. This code will be the basis for future posts to come.

1. Open the csharpi folder on your local machine in Visual Studio Code.

2. Replace the contents of Program.cs with the following:
(note) If you did not name your project csharpi, be mindful of the namespace declaration and update yours to match your project name!

 1
 2
 3
 4
 5
 6
 7
 8
 9
10
11
12
13
14
15
16
17
18
19
20
21
22
23
24
25
26
27
28
29
30
31
32
33
34
35
36
37
38
39
40
41
42
43
44
45
46
47
48
49
50
51
52
53
54
55
56
57
58
59
60
61
62
63
64
65
66
67
68
69
70
71
72
73
74
75
76
77
78
79
using System;
using Discord;
using Discord.Net;
using Discord.Commands;
using Discord.WebSocket;
using System.Threading.Tasks;
using Microsoft.Extensions.Configuration;
using Microsoft.Extensions.Configuration.Json;

namespace csharpi
{
    class Program
    {
        private readonly DiscordSocketClient _client;
        private readonly IConfiguration _config;

        public static Task Main(string[] args) => new Program().MainAsync();

        public async Task MainAsync(string[] args)
        {
            
        }

        public Program()
        {
            _client = new DiscordSocketClient();

            //Hook into log event and write it out to the console
            _client.Log += Log;

            //Hook into the client ready event
            _client.Ready += Ready;

            //Hook into the message received event, this is how we handle the hello world example
            _client.MessageReceived += MessageReceivedAsync;

            //Create the configuration
            var _builder = new ConfigurationBuilder()
                .SetBasePath(AppContext.BaseDirectory)
                .AddJsonFile(path: "config.json");            
            _config = _builder.Build();
        }

        public async Task MainAsync()
        {
            //This is where we get the Token value from the configuration file
            await _client.LoginAsync(TokenType.Bot, _config["Token"]);
            await _client.StartAsync();

            // Block the program until it is closed.
            await Task.Delay(-1);
        }

        private Task Log(LogMessage log)
        {
            Console.WriteLine(log.ToString());
            return Task.CompletedTask;
        }

        private Task Ready()
        {
            Console.WriteLine($"Connected as -> [] :)");
            return Task.CompletedTask;
        }

        //I wonder if there's a better way to handle commands (spoiler: there is :))
        private async Task MessageReceivedAsync(SocketMessage message)
        {
            //This ensures we don't loop things by responding to ourselves (as the bot)
            if (message.Author.Id == _client.CurrentUser.Id)
                return;

            if (message.Content == ".hello")
            {
                await message.Channel.SendMessageAsync("world!");
            }  
        }
    }
}
programcseditor.png

3. Now that we have the new code for Program.cs, let’s test it by debugging (F5).

debugconnected.png

4. Now that we verified it is connected and debugging, try sending .hello to the discord server your bot is in, and see what happens (the bot should appear online now!)

hellofromlocal.png

Awesome! It works locally. Now let’s work on getting it to the Pi.

Commit New Code to Github

Let’s get our new code committed to Github!

1. Open up the csharpi folder on your local machine with VS Code.

2. The Git icon should show that 2 files have been modified. These are the .csproj file with the required packages we added, and the Program.cs file we modified.

gitmod.png

3. Since VS Code is Git-aware, let’s push these changes up to our Github repository.

4. Add a commit message and click the checkmark icon to stage/commit the files.

commitmessage.png

5. Now click the three dots “”, and select “Push”.

6. Verify the files have been modified by going to your Github repository’s page:

Update Code on Pi

Now let’s get the updated code on the Raspberry Pi, and publish the app again. After we do that, we can run the updated app and ensure it works as the Discord bot!

1. SSH into your Pi.

2. Navigate to the source code folder /home/pi/csharpi:

    cd /home/pi/csharpi

3. Run:

    git pull

(you should see that some changes have been made)

gitpull.png

4. Now let’s publish and run the application (since we already created config.json in /home/pi/bot earlier, it should pick up that file and have the token ready). The first command publishes the application, then we change directory to the published application, and run it.

dotnet publish -o /home/pi/bot
cd /home/pi/bot
dotnet csharpi.dll

(note) The restore/publishing process will take a while, but you only need to run it if your code has changed.

If all goes well, we should see our bot connected message, and we can test it out in the Discord server!

itworks.png
helloworldpi.png

And there you have it, a Discord bot running on a Raspberry Pi, with .NET and C#. The next parts of this series will go over proper command handling (hint: not how we did it here), and more!

C# Discord Bot Series

Next post:

If you have any feedback or questions, feel free to leave a comment below!

C# Discord Bot on Raspberry Pi: Setting Things Up

C# Discord Bot on Raspberry Pi: Setting Things Up

CSharPi: Getting Started

RPi-Logo-Reg-SCREEN.png

What if I said it was possible to run a Discord bot on a Raspberry Pi natively? With .NET, we can do just that.

Getting Started

Updated for .NET version 6.0!

Let’s get some prerequisites out of the way. The first thing we’ll do is install the .NET SDK on our local machine, as well as our Raspberry Pi. Next, we’ll ensure Git is installed both places as well.

Finally, I will be using Visual Studio Code for this project, so I will go over installing that as well.

If you are familiar with all of these concepts, and have created Discord bots before, feel free to skip to the next part of the series:

Otherwise, carry on!

Installing .NET

Local Machine

Let’s start out by installing the .NET SDK on our local machine. You’ll want to start here, and follow specific instructions for your OS: https://dotnet.microsoft.com/download.

Once installed, you can verify it is working by dropping to the command line (OSX you’ll use Terminal, Windows you want PowerShell, and Linux whatever your favorite shell is), and running: dotnet --help

You should see something like this:

dotnet_help.png

Raspberry Pi

The one prerequisite here is that you can SSH into your Raspberry Pi. If you need some help enabling SSH, check out this article here: https://www.raspberrypi.org/documentation/remote-access/ssh/.

If you’d like to setup your Raspberry Pi headless, and ensure it connects to your WiFi network and automatically enables SSH on first boot, check out my post:

Once you’re sshed in (Windows users that need help check this out: https://learn.adafruit.com/adafruits-raspberry-pi-lesson-6-using-ssh/ssh-under-windows), you can start installing .NET on your Pi.

The following commands will:

1. Navigate to the home directory

2. Download the .NET SDK

3. Create the directory /usr/share/dotnet

4. Uncompress the archive we downloaded into /usr/share/dotnet

5. Create a symbolic link so we can use the dotnet command

cd ~
wget https://download.visualstudio.microsoft.com/download/pr/72888385-910d-4ef3-bae2-c08c28e42af0/59be90572fdcc10766f1baf5ac39529a/dotnet-sdk-6.0.101-linux-arm.tar.gz
sudo mkdir /usr/share/dotnet
sudo tar -zxf dotnet-sdk-6.0.101-linux-arm.tar.gz -C /usr/share/dotnet
sudo ln -s /usr/share/dotnet/dotnet /usr/local/bin/dotnet

If all goes well, we should be able to run: dotnet --version.

dotnet_pi.png

Installing Git

Local Machine

Check out this URL for help installing Git on your local machine: https://git-scm.com/book/en/v2/Getting-Started-Installing-Git.

We can verify it works after installing by dropping to your favorite shell and running: git.

git.png

Raspberry Pi

If you are using the minimal (lite) version of Raspbian, or need Git installed otherwise, run: sudo apt install git, and accept any prompts with “y”.

gitin.png

Now we can run: git to verify it installed correctly.

gitpi.png

Visual Studio Code

Visual Studio Code has become my editor of choice, even for some C# projects. We will install the client onto our local machine so we can edit the code there. For help installing Visual Studio Code, go here: https://code.visualstudio.com.

Once you have Visual Studio Code installed, open it up and click the extensions icon on the left (looks like a square). Then search for and install the C# extension. In this screenshot, it is the only one in the list for me that does not have an install option, and has a gear next to it (since I already have it installed). Once you install it, it will give you the option to reload Visual Studio Code.

C# ext.png

Creating the .NET Project

Now we will be creating the .NET project. The machine we will be doing this on is our local machine, not the Pi.

Hello World

Let’s start by creating a dotnet console application.

1. Fire up your favorite shell, and run: dotnet new console -n csharpi.

This will create a new directory named csharpi, and create the project there.

dotnetnewc.png

2. Now open up the csharpi folder with Visual Studio Code. You will see a prompt in the lower right-hand corner asking if you want to add required assets, click “Yes”.

assets.png

If all went well, you will now see a .vscode folder in the list.

vscodefolder.png

3. Now to test things out. Click Program.cs to see the example code the default project provides that will write out “Hello World” to the console. Go to the Debug menu, and click “Start Debugging” (or simply hit F5).

debut menu.png
helloworked.png

If you see “Hello World”, our project has been created, and we have the ability to edit it in Visual Studio Code.

Git Repository Initialization

Now we will initialize the local instance of the Git repository, and push up our code to Github. If you don’t have an account on Github, you can create one, here: https://github.com/join?source=header-home. Once you create it, log in and hang on because we will be using it shortly.

Local Initialization

1. Open up your favorite terminal / console and navigate to the csharpi folder we created. Once there, run: git init. Keep the window open.

gitinit.png

2. Open up the csharpi folder in Visual Studio Code. You’ll notice the Git icon (branching line) has an indicator that there are 22 files to work with. Let’s fix that by creating a file named .gitignore, and tell Git what files we don’t want to commit.

3. Click the File icon in VS Code to see the files in the project, and then click the create new file icon. Name the file .gitignore

newfile.png
filename.png

4. Open the .gitignore file by clicking it, and add the following contents:

        /bin
        /obj
        *.json

This will tell Git to ignore the /bin and /obj folders, as well as any file ending in .json. Since we will be creating a json configuration file with a token we do not want to share in it later, this is a good thing.

contents.png

5. Switch back to the terminal / console window you have open and run:

        git add .        
        git commit -m 'first for csharpi'
addstage.png

6. Now go to Github and login.

7. Once logged in, click the [+] icon in the upper right, and select “New repository”.

newrepo.png

8. On the next page, give it a name and description. Keep it public to follow along with this tutorial. Cloning it will be much easier on the Pi that way.

create.png

9. Click “Create repository, and check out the instructions on the next screen. You’ll see that we completed most of it already.

10. Run the two commands for existing repository.

For me it is (your commands will look similar, with the url after origin reflecting your username and repo name):

            git remote add origin https://github.com/gngrninja/csharpi.git                     
            git push -u origin master

11. You should now see the following on the command line, and on Github once you refresh the page:

pushit.png
reposuccess.png

Cloning the Repository to the Pi

Now let’s test that .NET is working correctly on the Pi.

1. Go to your Github repository for this project (for me it is https://github.com/gngrninja/csharpi), and click “Clone or download”, and then copy the URL.

copyurl.png

2. SSH into your Raspberry Pi and run git clone, and then paste in the URL we copied from the above step.:

        git clone https://github.com/gngrninja/csharpi.git

3. We can now change directory to csharpi, check out the contents, and try running it (essentially in debug mode):

        cd csharpi
        ls
        dotnet run
cdrun.png

4. Debugging on the Pi with .NET is not fun. It takes forever, and is on their list to fix (as much as they can, considering it is not the fastest processor). Eventually, however, you should see the following:

helloworldpi.png

5. Fret not, running the compiled/published application is much faster. To see this happen let’s create a folder under our home folder that will contain the published version of our code.

        mkdir /home/pi/bot

6. The /home/pi/csharpi folder will contain the code we clone from the repo, that we work on from our main machine via VS Code. The /home/pi/bot folder will contain the published version of that code, that executes much faster. Let’s ensure we are in the source code folder, and run the command to publish the app:

        cd /home/pi/csharpi
        dotnet publish -o /home/pi/bot
        
publish.png

7. Now that it is published, we can run the application. It will execute much faster as the published version.

        cd /home/pi/bot
        dotnet csharpi.dll

(I know right, running a dll on *nix?!)

runpub.png

Success! We now have the groundwork laid for creating the Discord bot.

Now let’s get a Discord bot going: