
Welcome to my Visual Studio Code/PowerShell series!
Navigation
What is Visual Studio Code?
Visual Studio Code is a lightweight, open source, extensible code editor that you can do pretty much anything with. You can run it on Windows, Linux, and macOS. It also has built-in git support.
But what about the PowerShell ISE?
While the PowerShell ISE was a comfortable home for many, it is no longer being developed or added to.
“Windows” or the Desktop version of PowerShell, also called FullCLR, will no longer be getting new features, and will only receive security patches going forward.
PowerShell Core is the future of PowerShell, and should be used whenever possible. It is also open source, and like VS Code, works on pretty much any platform. I even use it on my Raspberry Pis!
It is an exciting time to be using PowerShell, and getting up and running with VS Code will make you even more of a code ninja.
You can read more about the PowerShell changes, here: https://devblogs.microsoft.com/powershell/powershell-core-6-0-generally-available-ga-and-supported/
Installing Visual Studio Code
Installing VS Code is easy! Simply go to https://code.visualstudio.com, and click the download link for your OS.
Once downloaded, run the installer.
If you need help installing VS Code, check out Microsoft’s documentation, here: https://code.visualstudio.com/docs/setup/setup-overview.
Open Visual Studio Code / Install Extensions
Now let’s open VS Code and get some extensions installed.
PowerShell Extension
The first extension we will install is the PowerShell extension.
In Visual Studio Code:
Click the extension icon
Search for PowerShell
Click Install


You may notice it also installs a theme, which you can use if you enjoy light themes. We will be installing a theme pack later to give you some more options.
vscode-icons
Now let’s install an icon pack, named vscode-icons
Click the extension icon
Search for vscode-icons
Click Install / then activate/set the theme.
Themes!
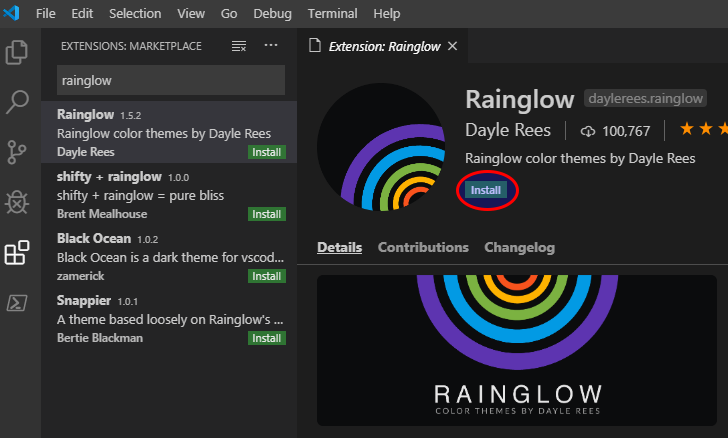
Now let’s get some themes installed. The theme pack I like the most is Rainglow, and I recommend starting there.
Click the extension icon
Search for Rainglow
Click Install
Set the theme
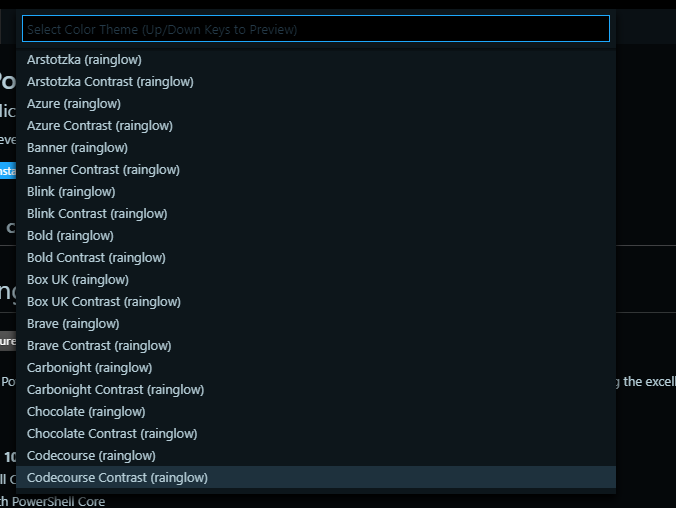
Use the keyboard shortcut CTRL+SHIFT+P (win/linux) or Command+SHIFT+P (macOS) to bring up the Command Palette. From there, ensure the character “>” is to the left to indicate you’d like to search, and search for theme.

Click the option Preferences: Color Theme
Feel free to dig through them, and see which one you like the most. I recommend starting with Codecourse Contrast (rainglow) (which you can search for to make selecting it quicker)
PowerShell Versions
If you are running Windows, you should see the current PowerShell version in the lower right-hand corner.

This means that you can edit/debug PowerShell code in the Desktop/5.1 environment. If you’re not running Windows, you won’t see this as there is no version installed by default.
VS Code makes it very easy to switch between PowerShell environments. The next step is to get PowerShell Core installed.
Follow these instructions per your OS:
PowerShell Core and Windows PowerShell can happily co-exist on the same machine. Windows/Desktop PowerShell has the executable named powershell.exe, whereas PowerShell Core is pwsh.exe.
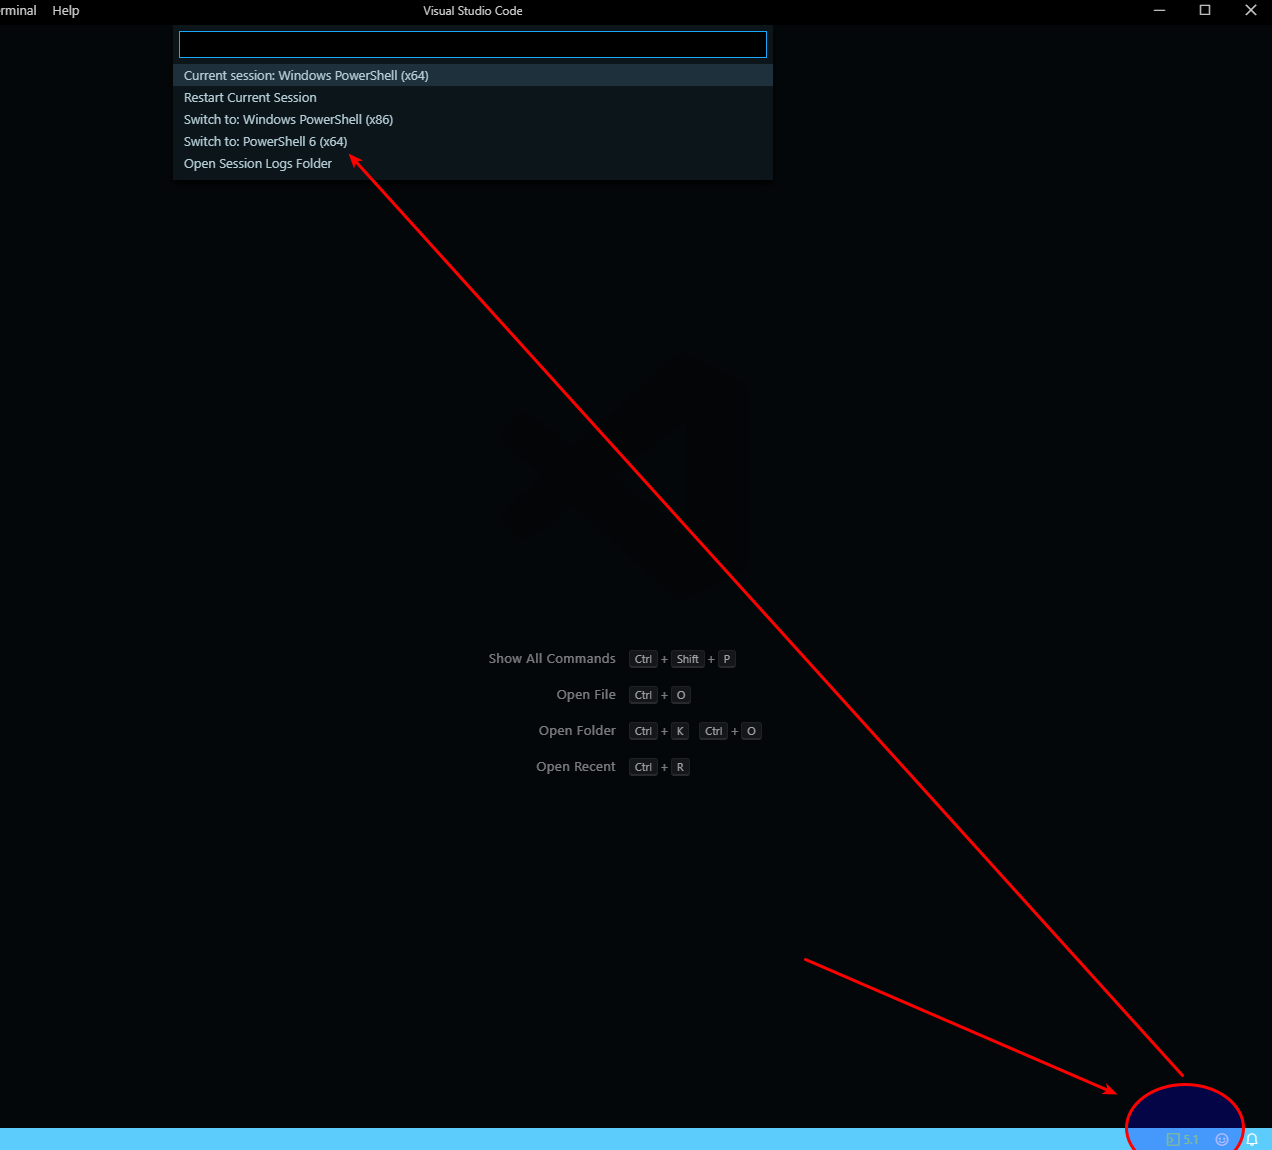
Once you have the latest version of PowerShell Core installed, you can do the following to switch your session in Visual Studio Code:
Click the [>]5.1 icon in the lower right-hand corner (or whatever version is specified)
At the top, select the PowerShell Core version you just installed

You can use the same steps to switch back to other versions of PowerShell. If for some reason you do not see the icon in the lower right-hand corner, fret not, it should appear after the next section.
Hello World Script in VS Code
In this section we will be creating a simple script to demonstrate a few of the basics in Visual Studio Code. I will be expanding upon different features in the next parts of this series.
In VS Code:
Either use CTRL+N or click File -> New File
Once in the Untitled-1 document, use CTRL+S or click File -> Save
Save the file as hello.ps1, wherever you’d like.


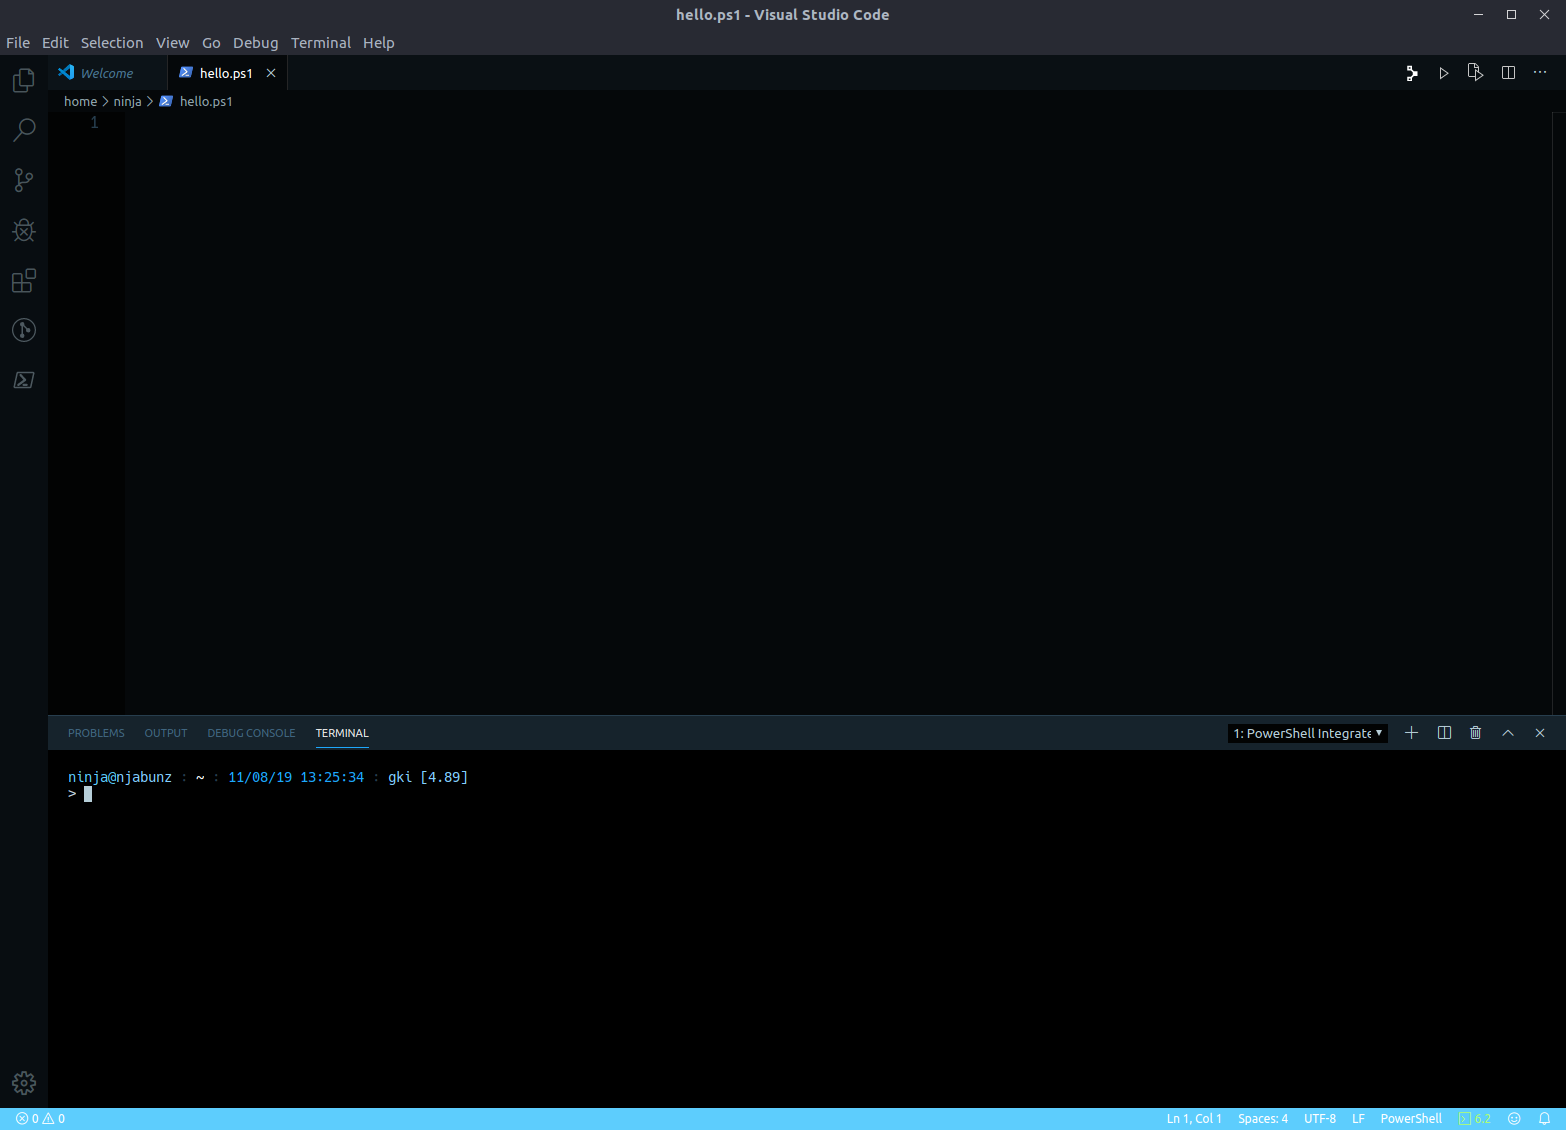
Once you’ve performed the above steps, we will get Visual Studio Code setup with the hello.ps1 script ready to be edited. The Terminal will be at the bottom, and the script editor up above.
Time to add some code!
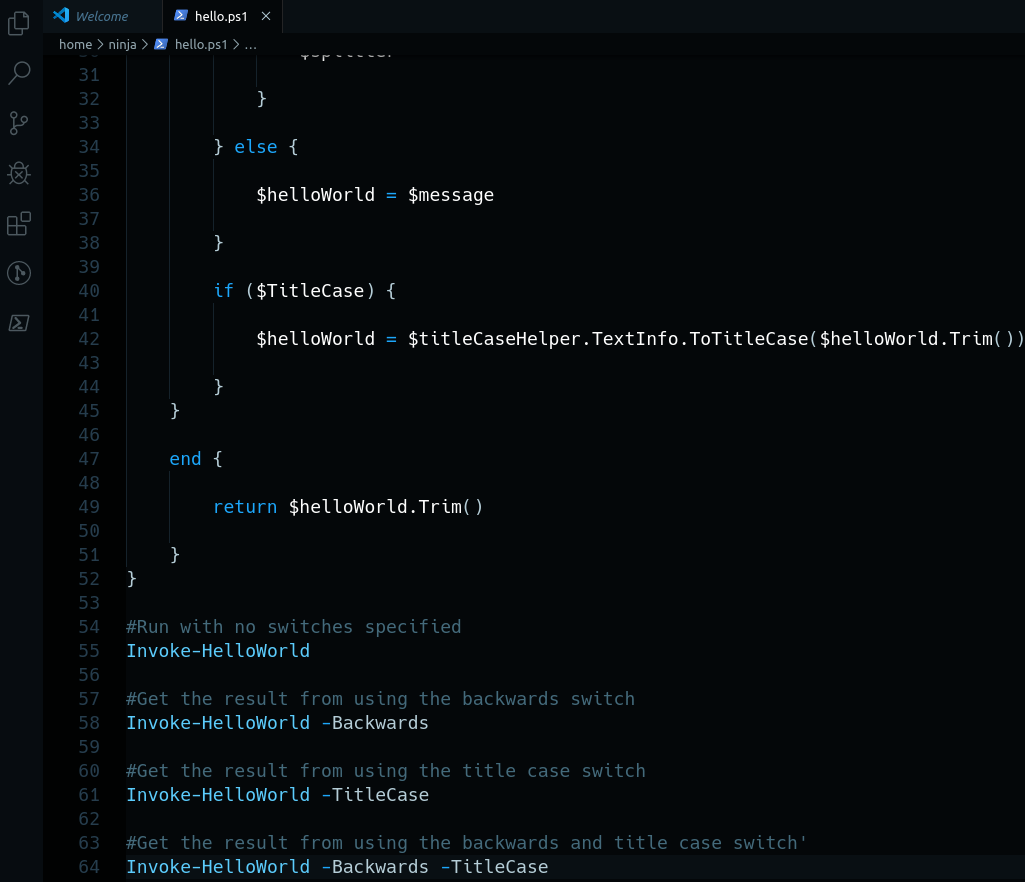
function Invoke-HelloWorld {
    param(
        [Parameter()]
        [switch]
        $Backwards,

        [Parameter()]
        [switch]
        $TitleCase
    )

    begin {

        $message         = 'This is the "Hello World" example!'
        $helloWorld      = [string]::Empty
        $titleCaseHelper = [System.Globalization.CultureInfo]::new([string]::Empty)

    }

    process {

        if ($Backwards) {

            $splitter = -1

            for ($i = 0; $i -lt $message.Split(' ').Count; $i++) {

                $helloWorld += "$($message.Split(' ')[$splitter]) "

                $splitter--

            }

        } else {

            $helloWorld = $message

        }

        if ($TitleCase) {

            $helloWorld = $titleCaseHelper.TextInfo.ToTitleCase($helloWorld.Trim())

        }
    }

    end {

        return $helloWorld.Trim()

    }

}

#Run with no switches specified
Invoke-HelloWorld

#Get the result from using the backwards switch
Invoke-HelloWorld -Backwards

#Get the result from using the title case switch
Invoke-HelloWorld -TitleCase

#Get the result from using the backwards and title case switch'
Invoke-HelloWorld -Backwards -TitleCase
Now that we have some code to look at, we can take a look at some of the features of VS Code.
Hide the Explorer Pane
To hide/un-hide the explorer pane, use CTRL+B:

Function Info / Completion
If you were to type:
Invoke-HelloWorld -It shows the different parameters available, and their type on the right.

When you start typing a function name, it will also list the available functions.
Invoke-
Running Code
While [F5] will run the entire script, you can use [F8] to run a selection.
Running a selection of code
Let’s start by doing the following:
Highlight the entirety of the function.
Hit [F8]. Note that this is the same as highlighting all the code you want to run, rick-clicking- and going to Run Selection.

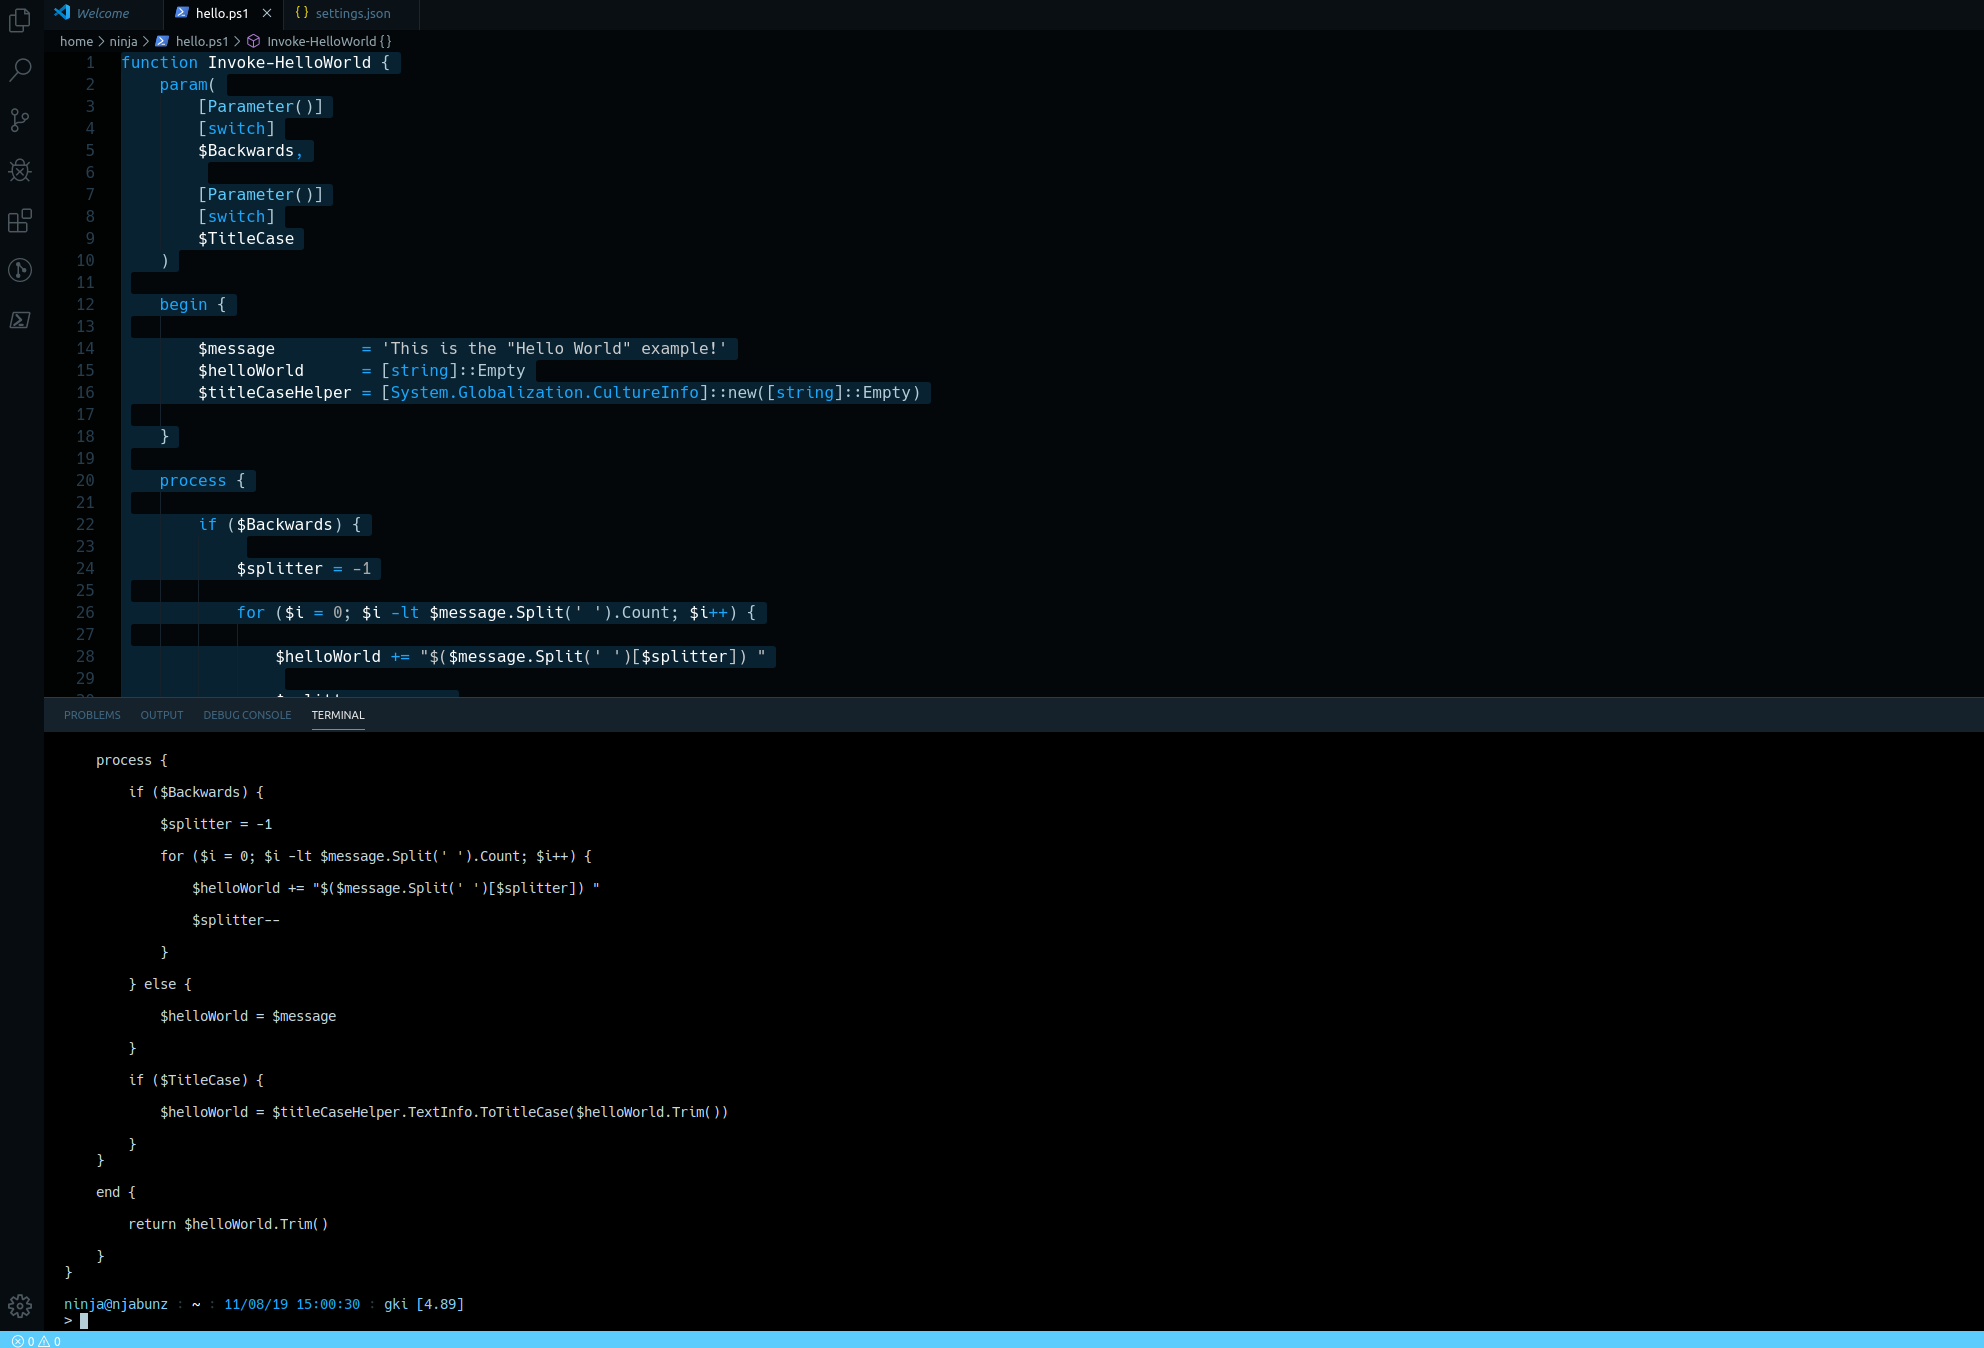
The end result here is that it save the function into memory, as we can see in the terminal window.
Now let’s scroll down below the function and run some of the commands that invoke the function we just stored in memory.
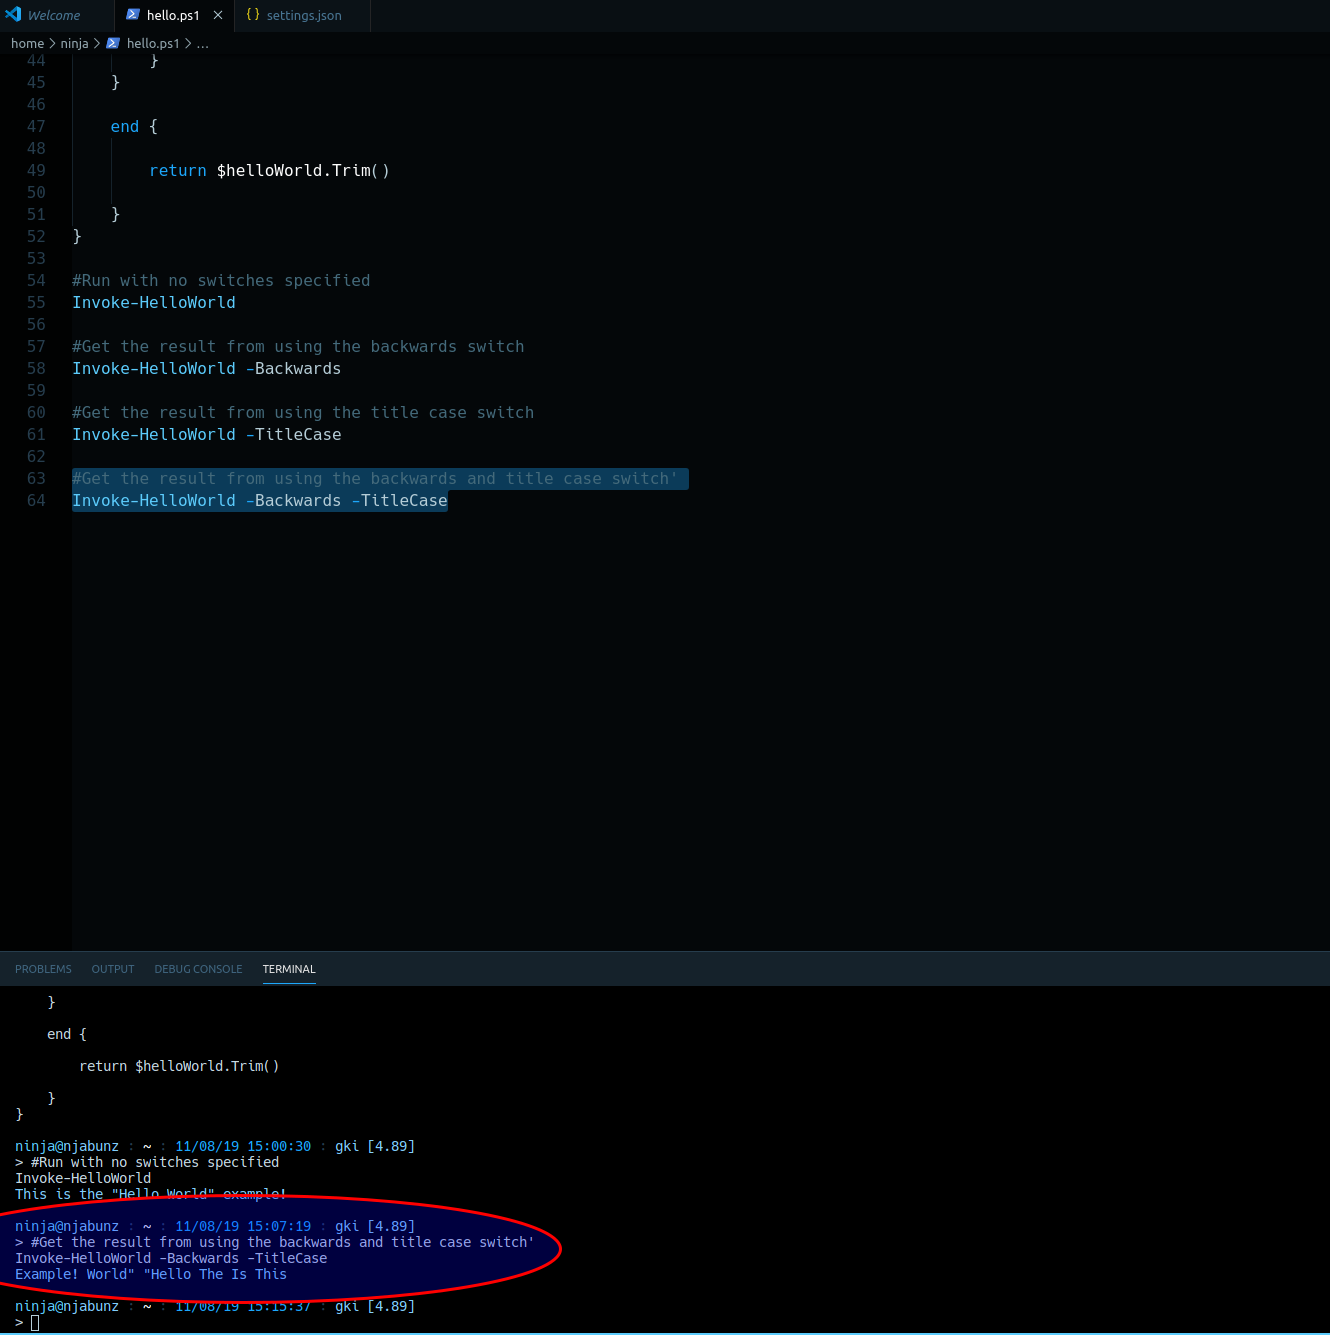
Highlight Invoke-HelloWorld, and run the selection [F8]. You can also highlight the comment on the line before it.

Your results should be similar as the above screenshot, in terms of output:
This is the “Hello World” example!Now let’s run the last example, which uses both of the parameter switches:
Highlight the example Invoke-HelloWorld -Backwards -TitleCase, and run it [F8]
Running the entire script (F5)
F5 will run the entire script, and also start debugging if you set any breakpoints.
This one is easy, simply hit [F5] or click Debug -> Start Debugging
Here is the output from doing just that:

A Very Quick Example of Debugging
For this example I will add a breakpoint on line 49 (by clicking in the blank space to the left of the line number), which is the return line of the function:

Now when we hit [F5] to debug, it will stop at this breakpoint, and give us some information about the state of the script.
On the left you will see the current state of any objects/variables:

Across the top there is a bar that controls the state of flow within the debugging experience.

For now, let’s click the up arrow, which performs the Step Out action. You can also use Shift+F11.
The script will stop at the point each time it is hit, until execution is complete.
Congratulations
You’ve setup VS Code and have done some work to make it feel like home, and did some work with a PowerShell script. Poke around and try to break/fix some things to learn some more.
More to come
I will be going in depth on various VS Code + PowerShell topics in the next parts of this series. Let me know if there is something you’d like me to cover sooner rather than later!