
CSharPi: Simple Bot With Config File
Now let’s get a Discord bot working on our Pi!
Creating the Discord App
We will need a bot token to authenticate the bot and get things going.
1. Login to the developer portal for Discord, here: https://discordapp.com/developers/applications/.
2. Once logged in, click “New Application”, and give it a name.

3. Now click “Bot” on the menu to the left.

4. Click “Add Bot”, and confirm.
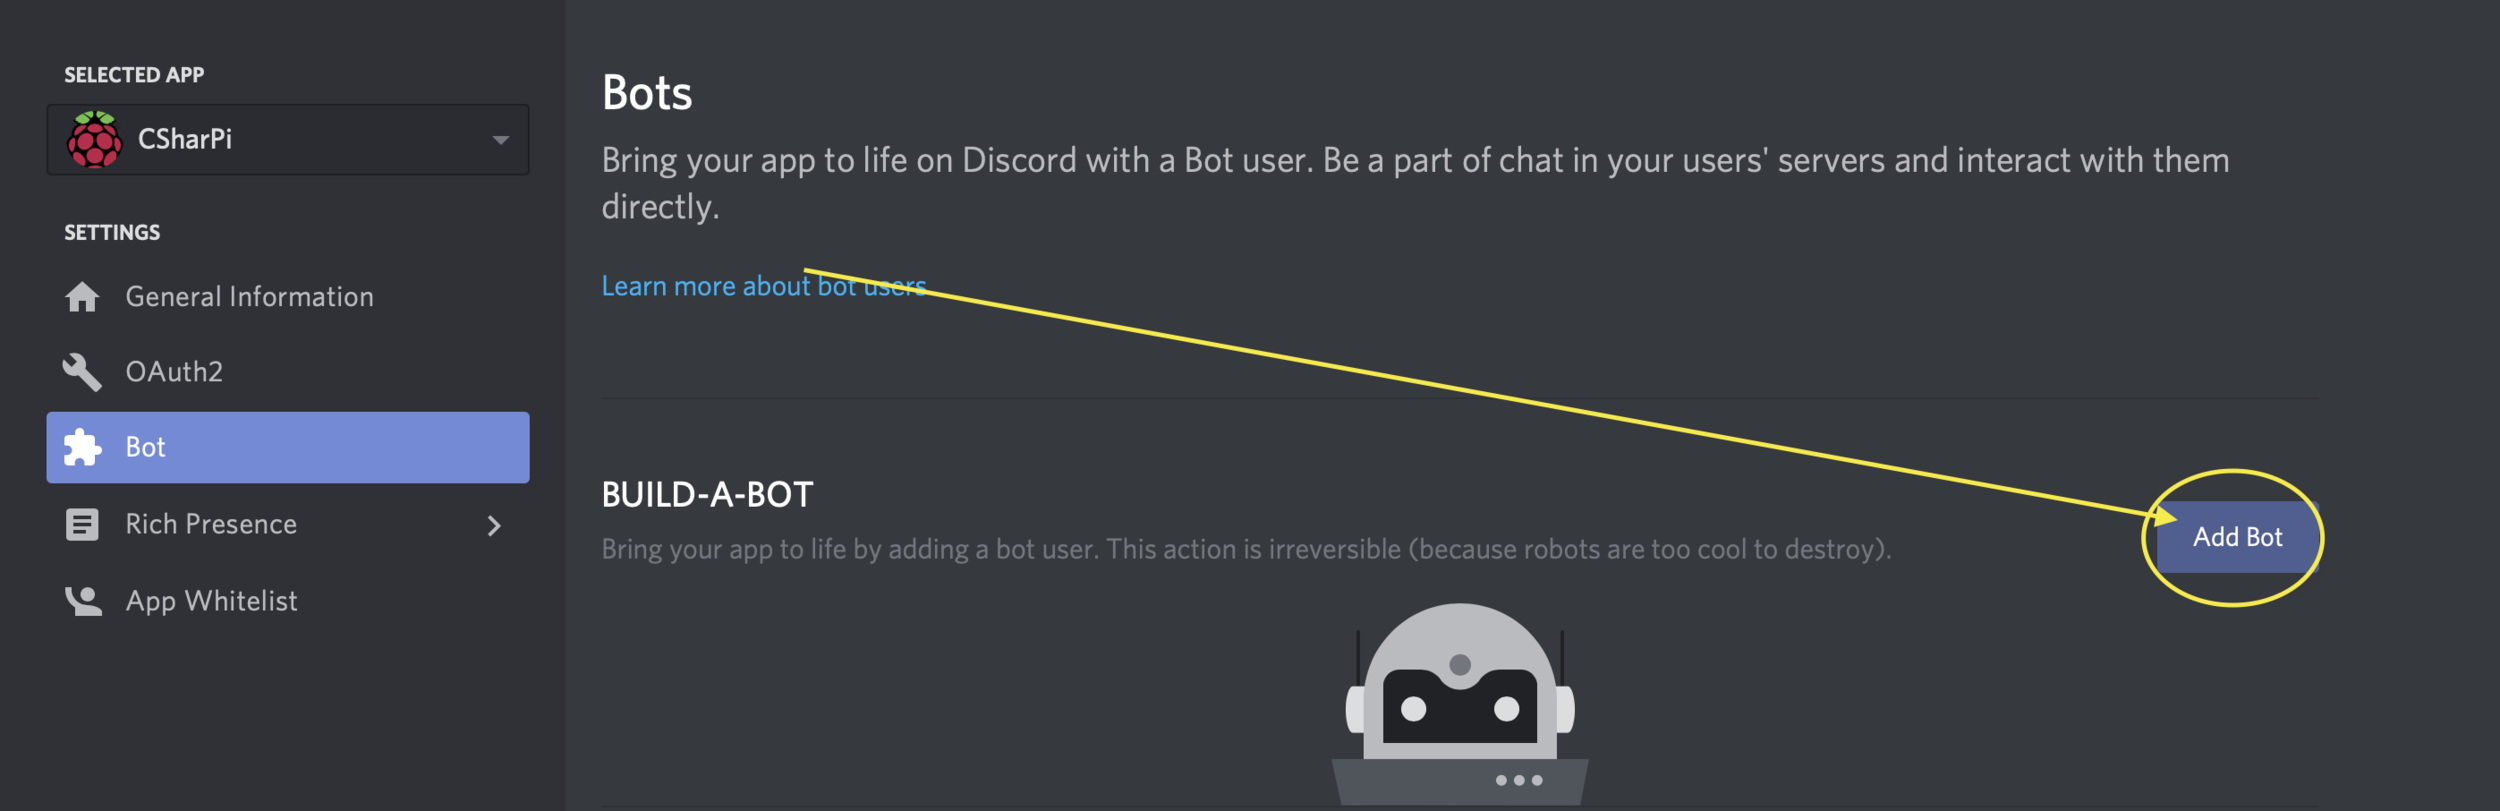

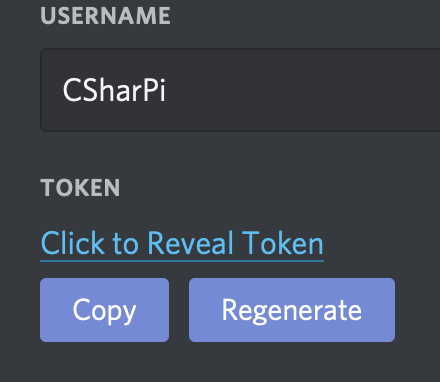
5. Now you should see an option to reveal the bot’s token. We will need to get this information shortly.
6. Let’s invite the bot to a Discord server. You will need to be an administrator on the server you want to invite the bot to. To do this, go to the “General Information” option on the menu to the left, and copy the Client ID.
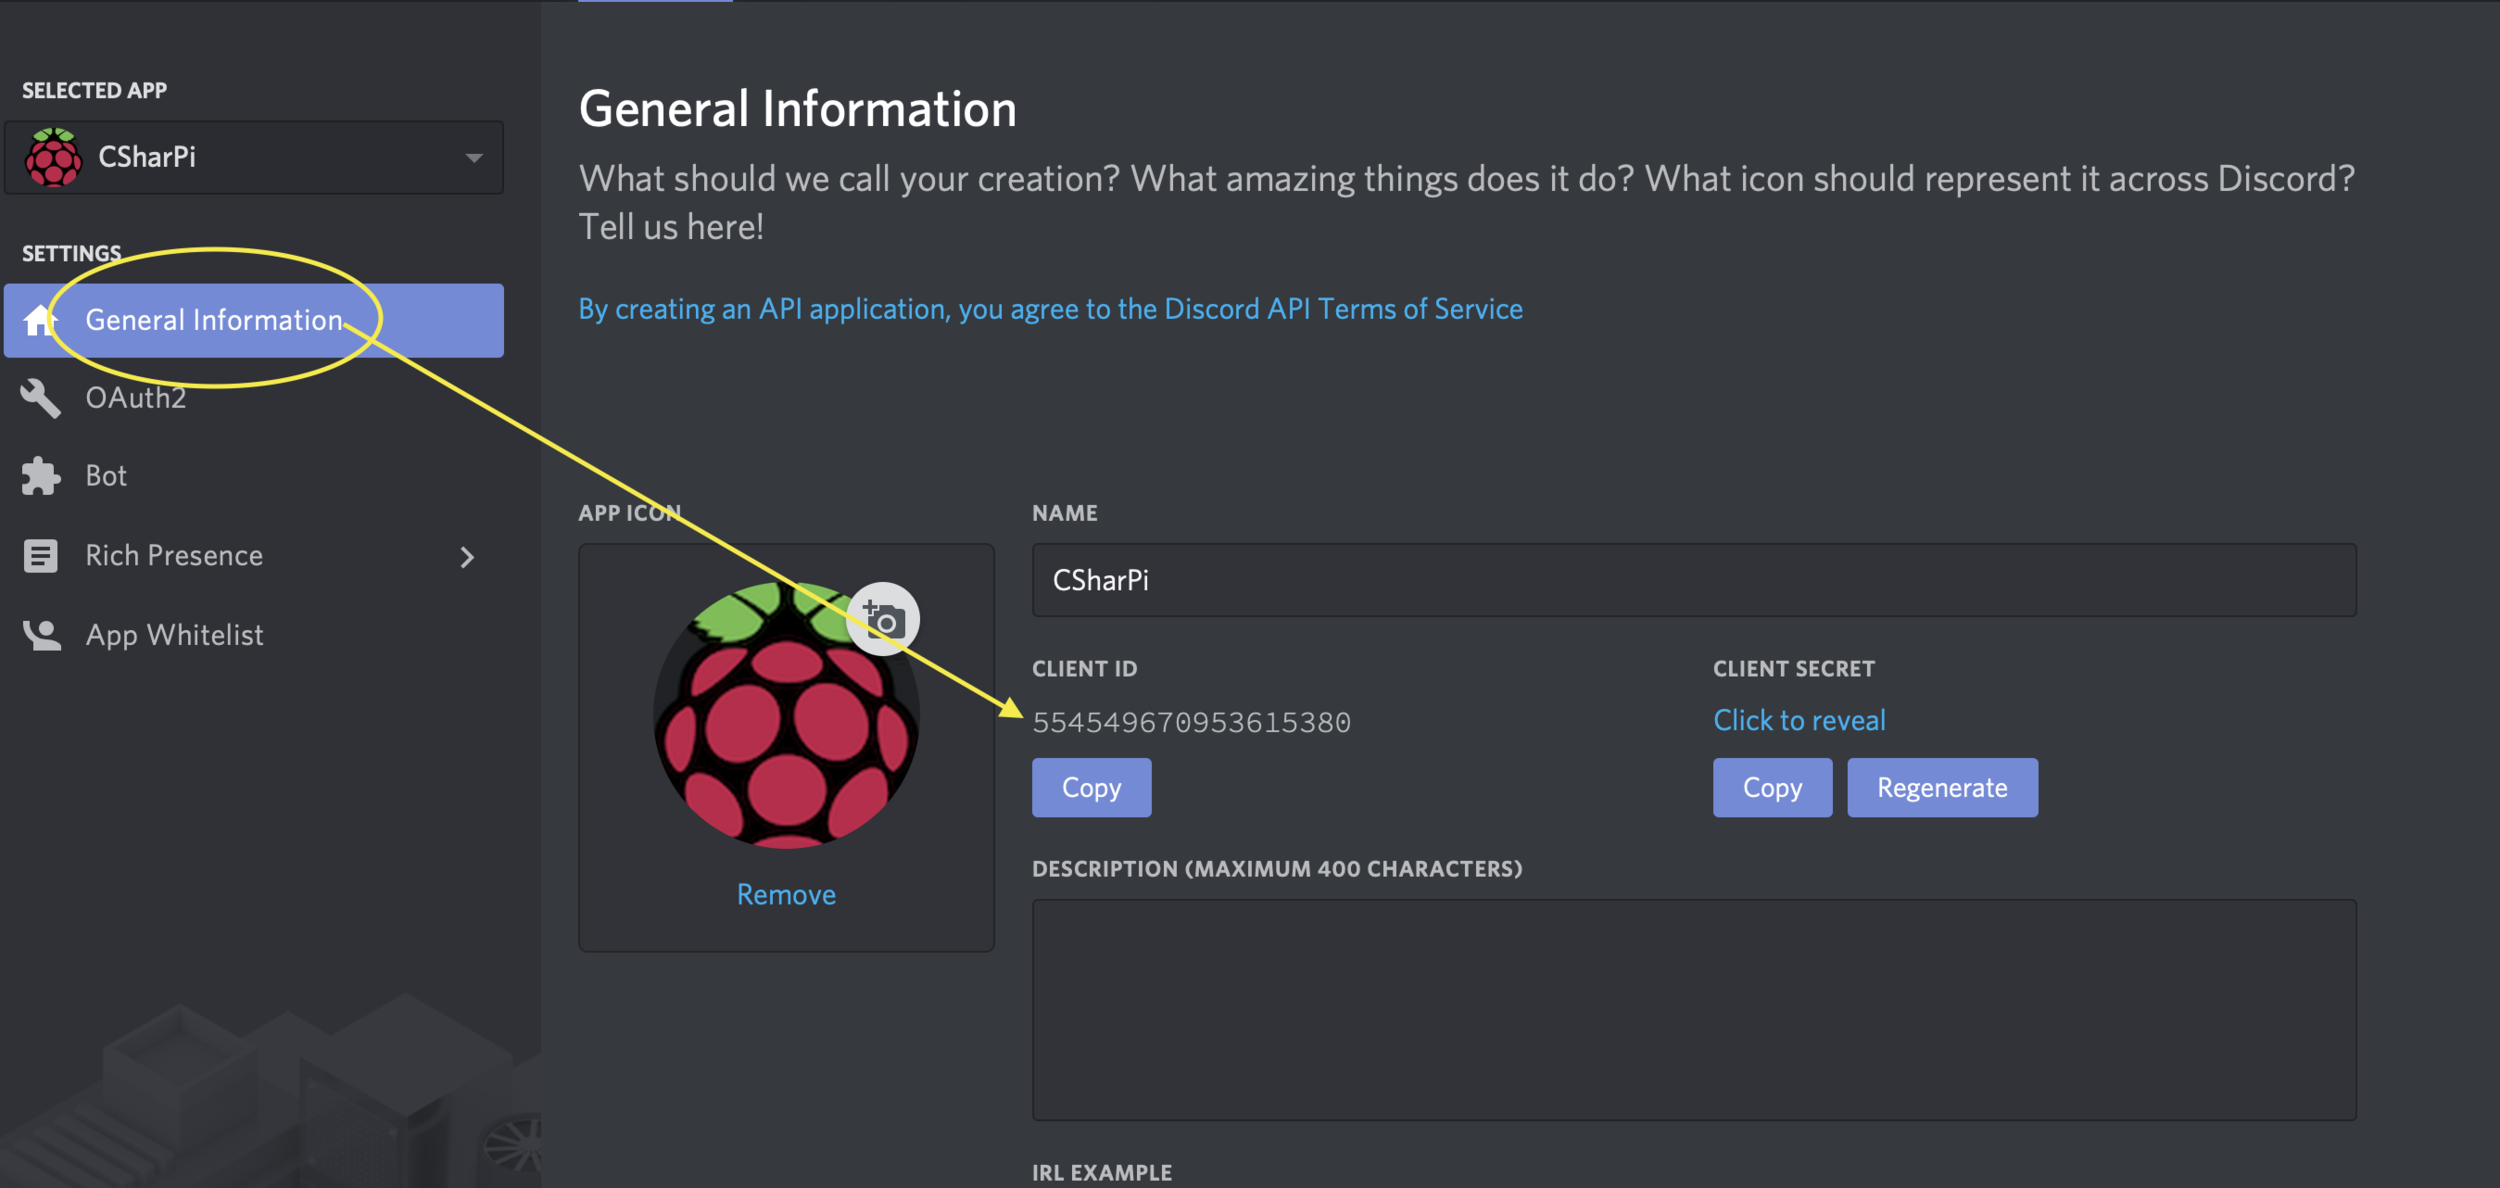
My bot’s client ID is 554549670953615380.
7. Go to https://discordapi.com/permissions.html#3198016, and input your client ID towards the bottom. I’ve added the basic permissions that will be good for this example bot. Feel free to add more if you’d like.
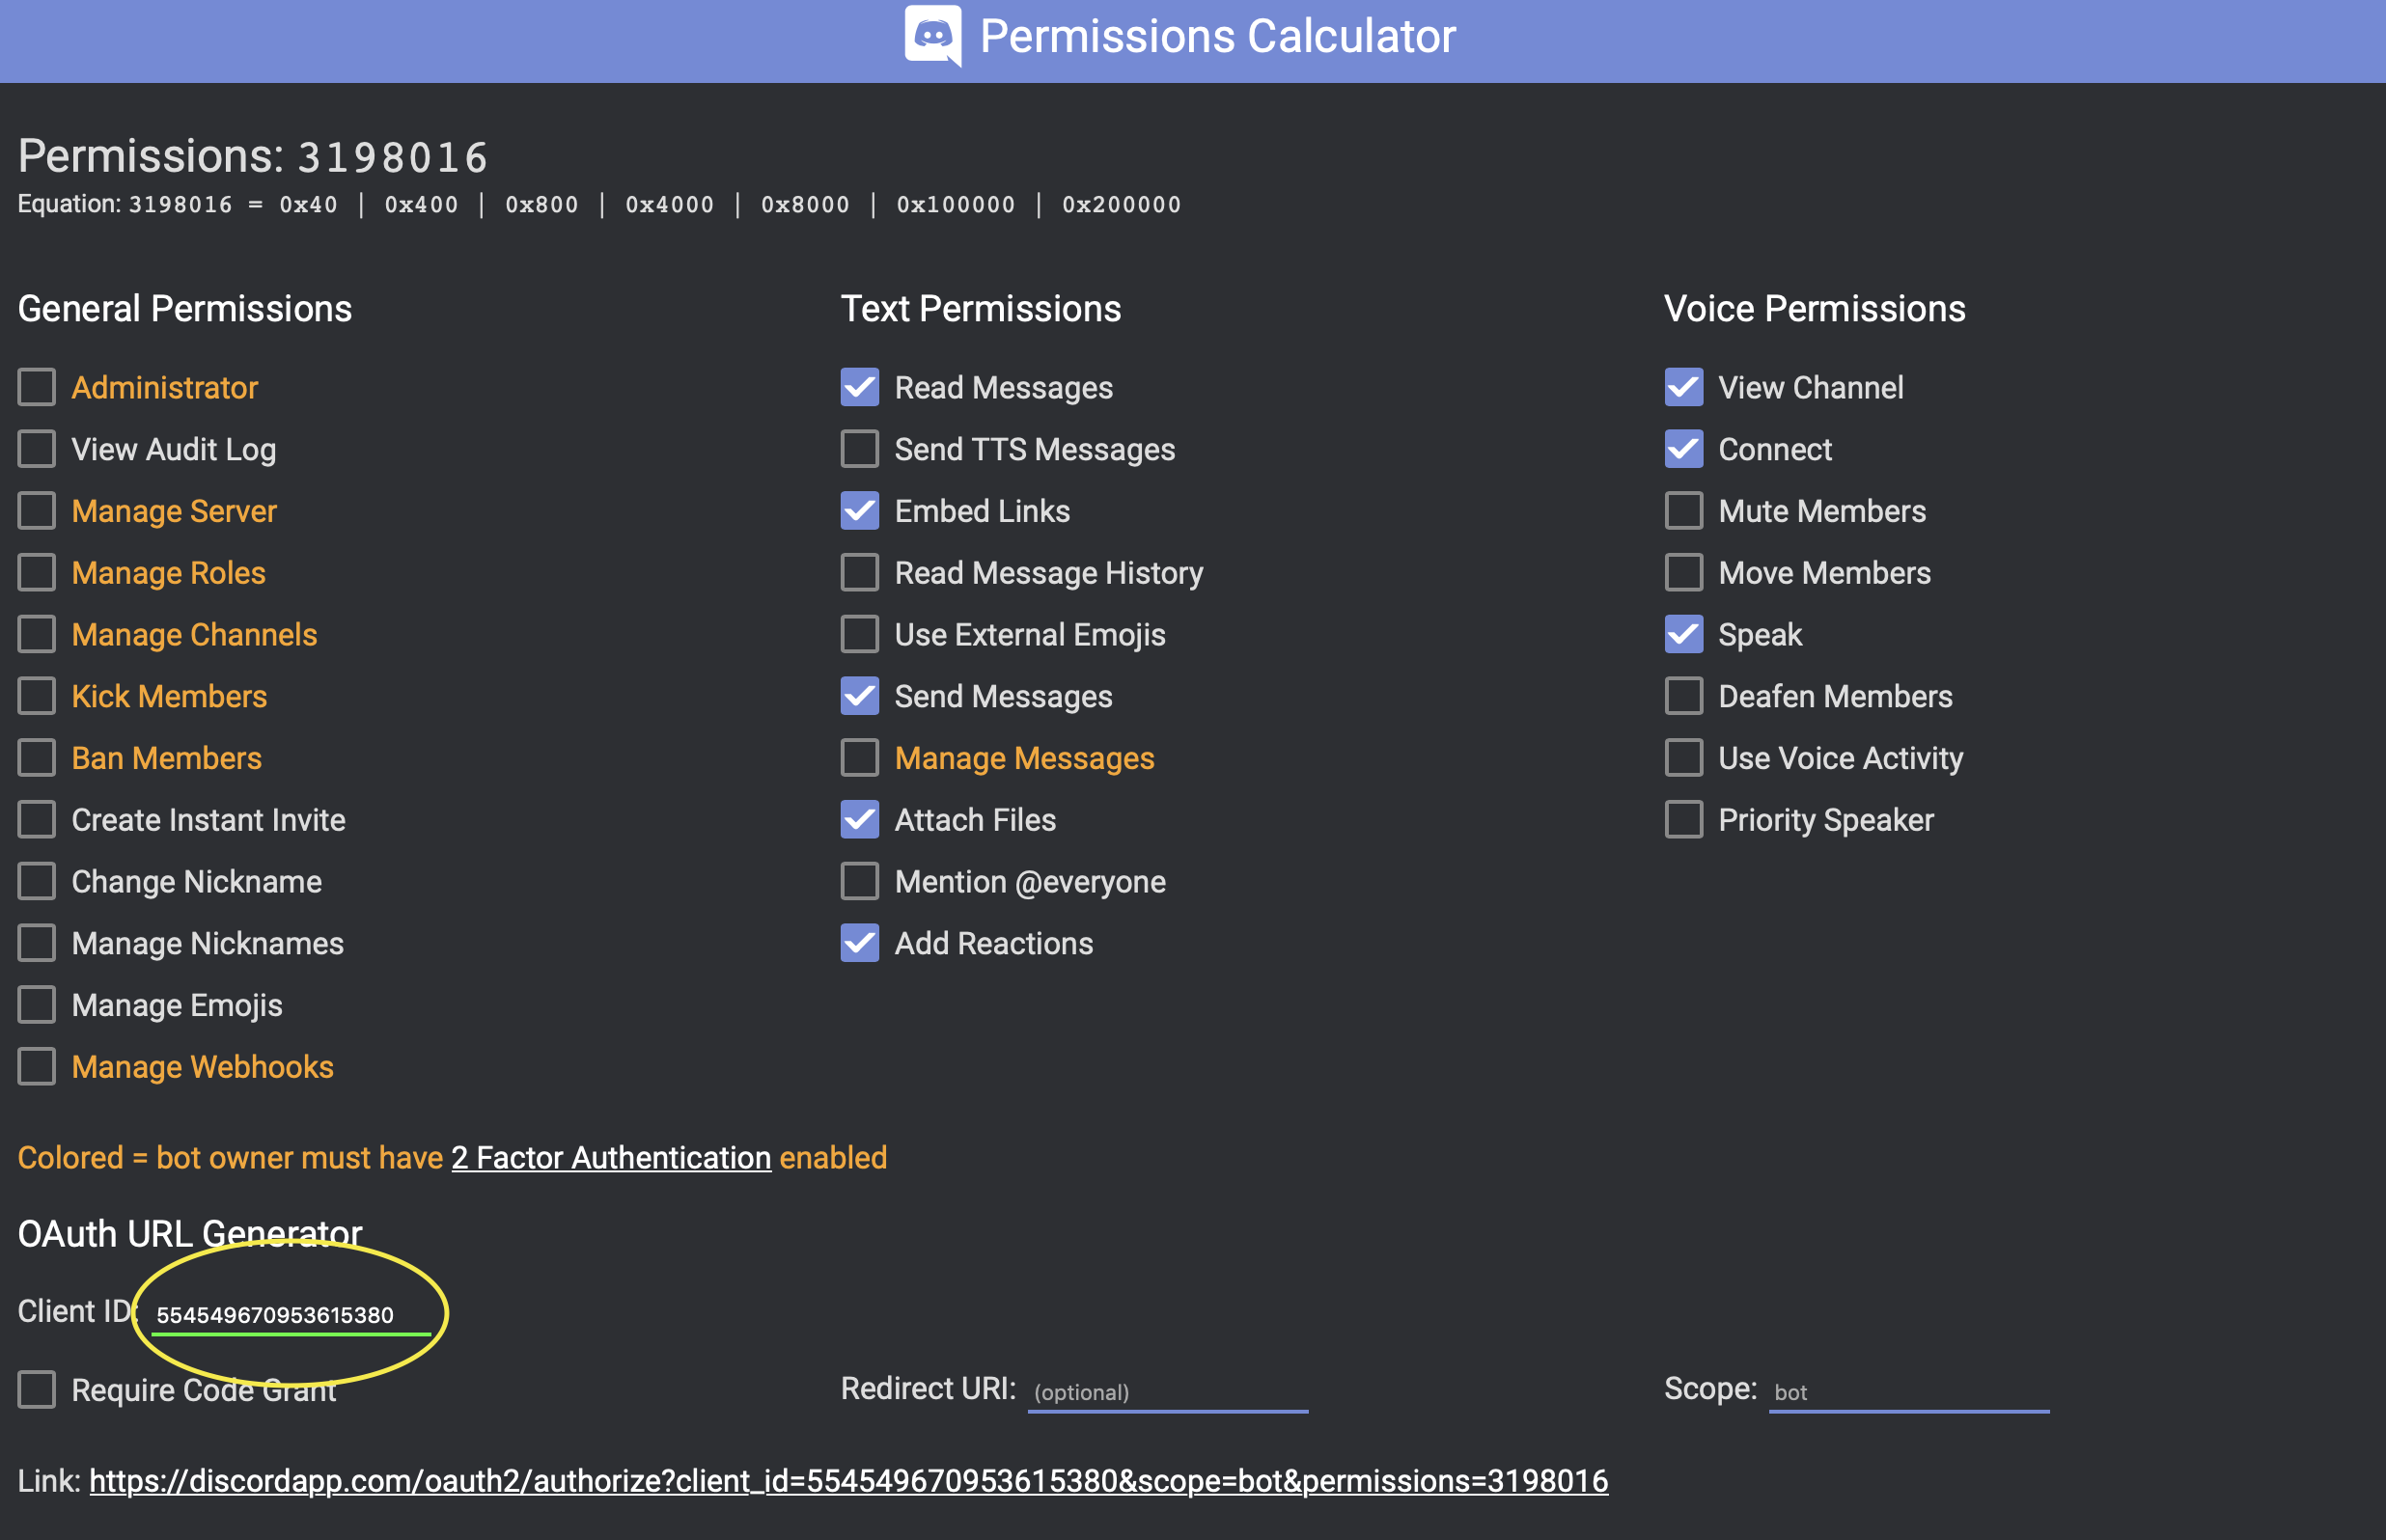
8. The invite URL is the one you see towards the bottom. Go to that link in your browser. For my bot, it is: https://discordapp.com/oauth2/authorize?client_id=554549670953615380&scope=bot&permissions=3198016.
9. Confirm the server you are adding the bot to, and click “Authorize”.
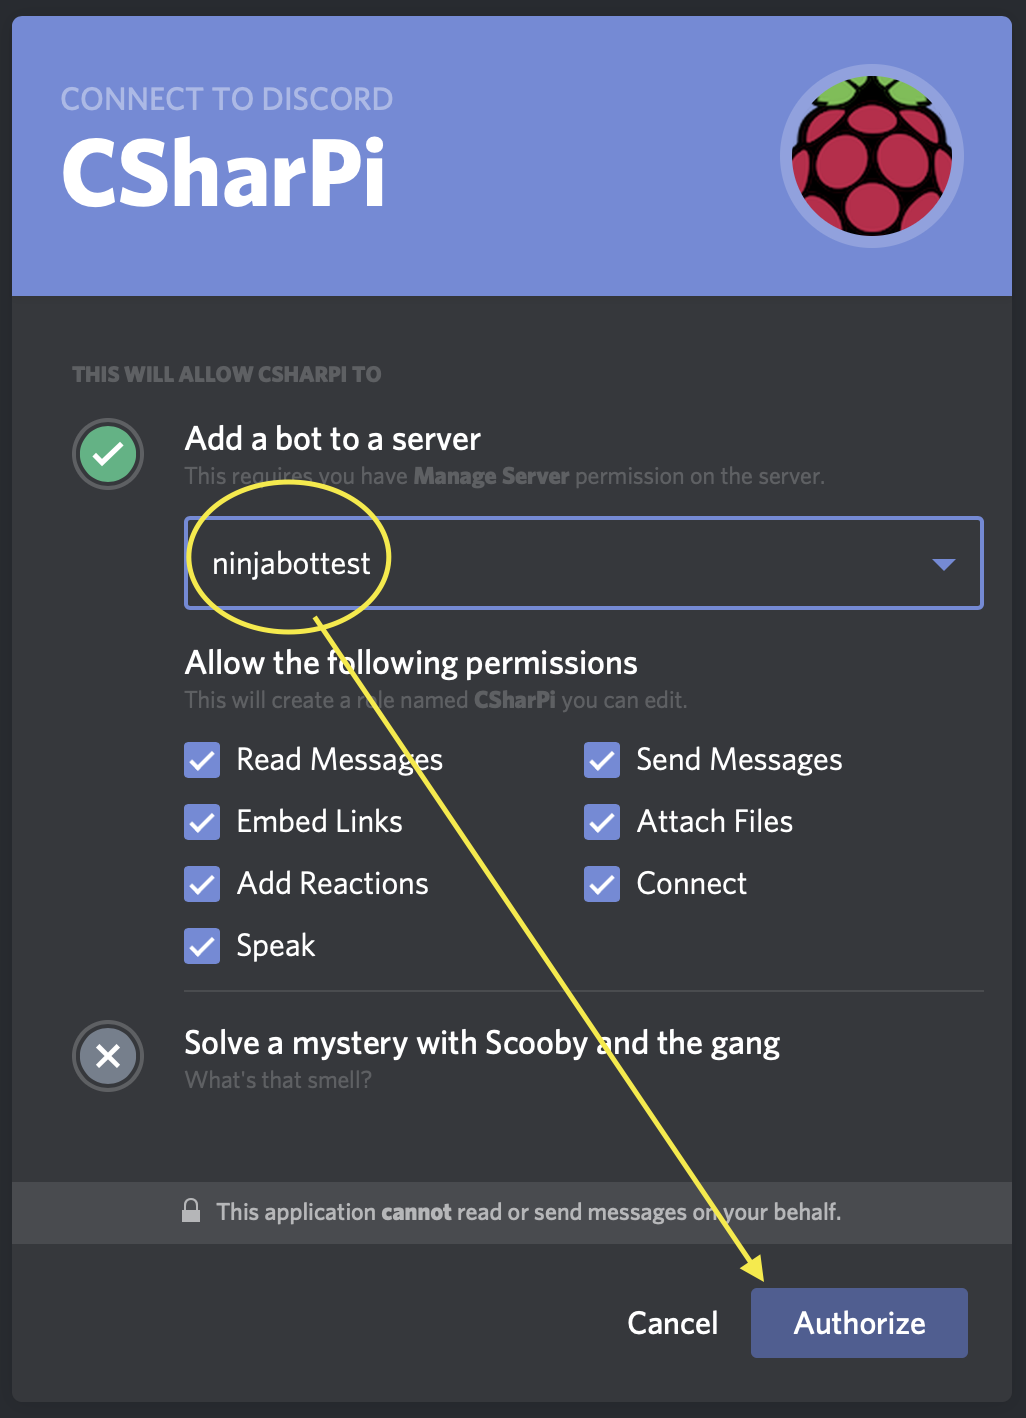
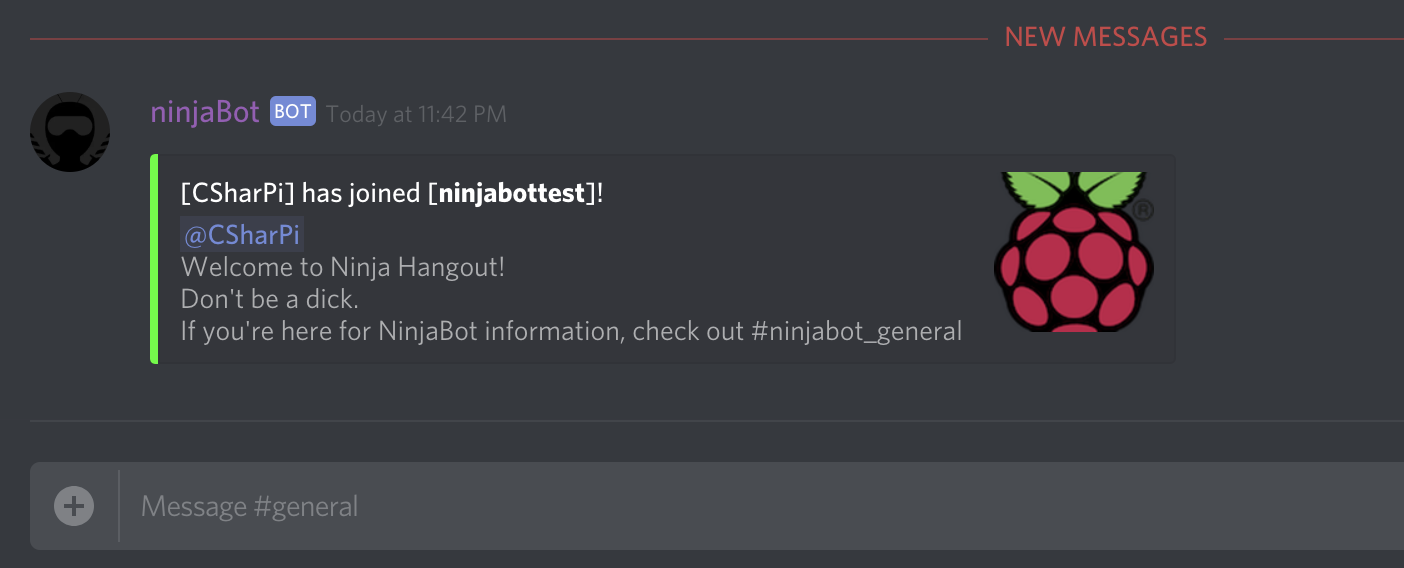
10. You should now see an (offline) bot join your server.
Token in Configuration File
Local Machine
From here on out we will be relying upon the groundwork we laid in this post:
If you haven’t done the setup in that post, but are an advanced user familiar with C# / .NET, carry on. Otherwise, I strongly recommend going through it.
1. Open the csharpi folder in Visual Studio Code on your local machine.
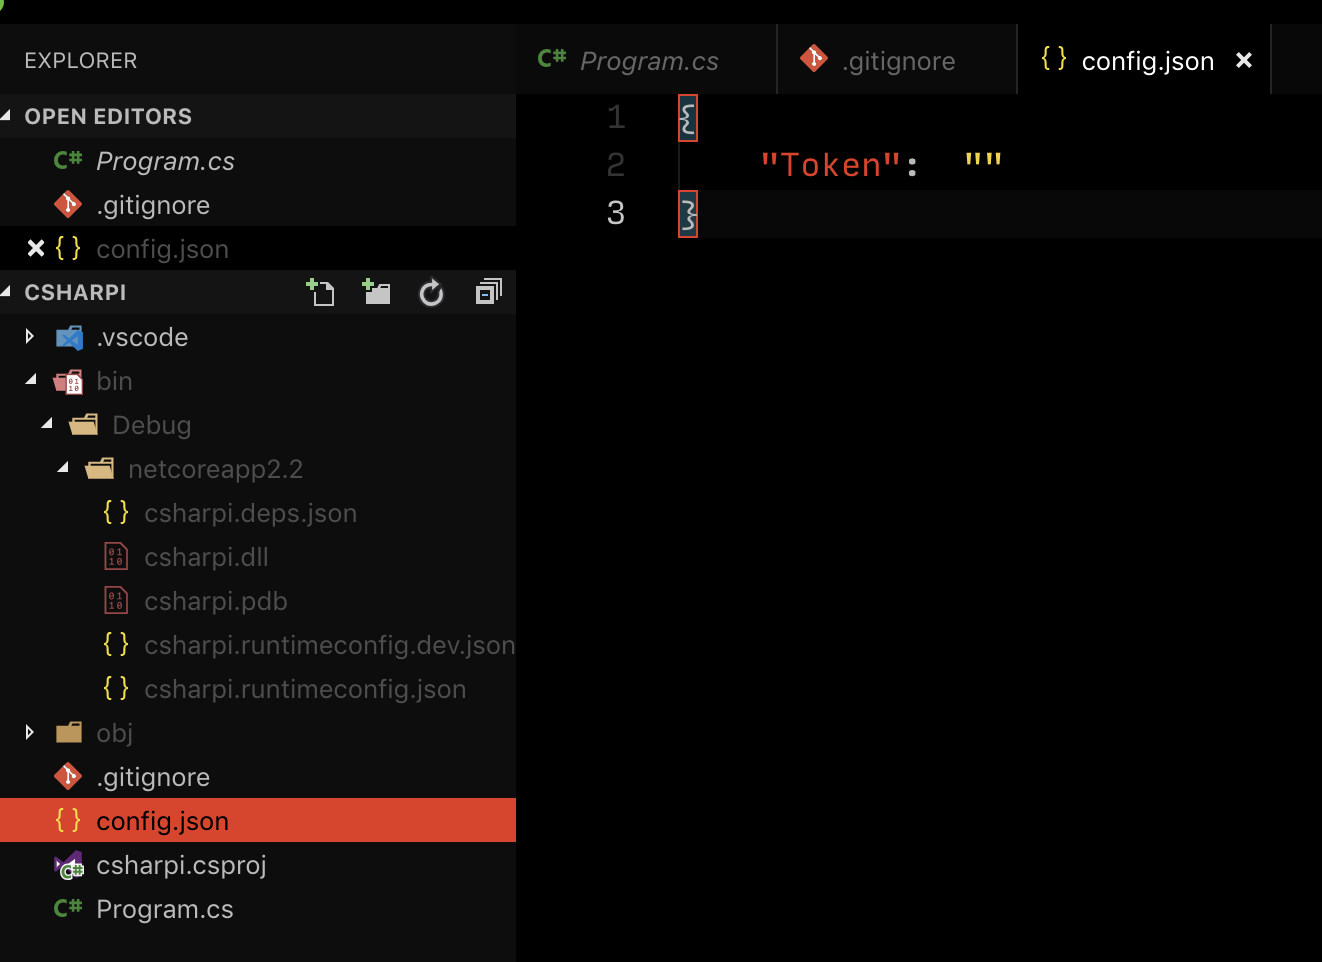
2. Create a new file in the root named config.json

3. Give it the following content:
    {
        "Token":  ""
    }
4. Move the file to the /bin/Debug/netcoreapp3.1 folder (if you are using a different version, it will show up as a different number, such as 2.2 as seen in the screenshot. That is ok, just move the file there instead).
(note) the only reason we are creating this copy is for testing, and when we debug the app it uses this folder as its root folder. We will be creating a separate config.json on the Pi in a moment.

5. Navigate back to https://discordapp.com/developers/applications/, and click the application we made earlier.
6. Click “Bot” from the menu on the left, and then click “Reveal Token”

7. Copy the token and drop it inbetween the quotes in the config.json file.

(note) it is very important you keep your token a secret, and regenerate it if you think anyone else knows it.
Raspberry Pi
1. SSH into your Raspberry Pi
2. Navigate to the published folder we created in part one:
cd /home/pi/bot3. Create the configuration file here:
touch config.json4. Copy the contents of the file from the one created on your local machine.

5. Open the config.json file in /home/pi/bot on the Pi in nano:
nano config.json
6. Once the editor is opened, paste in the contents.

7. Use the following sequence to write the contents and exit the editor:
        CTRL+O
        [Enter]
        CTRL+X
8. Verify the file contents via the more command:
more config.json
Add Required Packages
Now it is time to add required packages to our project. We will need to add the Discord.Net package, and a couple Microsoft configuration packages to help us read and store the configuration file.
1. Open your favorite console / terminal, and navigate to the csharpi project folder on your local machine.
2. Run the following commands:
dotnet add package Discord.Net --version 3.1.0
dotnet add package Microsoft.Extensions.Configuration --version 6.0.0
dotnet add package Microsoft.Extensions.Configuration.Json --version 6.0.0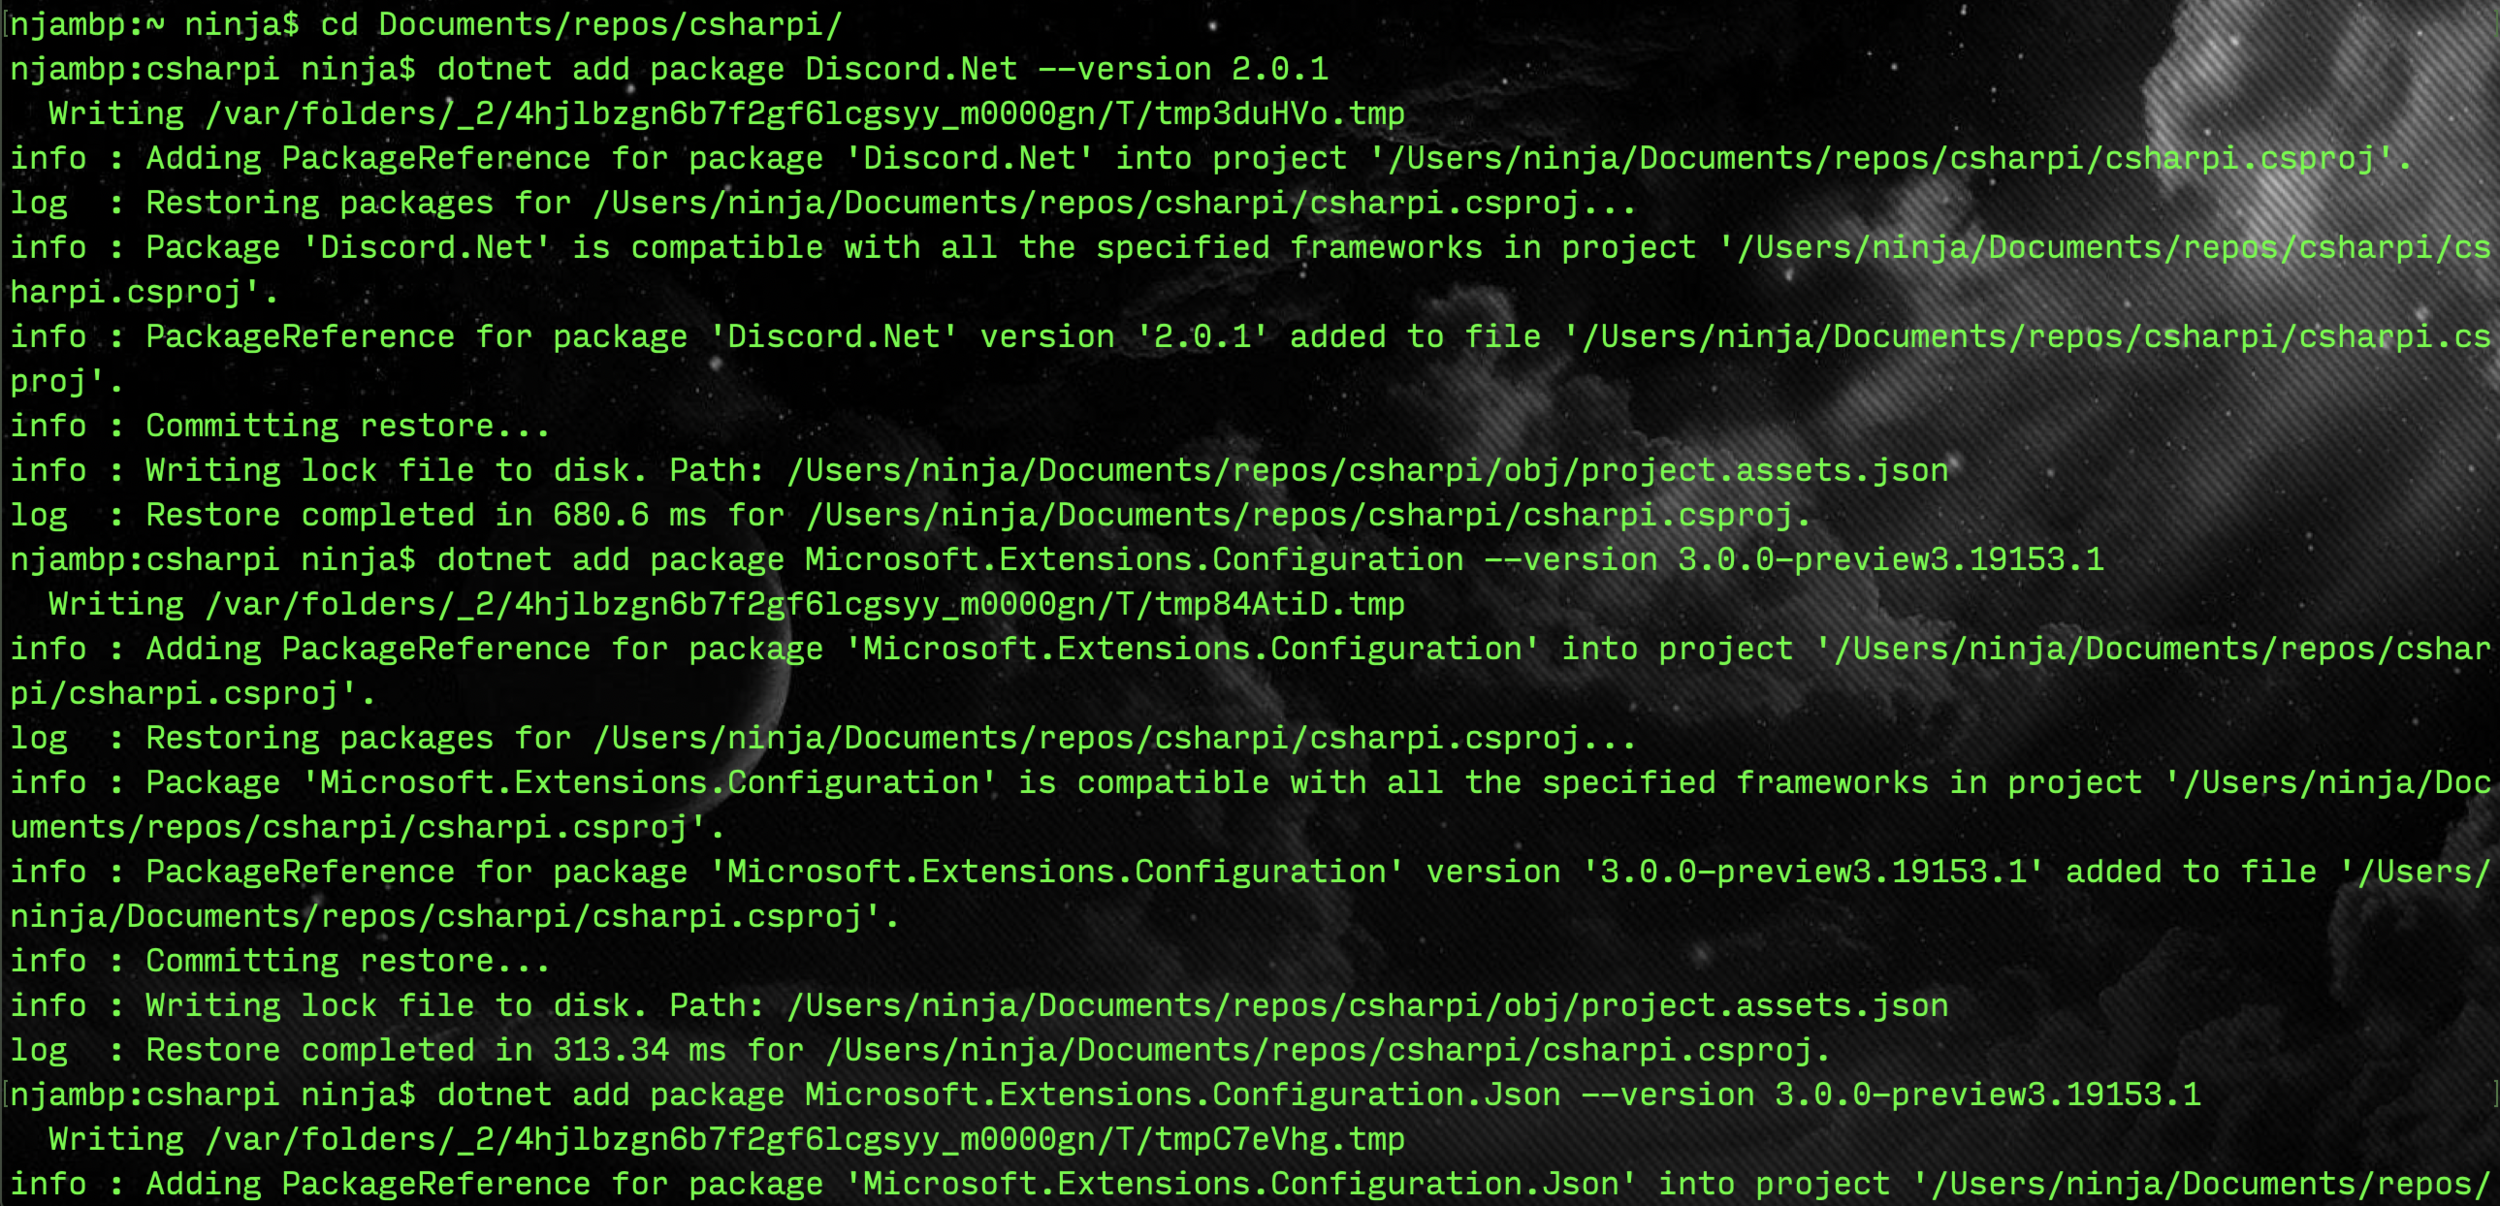
Add Simple Bot Code
Now we’re going to replace the contents of Program.cs with the simple bot code. This code will be the basis for future posts to come.
1. Open the csharpi folder on your local machine in Visual Studio Code.
2. Replace the contents of Program.cs with the following:
(note) If you did not name your project csharpi, be mindful of the namespace declaration and update yours to match your project name!
1 2 3 4 5 6 7 8 9 10 11 12 13 14 15 16 17 18 19 20 21 22 23 24 25 26 27 28 29 30 31 32 33 34 35 36 37 38 39 40 41 42 43 44 45 46 47 48 49 50 51 52 53 54 55 56 57 58 59 60 61 62 63 64 65 66 67 68 69 70 71 72 73 74 75 76 77 78 79 | using System; using Discord; using Discord.Net; using Discord.Commands; using Discord.WebSocket; using System.Threading.Tasks; using Microsoft.Extensions.Configuration; using Microsoft.Extensions.Configuration.Json; namespace csharpi { class Program { private readonly DiscordSocketClient _client; private readonly IConfiguration _config; public static Task Main(string[] args) => new Program().MainAsync(); public async Task MainAsync(string[] args) { } public Program() { _client = new DiscordSocketClient(); //Hook into log event and write it out to the console _client.Log += Log; //Hook into the client ready event _client.Ready += Ready; //Hook into the message received event, this is how we handle the hello world example _client.MessageReceived += MessageReceivedAsync; //Create the configuration var _builder = new ConfigurationBuilder() .SetBasePath(AppContext.BaseDirectory) .AddJsonFile(path: "config.json"); _config = _builder.Build(); } public async Task MainAsync() { //This is where we get the Token value from the configuration file await _client.LoginAsync(TokenType.Bot, _config["Token"]); await _client.StartAsync(); // Block the program until it is closed. await Task.Delay(-1); } private Task Log(LogMessage log) { Console.WriteLine(log.ToString()); return Task.CompletedTask; } private Task Ready() { Console.WriteLine($"Connected as -> [] :)"); return Task.CompletedTask; } //I wonder if there's a better way to handle commands (spoiler: there is :)) private async Task MessageReceivedAsync(SocketMessage message) { //This ensures we don't loop things by responding to ourselves (as the bot) if (message.Author.Id == _client.CurrentUser.Id) return; if (message.Content == ".hello") { await message.Channel.SendMessageAsync("world!"); } } } } |

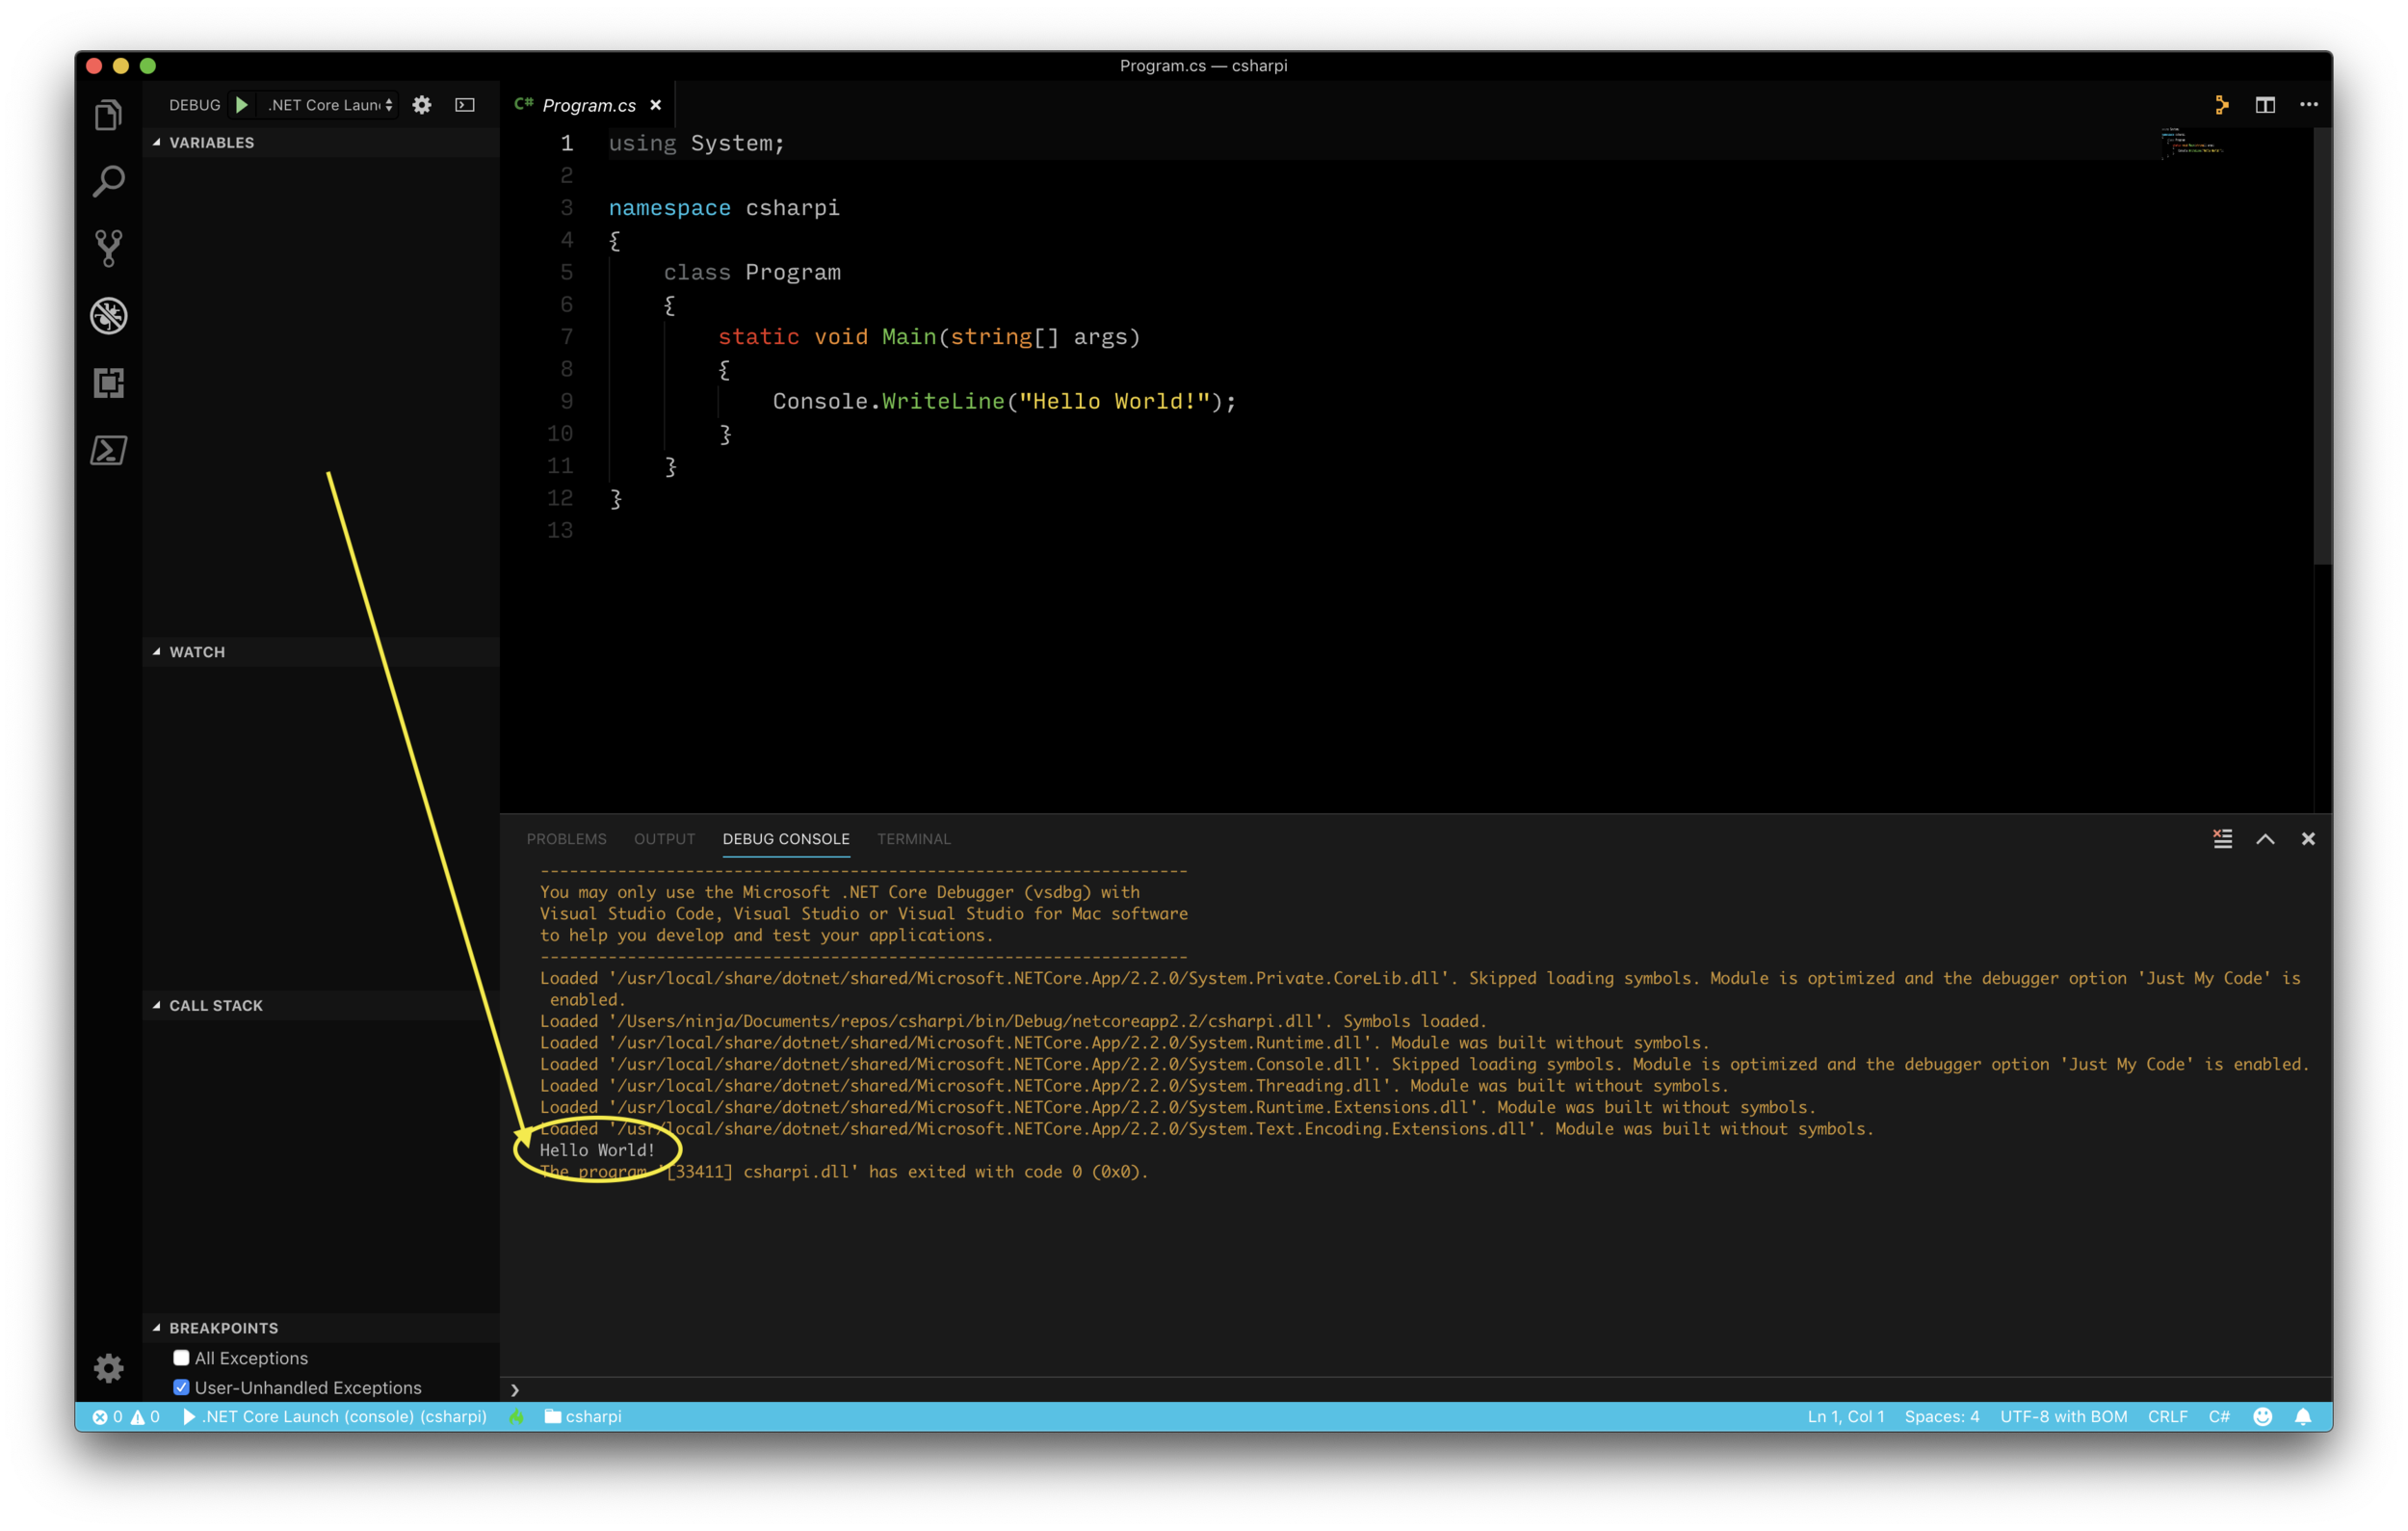
3. Now that we have the new code for Program.cs, let’s test it by debugging (F5).
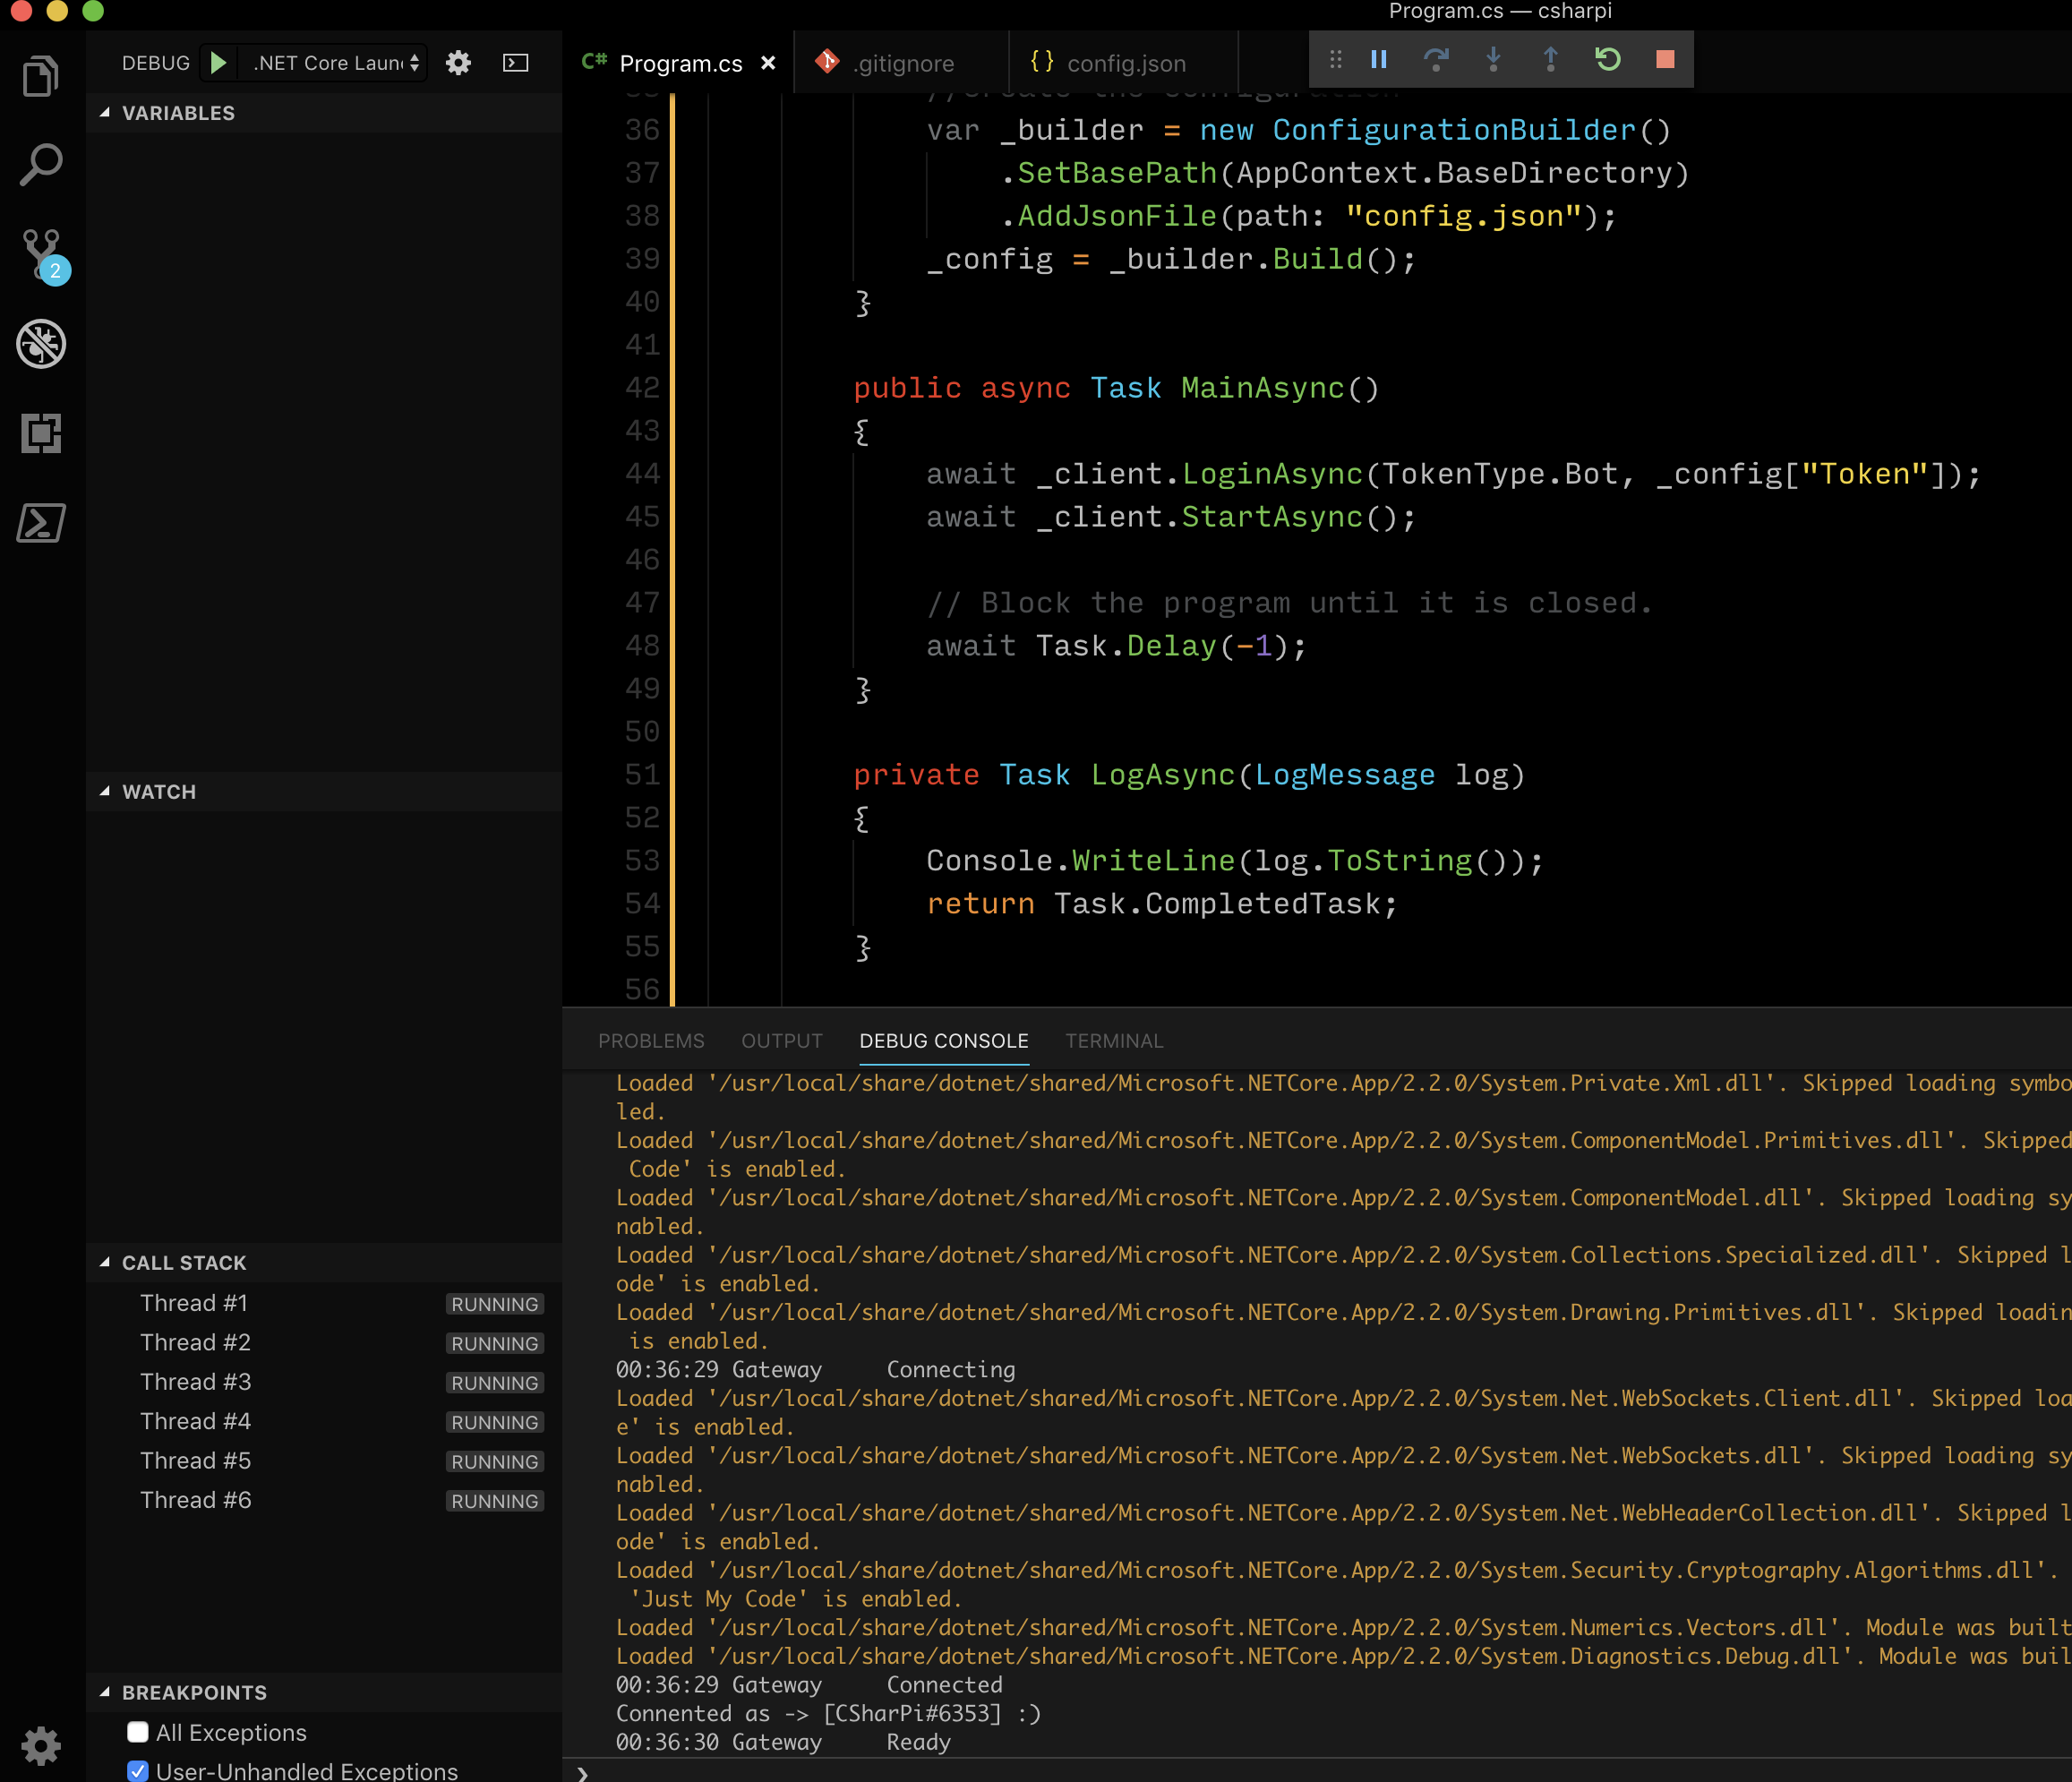
4. Now that we verified it is connected and debugging, try sending .hello to the discord server your bot is in, and see what happens (the bot should appear online now!)
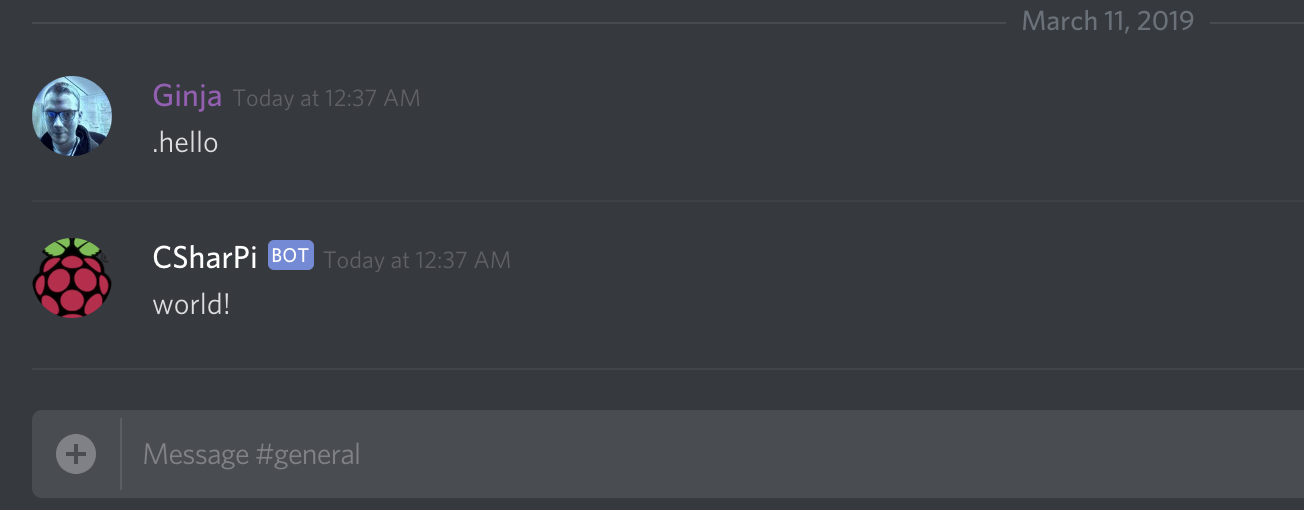
Awesome! It works locally. Now let’s work on getting it to the Pi.
Commit New Code to Github
Let’s get our new code committed to Github!
1. Open up the csharpi folder on your local machine with VS Code.
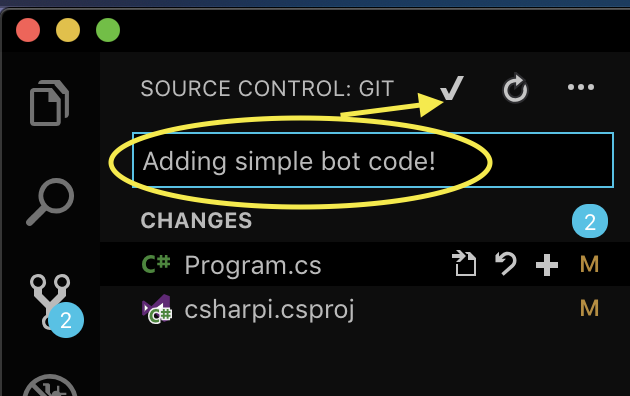
2. The Git icon should show that 2 files have been modified. These are the .csproj file with the required packages we added, and the Program.cs file we modified.
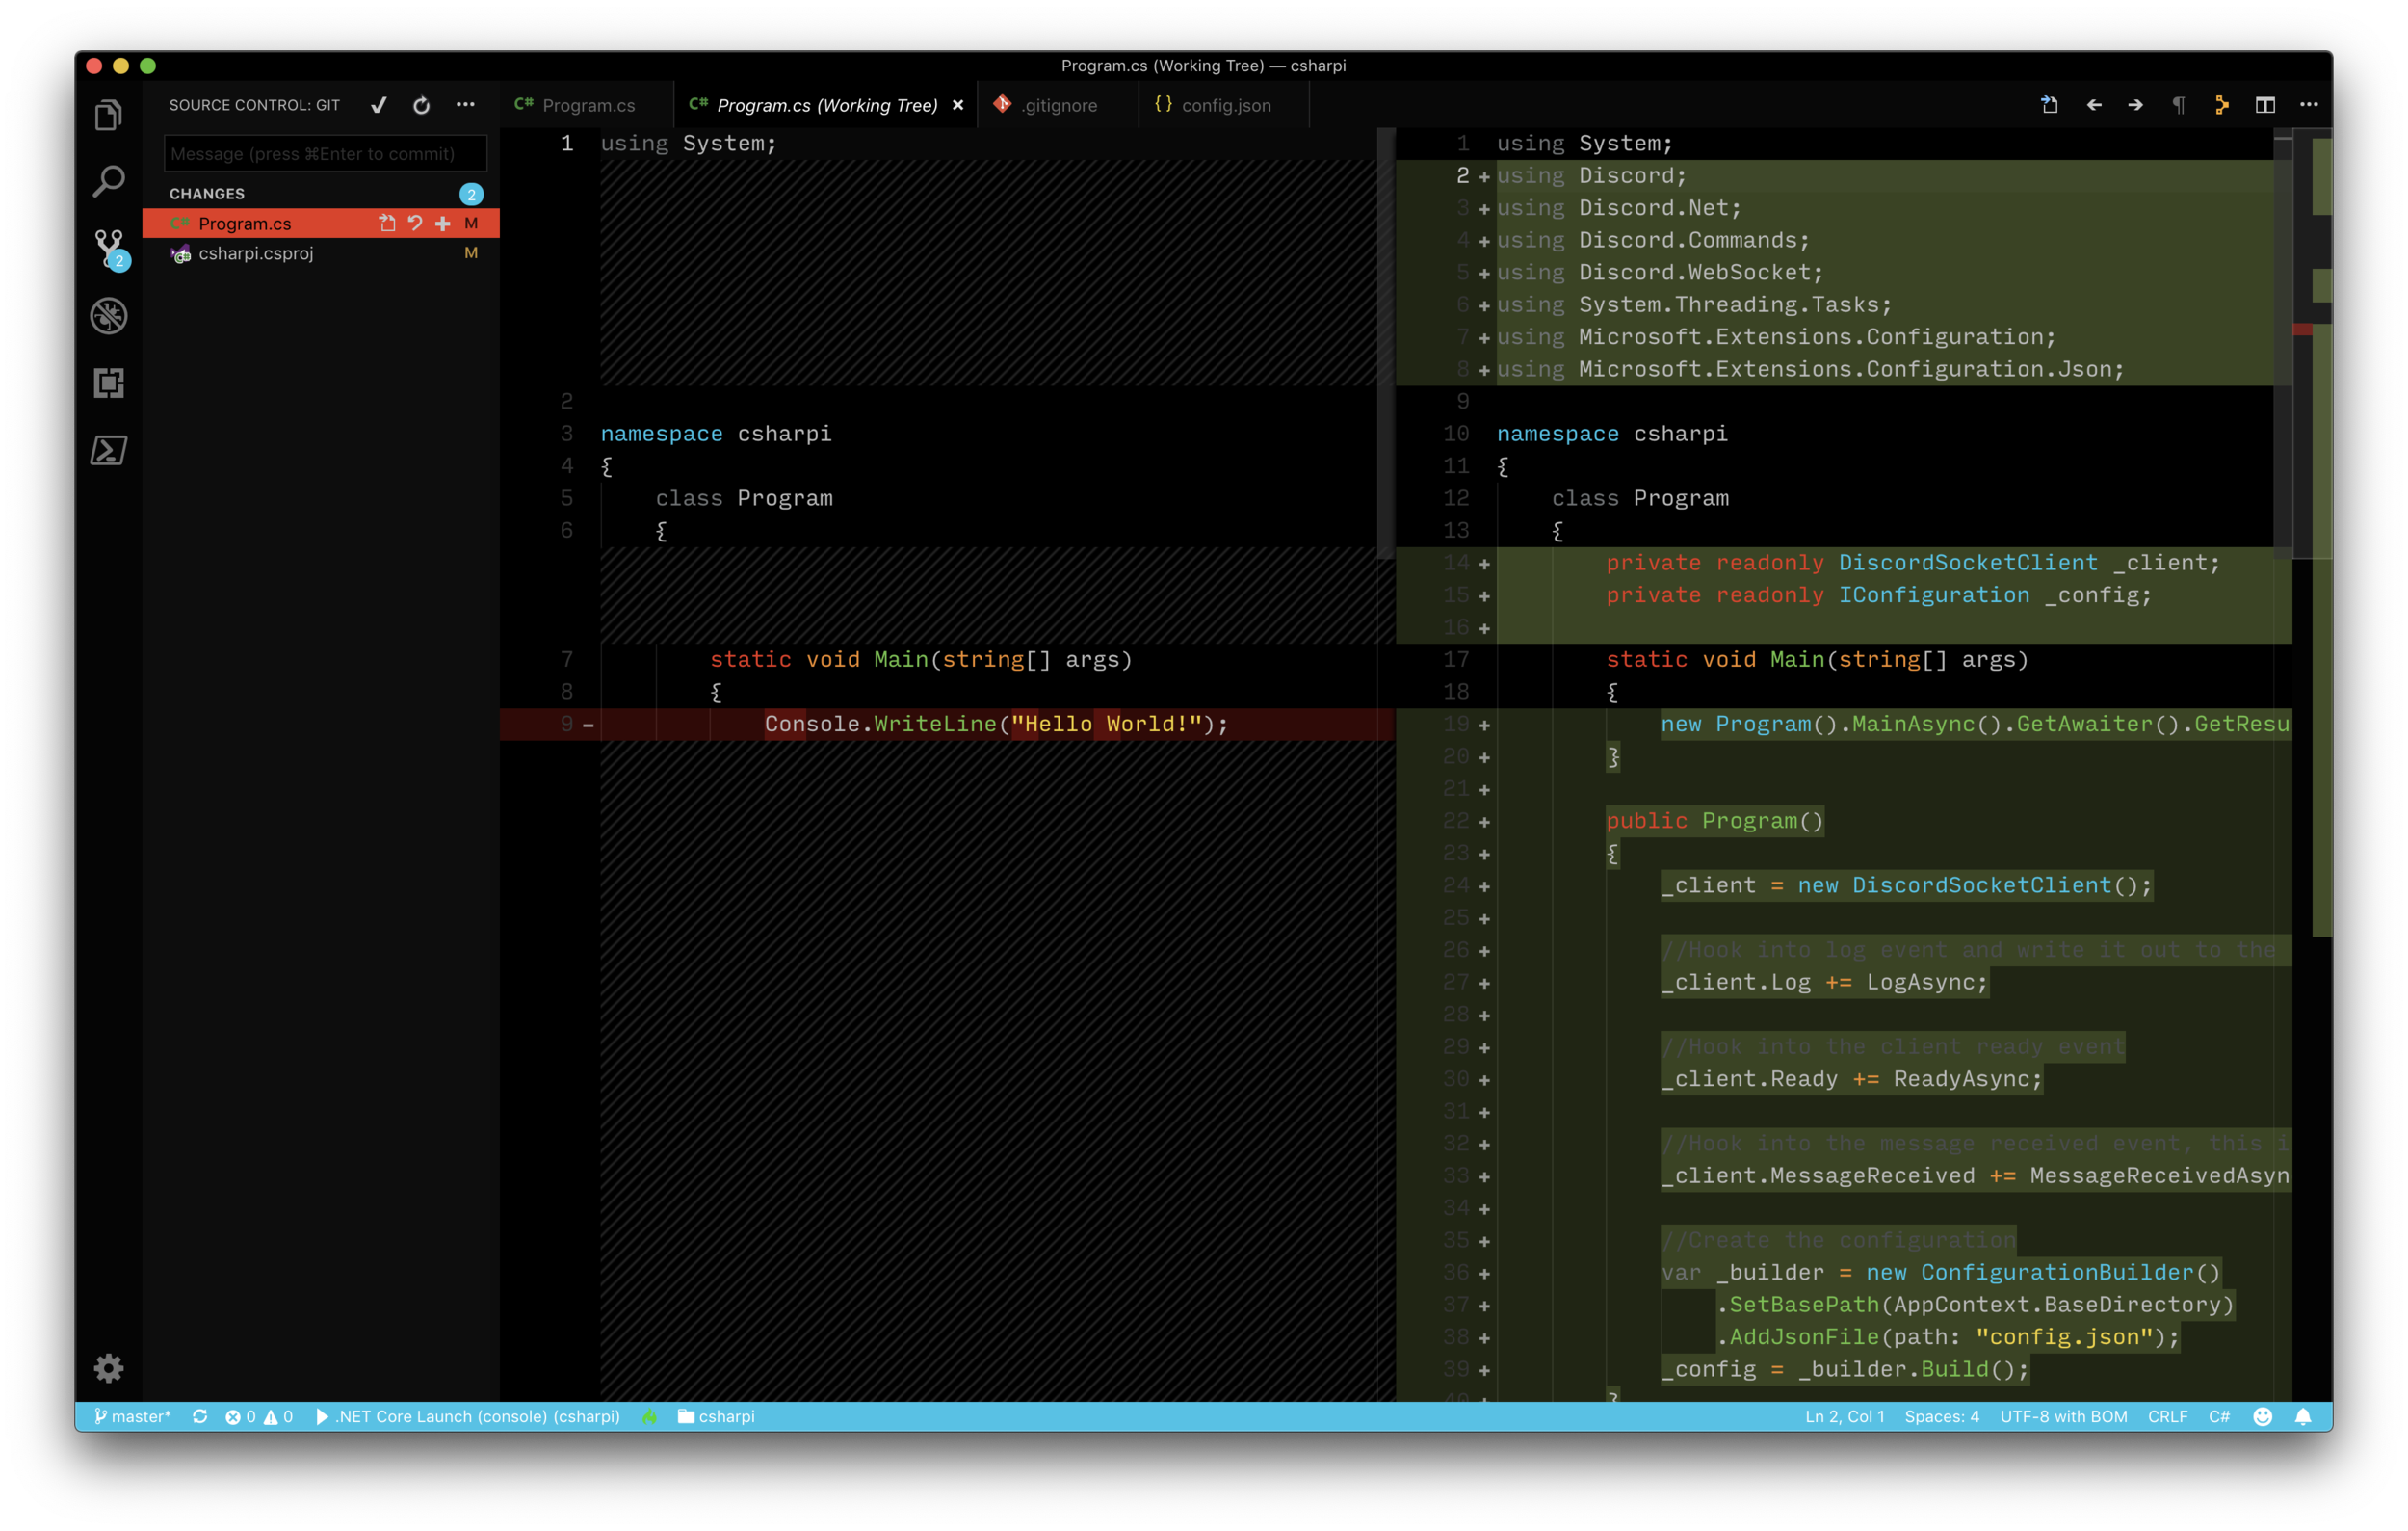
3. Since VS Code is Git-aware, let’s push these changes up to our Github repository.
4. Add a commit message and click the checkmark icon to stage/commit the files.
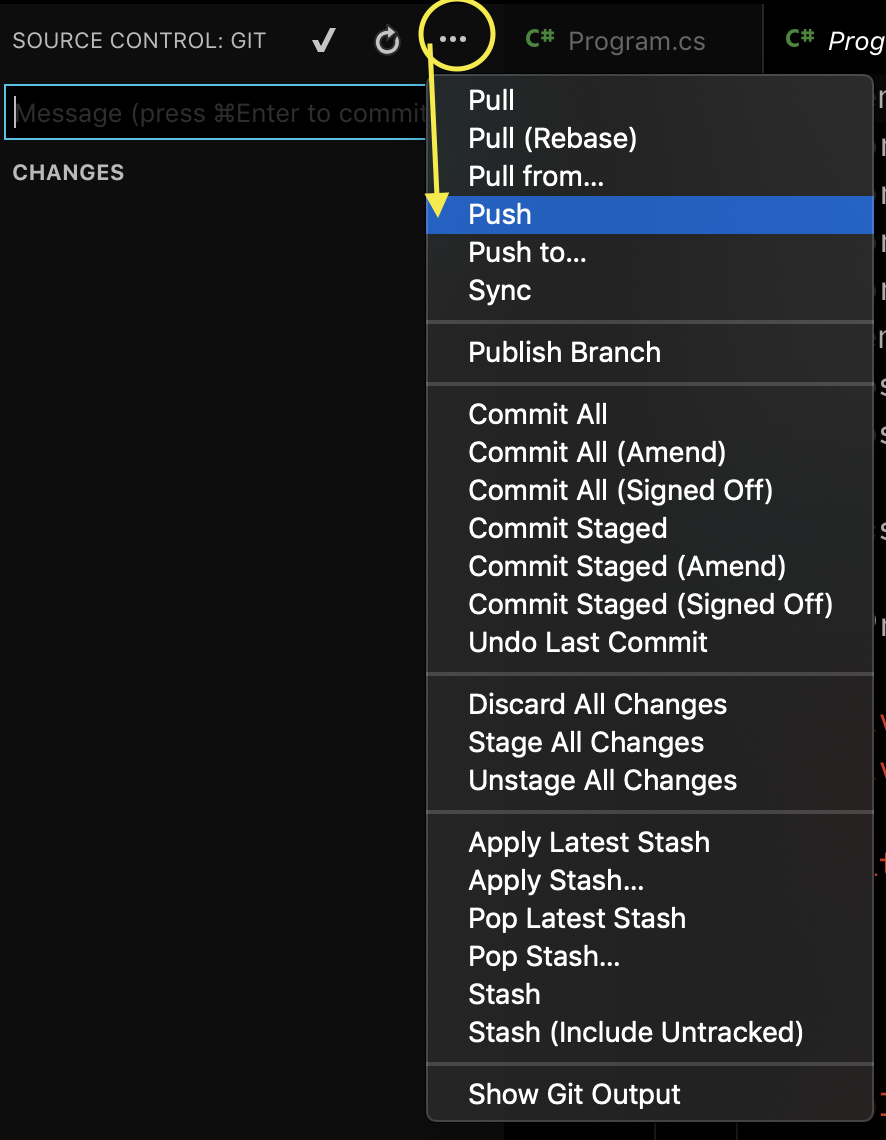
5. Now click the three dots “…”, and select “Push”.
6. Verify the files have been modified by going to your Github repository’s page:

Update Code on Pi
Now let’s get the updated code on the Raspberry Pi, and publish the app again. After we do that, we can run the updated app and ensure it works as the Discord bot!
1. SSH into your Pi.
2. Navigate to the source code folder /home/pi/csharpi:
cd /home/pi/csharpi3. Run:
git pull(you should see that some changes have been made)

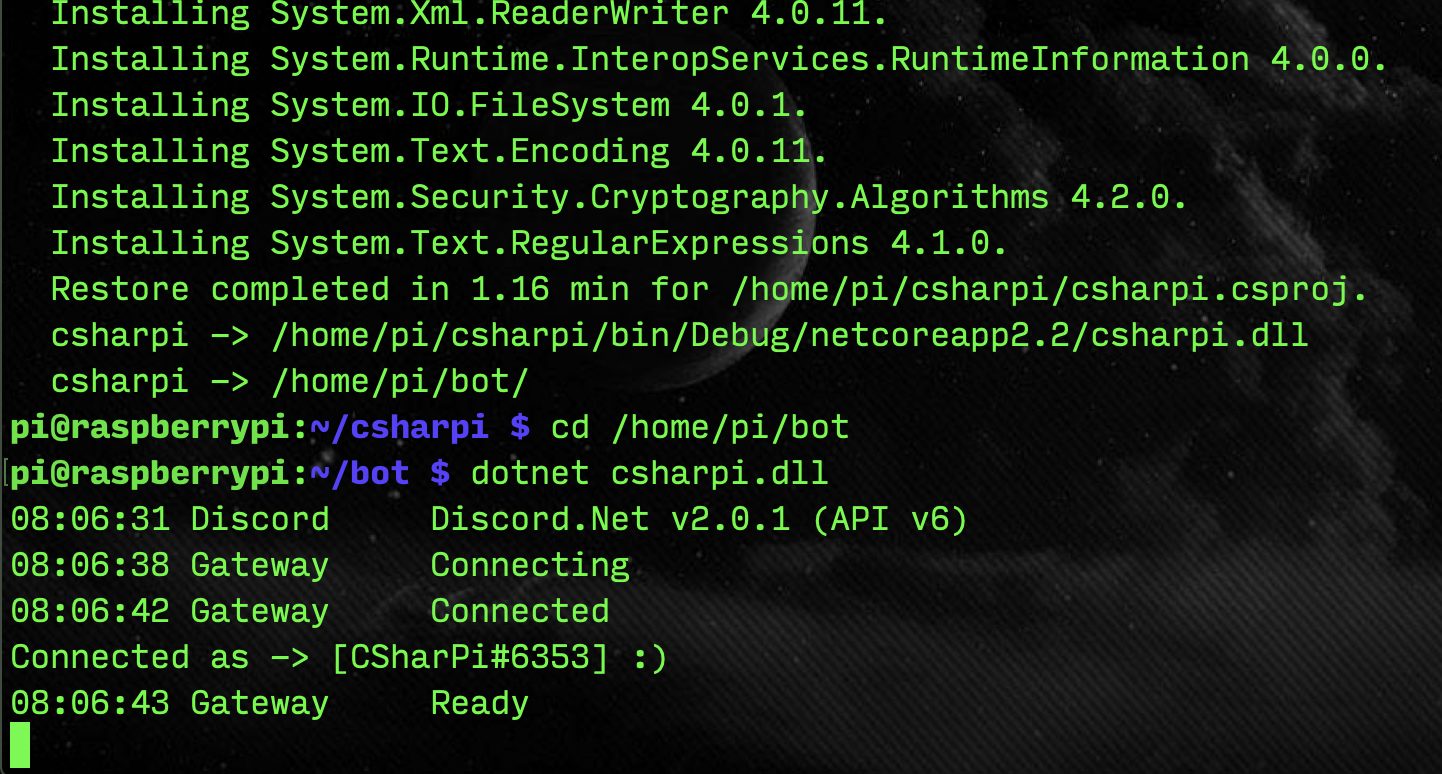
4. Now let’s publish and run the application (since we already created config.json in /home/pi/bot earlier, it should pick up that file and have the token ready). The first command publishes the application, then we change directory to the published application, and run it.
dotnet publish -o /home/pi/bot
cd /home/pi/bot
dotnet csharpi.dll(note) The restore/publishing process will take a while, but you only need to run it if your code has changed.
If all goes well, we should see our bot connected message, and we can test it out in the Discord server!

And there you have it, a Discord bot running on a Raspberry Pi, with .NET and C#. The next parts of this series will go over proper command handling (hint: not how we did it here), and more!
C# Discord Bot Series
Next post:

If you have any feedback or questions, feel free to leave a comment below!