

Getting Started - Using the ISE and Creating Functions
Welcome to my Getting Started with Windows PowerShell series!
In case you missed the earlier posts, you can check them out here:
We will be exploring
Let's get started!
PowerShell ISE
NOTE
The ISE is basically in maintenance mode now, and will likely only be getting security patches. Using Visual Studio Code is now the way to go.
Check out my post here on getting started with VS Code + PowerShell:

The ISE provides a way to use PowerShell more... powerfully. I generally prefer sticking to the shell if I'm using solid scripts and running random commands. However, once I get an idea for a script or start stringing different commands together, I turn to the ISE (or Visual Studio Code depending on what I'm doing).
For the purpose of this getting started series, I will stick to using the ISE. The ISE was introduced with PowerShell 2.0, and follows relatively the same version outline as described in part one.
Features
IntelliSense (commands auto finish as you type them, and it shows available options)
Script debugging
Recent file list
Syntax highlighting
For a full list of features, check out this TechNet article.
Using the ISE
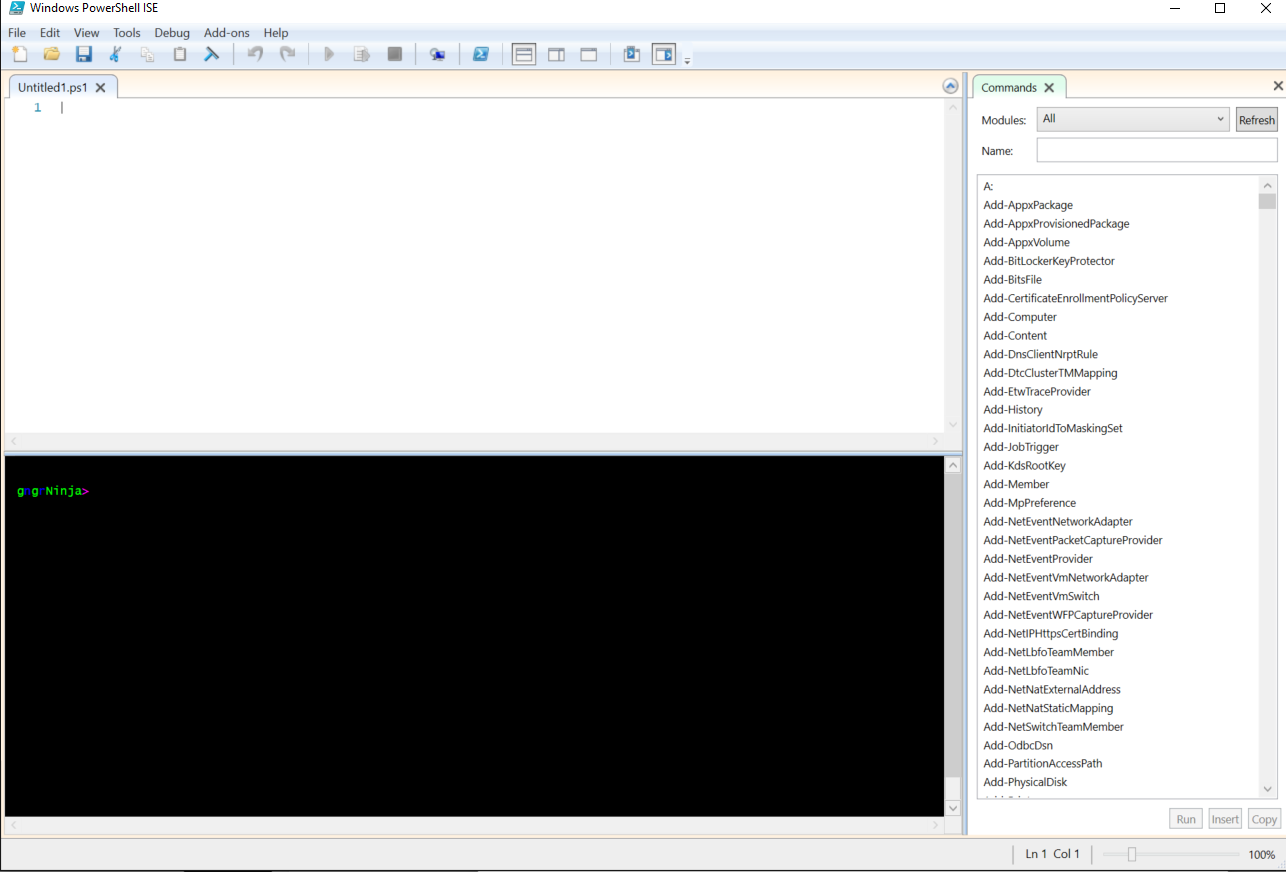
Launch the ISE by clicking the Start icon and searching for/typing "ISE".

You should see the following screen.
Go File -> Save As, and save this script as C:\PowerShell\part3.ps1 (Create the folder if it does not exist).

We are now ready to start using the ISE!
Customizing the ISE
As a preference I like to close the command pane on the right.
You can also adjust the theme by going to Tools -> Options.
The script pane can be toggled in various ways by using the icons highlighted here:

Running Commands
Let's type in Get-Date, and then click the green arrow.

Here's the result:

The result is shown below in the script pane.
Now, let's add another command:
Get-WMIObject -Class Win32_LogicalDiskHighlight this command by clicking and dragging, and then click the icon next to the green arrow (smaller green arrow with paper behind it).

The result of this should show that the highlighted command ran. (it will display under the output of Get-Date)

The green arrow will run every command in the script, while the green arrow with paper behind it will only run the current selection. You can also use the shortcut keys F5 (to run the entire script) and F8 (to run just the selected text).
Let's see what happens if you just type in Get-.

The ISE will show you a list of available command. Go ahead and choose Get-Alias.
On the same line as Get-Alias add a "-".
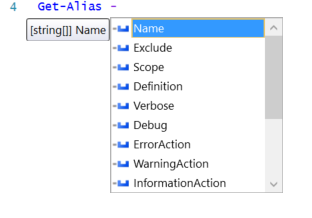
You'll see that the ISE will display a list of available parameters and the type of input you can use when specifying an argument.
In this case it is showing that the Name parameter accepts an argument type of string array.
That means that either of these commands will work:
Get-Alias -Name ls

Get-Alias -Name ls,dir
The results of running each command should look similar to this:

The first command returns just the ls alias, as expected.
The second command will return both the ls, and dir output of the command. This is because PowerShell interprets the comma separated values as an array.
Let's move on to creating some functions!
Functions
As described in part 2 of my series, functions are:
a series of commands that are grouped together to perform a specific task (or at least, that's the best practice). You can write functions and scripts that mimic the behavior of Cmdlets (via providing error checking and comment based help).
Go ahead and clear out any commands we've put in the ISE so we can start with a clean slate.
Creating a Function
Let's create a function that works by gathering information about the current OS of your machine.
When naming functions it is best practice to use approved verbs, and use PowerShell's Verb-Noun format.
Type the following in the ISE:
function Get-OSInfo {

 Write-Host "This function will display OS information"

}
Go ahead and run this in the ISE using F5 or the green arrow to run the entire script.
Let's see the result.
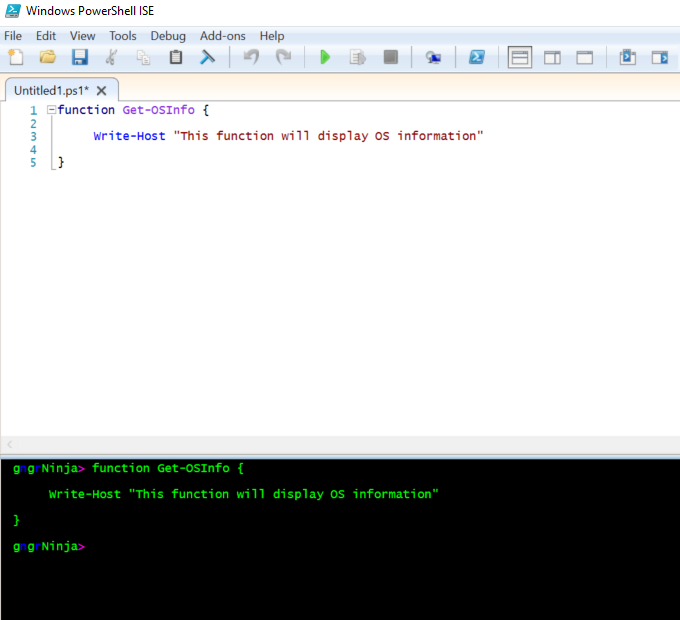
It looks like it ran, but nothing happened!
That's because the function is now stored in this PowerShell session. You have to call it to use it. To call it, add this line to the script:
Get-OSInfo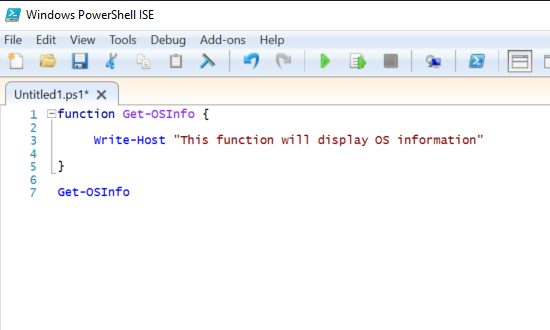
Go ahead and run the full script again.

In the above example you can see that the function was called via the script, and that you also can type the function name in the script pane manually.
You can see that Write-Host was executed and the text was displayed.
Replace the code inside of the function with the following code:
$osInfo = Get-WmiObject -Class Win32_OperatingSystem

Return $osInfo
Run the script again.
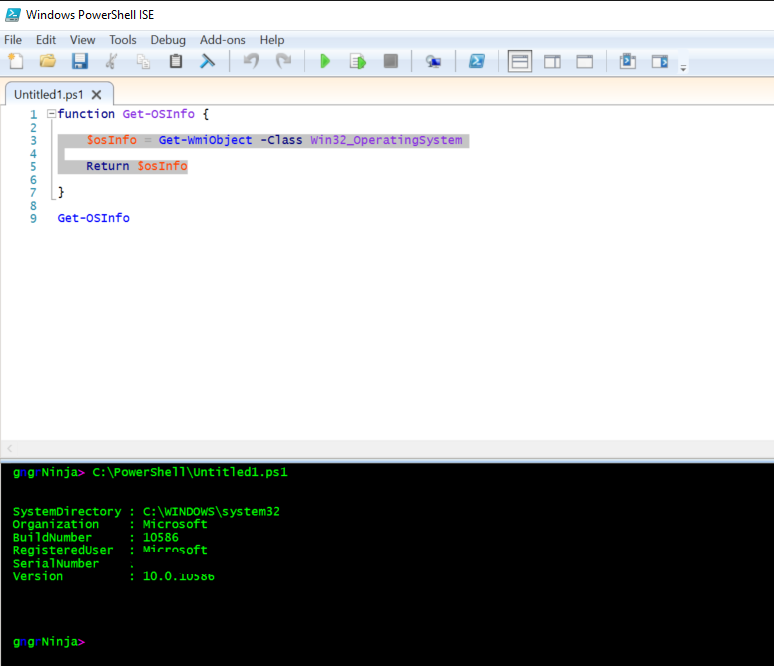
You can see that the function returns the variable we set within it (which contains the OS information). The following information is displayed:
SystemDirectory : C:\WINDOWS\system32
Organization: Microsoft
BuildNumber : 10586
RegisteredUser: Microsoft
SerialNumber: x
Version : 10.0.10586
Let's modify the Get-OSInfo function to reflect the following code:
function Get-OSInfo {

$osInfo = Get-WmiObject -Class Win32_OperatingSystem

$versionText = Get-VersionText -version $osInfo.Version.Split('.')[0]

Write-Host "You're running $versionText"

}
Finally, add this function below the first one (Get-VersionText):
function Get-VersionText {
param($version)

Switch ($version) {

10{$versionText = 'Windows 10'}

6.3 {$versionText = 'Windows 8.1 or Server 2012 R2'}

6.2 {$versionText = 'Windows 8 or Server 2012'}

6.1 {$versionText = 'Windows 7 or Server 2008 R2'}

6.0 {$versionText = 'Windows Vista or Server 2008'}

5.2 {$versionText = 'Windows Server 2003/2003 R2'}

5.1 {$versionText = 'Windows XP'}

5.0 {$versionText = 'Windows 2000'}

}

Return $versionText

}
The script should now look like this:

Functions should do one thing, and that one thing well. The second function adds a switch statement. The switch statement evaluates a variable's value and performs actions depending on what it receives. It also accepts one parameter, which is $version.
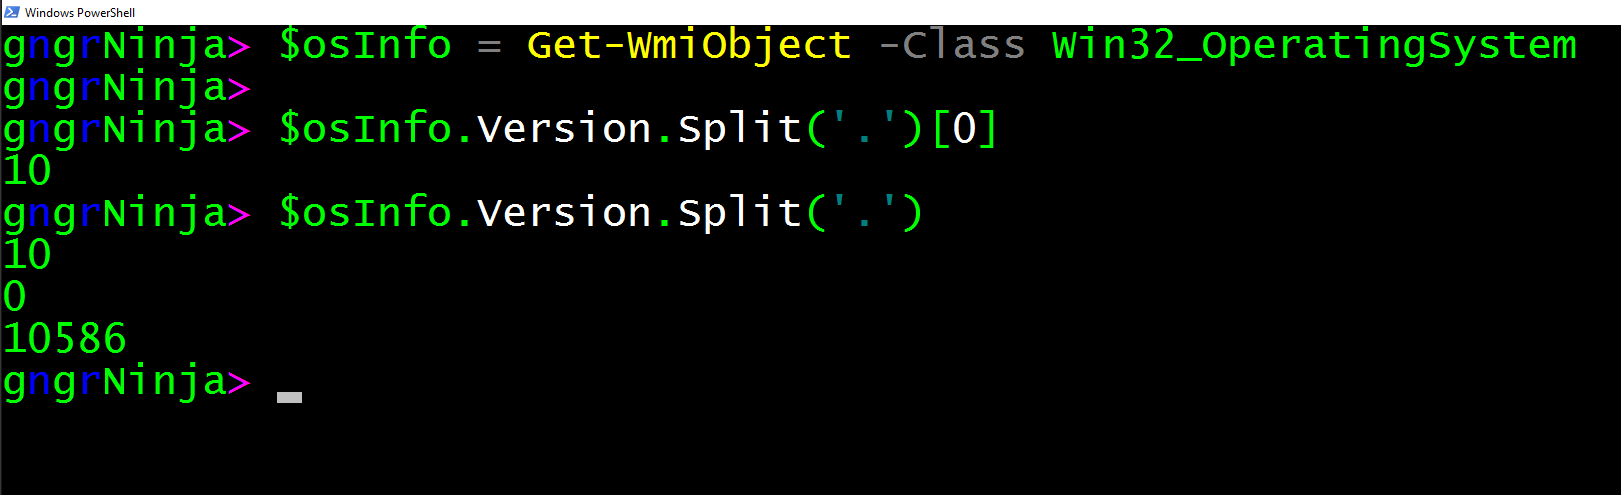
In the first function we use the .split() method on the version, and the [0] to select the first element in the split array.
You can see the result of that method if you run the following lines individually:
$osInfo = Get-WmiObject -Class Win32_OperatingSystem

$osInfo.Version.Split('.')[0]
That should return '10'. (if you're running Windows 10)
If you'd like to see what the whole array looks like type
$osInfo.Version.Split('.')You should see the following results (may vary depending on your version).
Let's get back to our script! Go ahead and run it!
If all goes well, it will display the returned text of the version you're running.

What it does
At the bottom of the script the first function is called via the Get-OSInfo command.
The function (Get-OSInfo) stores the WMI information for the Win32_OperatingSystem class in the $osInfo variable.
Then we declare $versionText, which calls the function Get-VersionText with the parameter -version and argument $osInfo.Version.Split('.')[0].
The Get-VersionText function then runs, and uses the Switch statement to determine how to set $versionText depending on what the value of $version is. This value is then returned into the $versionText variable called in the first function.
Finally, it uses Write-Host to display the text version of the version you're running that's stored in the $versionText variable.
After it executes, it will output "You're running Windows 10". (Or whichever version of Windows you're running).
That covers the basics of using functions in PowerShell. I will go over more advanced functions in part 4!
Homework
Use the Get-VersionText function with different numbers as the argument for the -version parameter.
Write your own functions! Maybe get some ideas from this post on Get-WMIObject.
Get a deeper understanding of the switch statement. How would you make it return a value in $versionText if none of the numbers specified are a match?
I hope you've enjoyed the series so far! As always, leave a comment if you have any feedback or questions!
-Ginger Ninja