

Getting Started - Command Discovery
Welcome to my Getting Started with Windows PowerShell series!
In case you missed the earlier posts, you can check them out here:
We will be exploring:
Terminology Overview
This part may not be as exciting as the hands on stuff, but it is important to understand. Don't worry if you don't grasp a lot of it right away. It will all come together the more you use PowerShell. When your knowledge of it deepens you'll see more and more use cases for it yourself! We'll actually be building scripts, functions, and modules in subsequent posts! If you would like to skip to the hands-on stuff (and I don't blame you!) click here.
Cmdlets
Cmdlets are essentially snippets of .NET code or classes that perform a single function in PowerShell. The core functionality of PowerShell revolves around Cmdlets. Keep in mind that when you are creating functions, modules, or scripts that you aren't actually creating Cmdlets. If you'd like to look further into actually creating Cmdlets, check out this page. Please note that it is not actually writing PowerShell at that point. It's .NET code that will interact, and provide functionality TO PowerShell.
Scripts
A PowerShell script is simply a file with a .ps1 extension that contains a series of PowerShell commands. The profile we created is actually an example of a PowerShell script.
Functions
A function in PowerShell is a series of commands that are grouped together to perform a specific task (or at least, that's the best practice). You can write functions and scripts that mimic the behavior of Cmdlets (via providing error checking and comment based help). Here's an example of a function I wrote in my post about using the LIFX API.
function Set-LightState { #Begin function Set-LightState
    [cmdletbinding()]
    param(
        [Parameter()]
        [ValidateSet('on','off')]
        [string]
        $state,
        [Parameter()]
        [string]
        $color,
        [Parameter()]
        [ValidateRange(0.0,1)]
        [double]
        $brightness,
        [string]
        $selector
    )

    if ($lifxLight.Connected) {

        $fullURL  = "$baseurl/$($lifxLight.id)/state"
        $payload  = [PSCustomObject]@{

            power      = $state
            color      = $color
            brightness = $brightness

        }

        $payloadJson = $payload | ConvertTo-Json

        Write-Host "Attempting to Change light to:" -ForegroundColor $foregroundcolor
        Write-Host `t"State     :" $state
        Write-Host `t"Color     :" $color
        Write-Host `t"Brightness:" ($brightness * 100)"%" `n

        $stateReturn = Invoke-RestMethod -headers $headers -uri $fullURL -Method Put -Body $payloadJson -ContentType $acceptheader

        Write-Host "API status:" -ForegroundColor $foregroundcolor
        Write-Host `t"Light :" $stateReturn.results.label
        Write-Host `t"Status:" $stateReturn.results.status `n

    } else {

        $lightName = $lifxLight.label
        Write-Host "$lightName is offline or unreachable :("

    }

} #End function Set-LightState
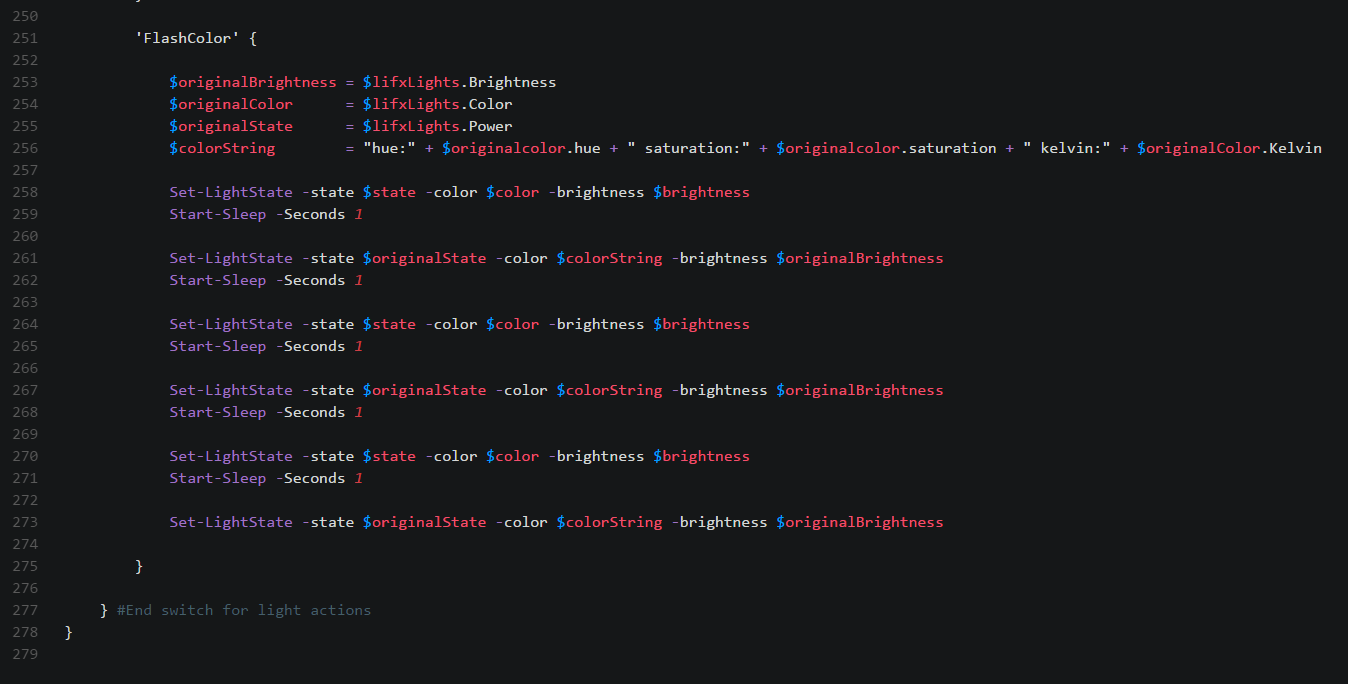
Here are some examples of that function in action.

Below you can see it being referenced in some code further on in the script.
Let's create a simple function to see how they work interactively.
function Get-RandomNameChaos {
param([string]$Name,
      [int]$Times
     )

    if ($Name) {
        $i = 1

        Do {

            Write-Host (Get-Random "`t","`n") [$i] [$Name] -foregroundColor (Get-Random -Minimum 1 -Maximum 15) -backgroundColor (Get-Random -Minimum 1 -Maximum 15)

            $i++

        } While ($i -lt ($times + 1))

    } else {

    Write-Host 'No name specified!'

    }
}
This functions takes two arguments, -Name and -Time.
You can get the function to work in PowerShell by:
- Copy and pasting it in from above
- Putting it in a script file and calling it within the script
- Putting it in a module file and importing the module
I decided to paste it in and show you what happens as an example. I ran:
Get-RandomNameChaos -Name Mike -Times 3

Functions can take different arguments which are assigned to the parameters defined.
This function we created has [int] next to the $Times parameter. This means that if you put anything other than an integer as a value, you will get an error message.
Try running the function by calling it with different arguments. Maybe 100 for times, or even putting a non-integer value in just to see what it does.
Modules
Modules are PowerShell scripts with a .psm1 extension that contain a group of functions. Once you write a lot of functions you use over and over, it's generally a good time to create a module. You can import modules in PowerShell by using the Import-Module command. Here's an example of a logging module I created:
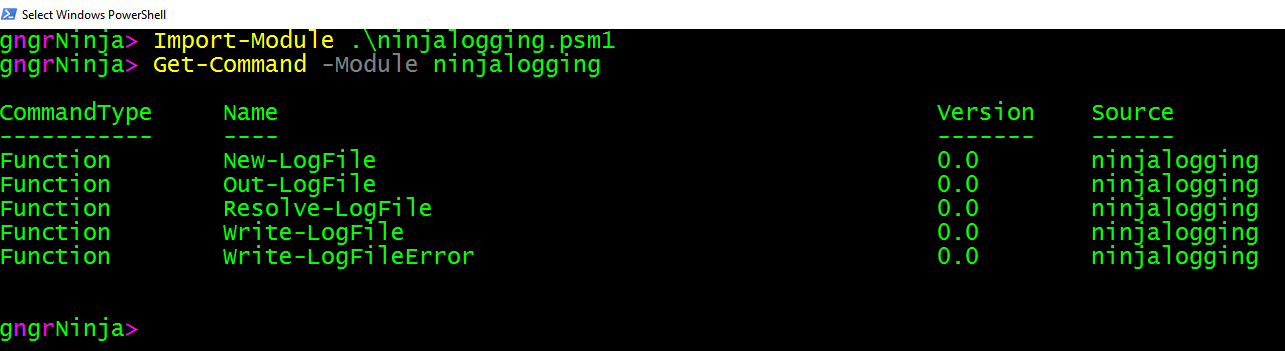
Above I imported my module to add logging functionality via specific functions I created. I then ran Get-Command -Module ninjalogging to get a list of commands it provides.
Command structure
PowerShell Cmdlets (and well written functions) utilize the following format: Verb-Noun.
You can use the Get-Verb command to see a list of verbs that PowerShell uses and are officially approved. This can be handy when you're creating your own functions so you can use an approved verb that fits.
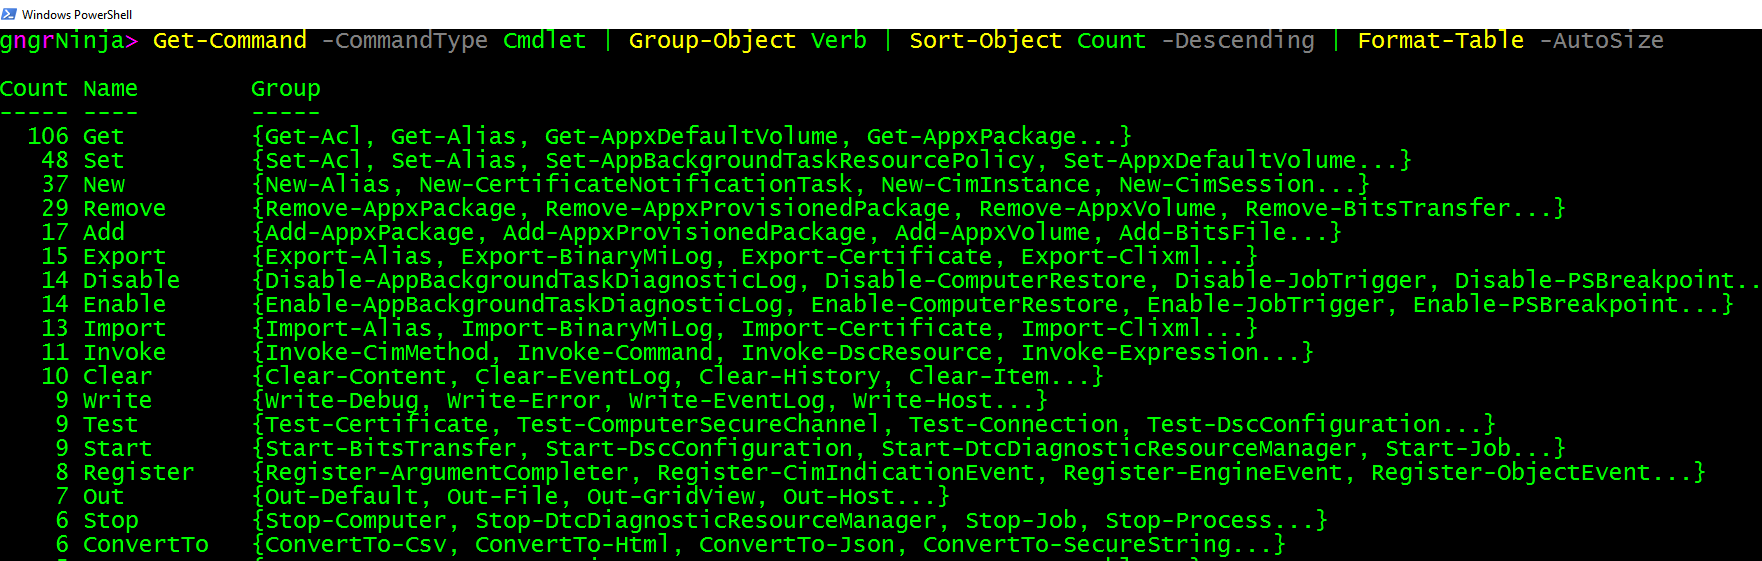
You can also run the following command which utilizes Get-Command, Group-Object, and Sort-Object to list out the most commonly used verbs for all the PowerShell CMDlets you have access to.
Get-Command -CommandType Cmdlet | Group-Object Verb | Sort-Object Count -Descending | Format-Table -Autosize
If you have any questions about the above string of piped commands let me know in the comments, or try using Get-Help <command>.
As you can see a lot of the Cmdlets use only a few of the approved verbs. I find myself trying to use a lot of those verbs myself. There's Get, Set, and New just to name a few.
Aliases
There are aliases in PowerShell that make writing out one-liners and troubleshooting during a fire easier to manage. To see a list of aliases type Get-Alias.

You can even create you own aliases and use them in PowerShell. The alias I personally use the most is ls. To see what that Alias is linked to you can use:
Get-Alias -Name ls

ls is simply an alias for Get-ChildItem

Simple, but it provides a quick way to execute different Cmdlets and shorthand format.
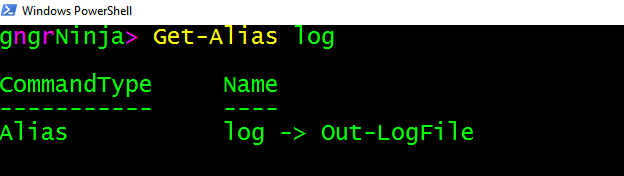
You can check if an alias exists, and create your own with the following commands:
Get-Alias -name log
New-Alias -Name log -Value Out-LogFile -Description 'Link to Out-LogFile'
Get-Process | Out-String | log

The above example will not work for you as you do not have a function named Out-LogFile. What it does in my case is creates a text file logging the output of Get-Process. If you want to try to create your own alias, use Get-Process for the value and psax for the Name. Give it any Description you'd like.
You can then use:
Get-Alias -Name 'your alias name'
to check on it. Here is the result for my example:
Command Discovery
The most straightforward command to use to discover commands is... Get-Command.

This command will display the commands as well as the command type, version, and its source.
You can narrow the scope of this command in various ways. One way is to specify the source:
Get-Command -Module Microsoft.PowerShell.Management

Let's say you wanted to discover all the commands available that had to do with processes. Let's try:
Get-Command -Name "*process*"

You could also run:
Get-Command | Where-Object {$_.Name -like "*process*"}

The $_. placeholder variable stands for the current element in the pipeline. In this case it would run through each line that is returned from Get-Command and look at the property Name ($_.Name). It then uses the comparison operator -like which allows us to specify wildcards.
Either way the results are the same, and let's focus in on...
Get-Process
Here is the result of running Get-Process.

Formatting the results
You can also pipe the command to Format-List
Get-Process | Format-List

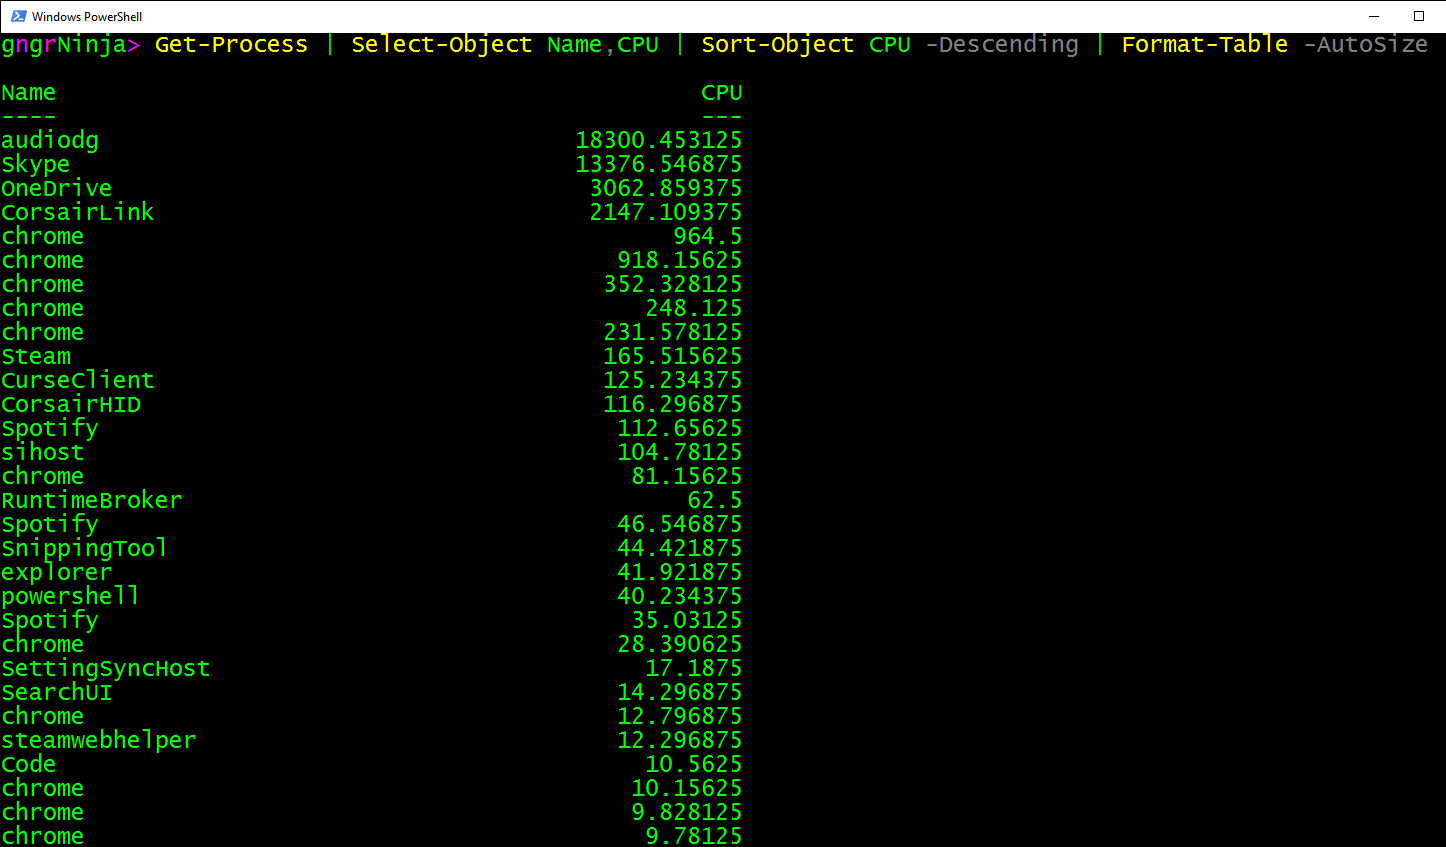
Here's an example of how to use Select-Object and Sort-Object. You can add more properties the the list if you want! Mess around with it to see what you can come up with that's useful to you. Here's what I ran:
Get-Process | Select-Object Name,CPU | Sort-Object CPU -Descending | Format-Table -AutoSize
Another way to output this information is to use Out-GridView. This can be a great way to get a visual of the returned items.
Get-Process | Out-GridView

In this instance I know that Get-Process is actually capable of displaying much more information. Let's try this command:
Get-Process | Select-Object * | Out-GridView

Well, that's a lot more information!
You can even add criteria to narrow it down.
I added one here (Use the [+ Add Criteria] button in the upper left) for VirtualMemorySize that islessthanorequalto 100000000.

Here's another one for Name contains chrome.

Exporting the Results
We can also use Get-Process with > and >>. These are very simple ways to output the results to a file.
> Creates a new file every time (and will overwrite the file if it exists)
>> Appends the results to a file if it exists, or creates one if it doesn't
Let's look at:
Get-Process > processes.txt

Let's run the following command to see the contents of the file:
Start-Process .\processes.txt.
You can also use [TAB] completion. Try typing Start-Pro[TAB] .\pr[TAB]

Start-Process will take the input you give it and then run that with the associated application handler that's set. For example:
Start-Process www.google.com
The above command would open your default browser, and then navigate to www.google.com
Back to Get-Process!
If you were to use:
Get-Process >> processes.txt
It would append the results to the file that already exists.
Out-File
You can also use Out-File. I prefer this option as you have more control over what happens. You can specify the encoding, path, and other various options such as NoClobber.
Let's give it a try:
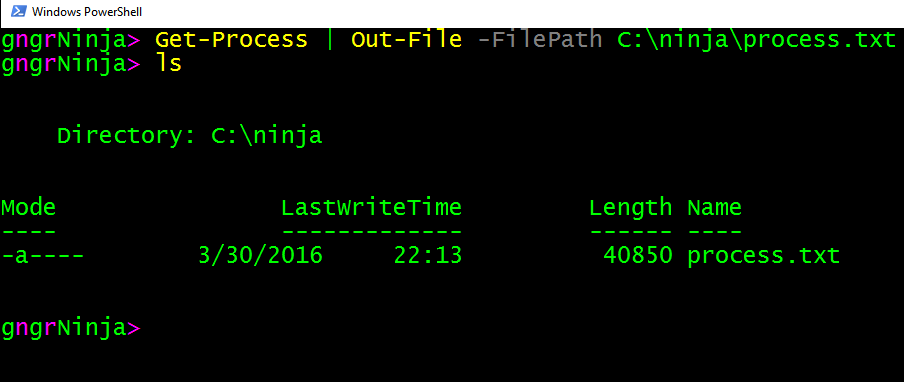
Get-Process | Out-File -FilePath C:\ninja\process.txt
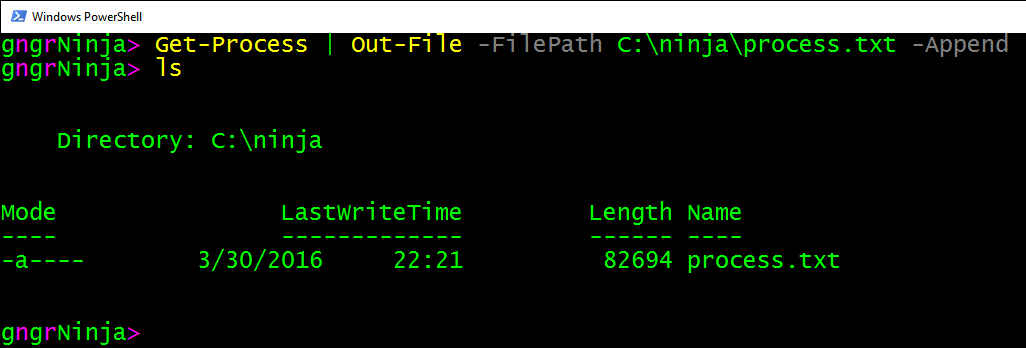
To append to this file using Out-File you would use:
Get-Process | Out-File -FilePath C:\ninja\process.txt -Append
Using Stop-Process with Get-Process
One of the handy things you can do with Get-Process is pipe it to Stop-Process. Just don't do this without specifying a process name, or you will very likely end up causing your computer to reboot!
This can, however, be a handy way to kill a hung process. Let's say you wanted to close any open notepad.exe instances.
Get-Process notepad | Stop-Process
You wont see any information returned, and that usually means it found the process and stopped it as well.

Profile Review
Below I have commented out the profile we created in part one with information on what each line is doing.
#Set the variable $foregroundColor to be white. Global means it will be set in all scopes.
$global:foregroundColor = 'white'

#Store the results of Get-Date in the $time variable
$time = Get-Date

#Store the current version in the $psVersion variable
$psVersion= $host.Version.Major

#Store the current user and computer in each variable
$curUser= (Get-ChildItem Env:\USERNAME).Value
$curComp= (Get-ChildItem Env:\COMPUTERNAME).Value

#Write-Host writes to the host that's running the script. In this case, very likley your console!
#The following lines takes the variables above and uses them in the output in various ways.
Write-Host "Greetings, $curUser!" -foregroundColor $foregroundColor
Write-Host "It is: $($time.ToLongDateString())"
Write-Host "You're running PowerShell version: $psVersion" -foregroundColor Green
Write-Host "Your computer name is: $curComp" -foregroundColor Green
Write-Host "Happy scripting!" `n

#This replaces the default prompt function with our own!
function Prompt {

#We get the time again as this function runs every single time you hit enter.
$curtime = Get-Date

#Writing to the host, this time with -noNewLine.
#-NoNewLine means it will keep writing to the same line.
#This allows us to use multiple colors on the same line.
Write-Host -NoNewLine "p" -foregroundColor $foregroundColor
Write-Host -NoNewLine "$" -foregroundColor Green
Write-Host -NoNewLine "[" -foregroundColor Yellow

#This line uses a string format operator (-f) and takes the results from Get-Date and formats them on the left.
#I'll be detailing more about how that works in a later post!

Write-Host -NoNewLine ("{0:HH}:{0:mm}:{0:ss}" -f (Get-Date)) -foregroundColor $foregroundColor

#Closing off the prompt
Write-Host -NoNewLine "]" -foregroundColor Yellow
Write-Host -NoNewLine ">" -foregroundColor Red

#This variable controls the PowerShell window title. We set it to the current path everytime this function runs.
$host.UI.RawUI.WindowTitle = "PS >> User: $curUser >> Current DIR: $((Get-Location).Path)"

#This next line is needed so we can override the default prompt with our Write-Host above!
Return " "

}
Homework
- Write your own profile using the one I gave you as a template for ideas.
- Customize the Get-RandomNameChaos function some more!
- Figure out just what the heck "{0}" -f (Get-Date) does and how it works. (Hint: String format operators)
- Get Get-Process | Out-GridView to show you only properties you care about.
- Learn what a calculated property is.
In part 3, we go over the ISE and creating functions!
-Ginger Ninja